Guy's Blog

Guy frequently keeps this blog updated with thoughts, challenges, interviews and more!

Category: Crafts

I was in Dumfries in April visiting my mum, and a friend of the family there happened to buy a set of four balloon-back chairs, and mentioned it when they came over for dinner. I immediately asked whether they were coming apart in the usual place (where the balloon top rail meets the uprights). Of course they were. So I naturally offered to have a look…

Three of the balloon back rails needed fixing.

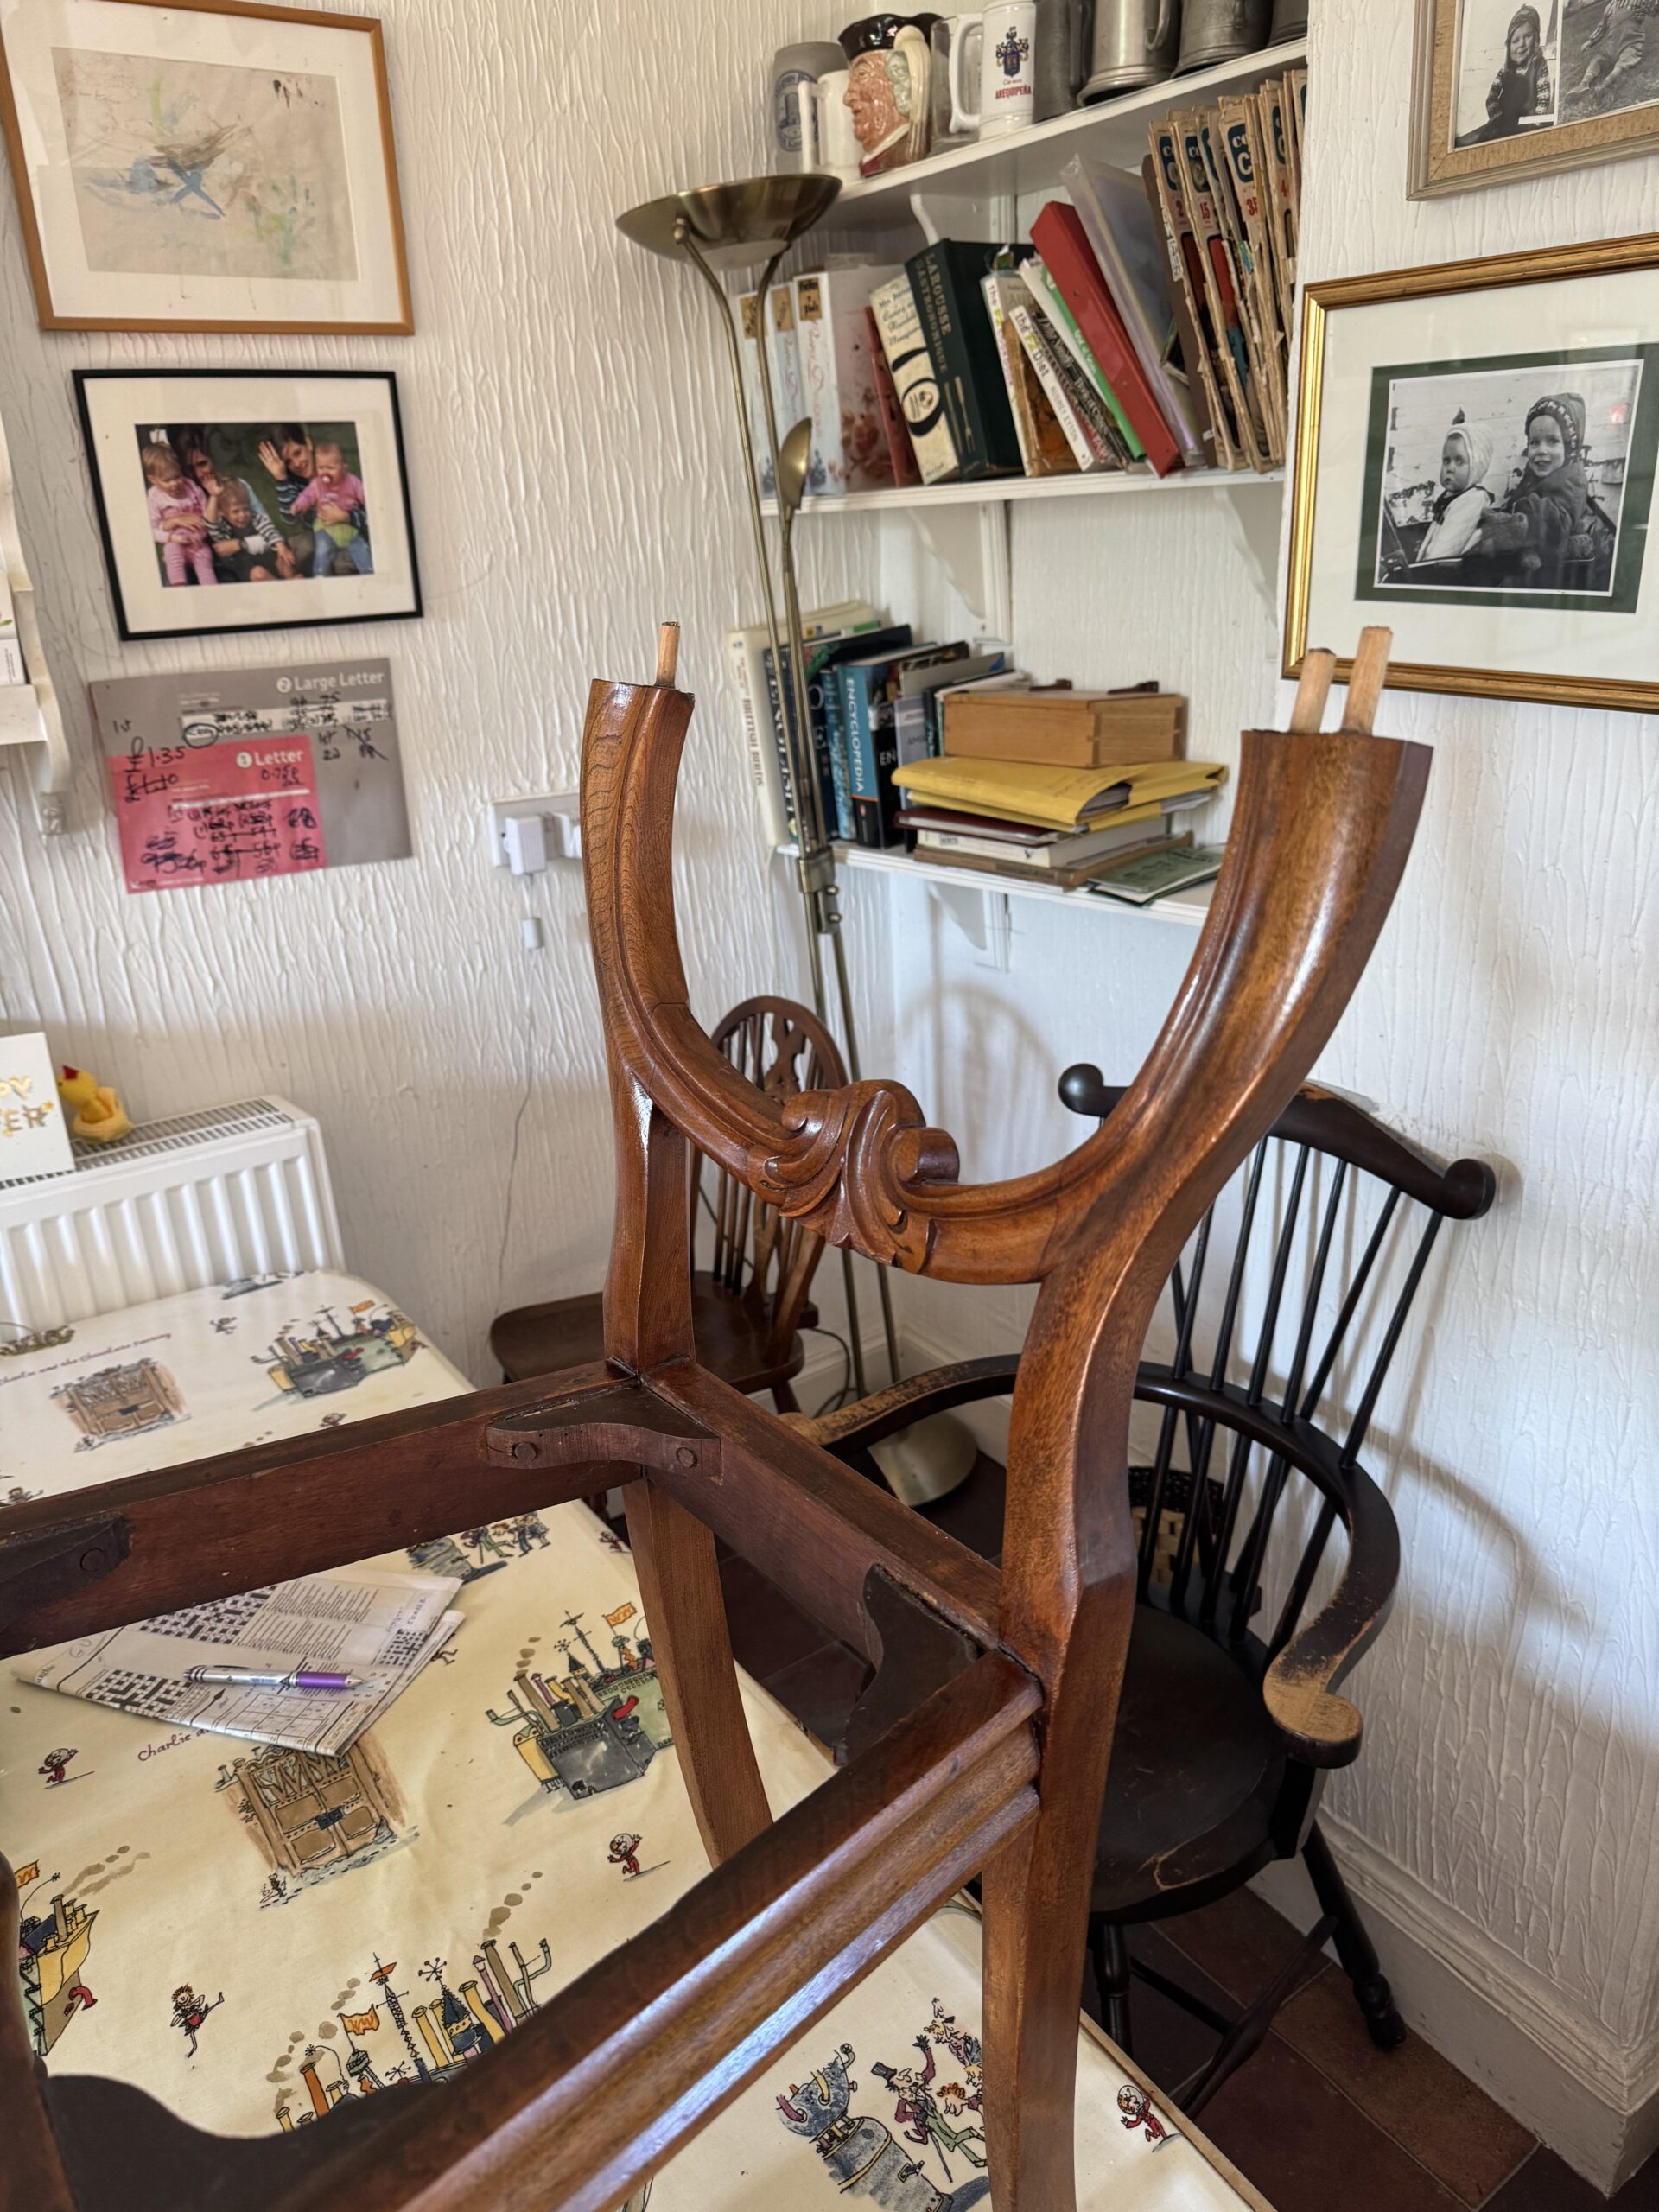
(The black and white photo of two kids in a pram are me and my sister in about 1976. Guess which one's which!)

Two of the chairs needed their rear joints (where the rails meet the backs) tightened up and their corner blocks re-fitted.

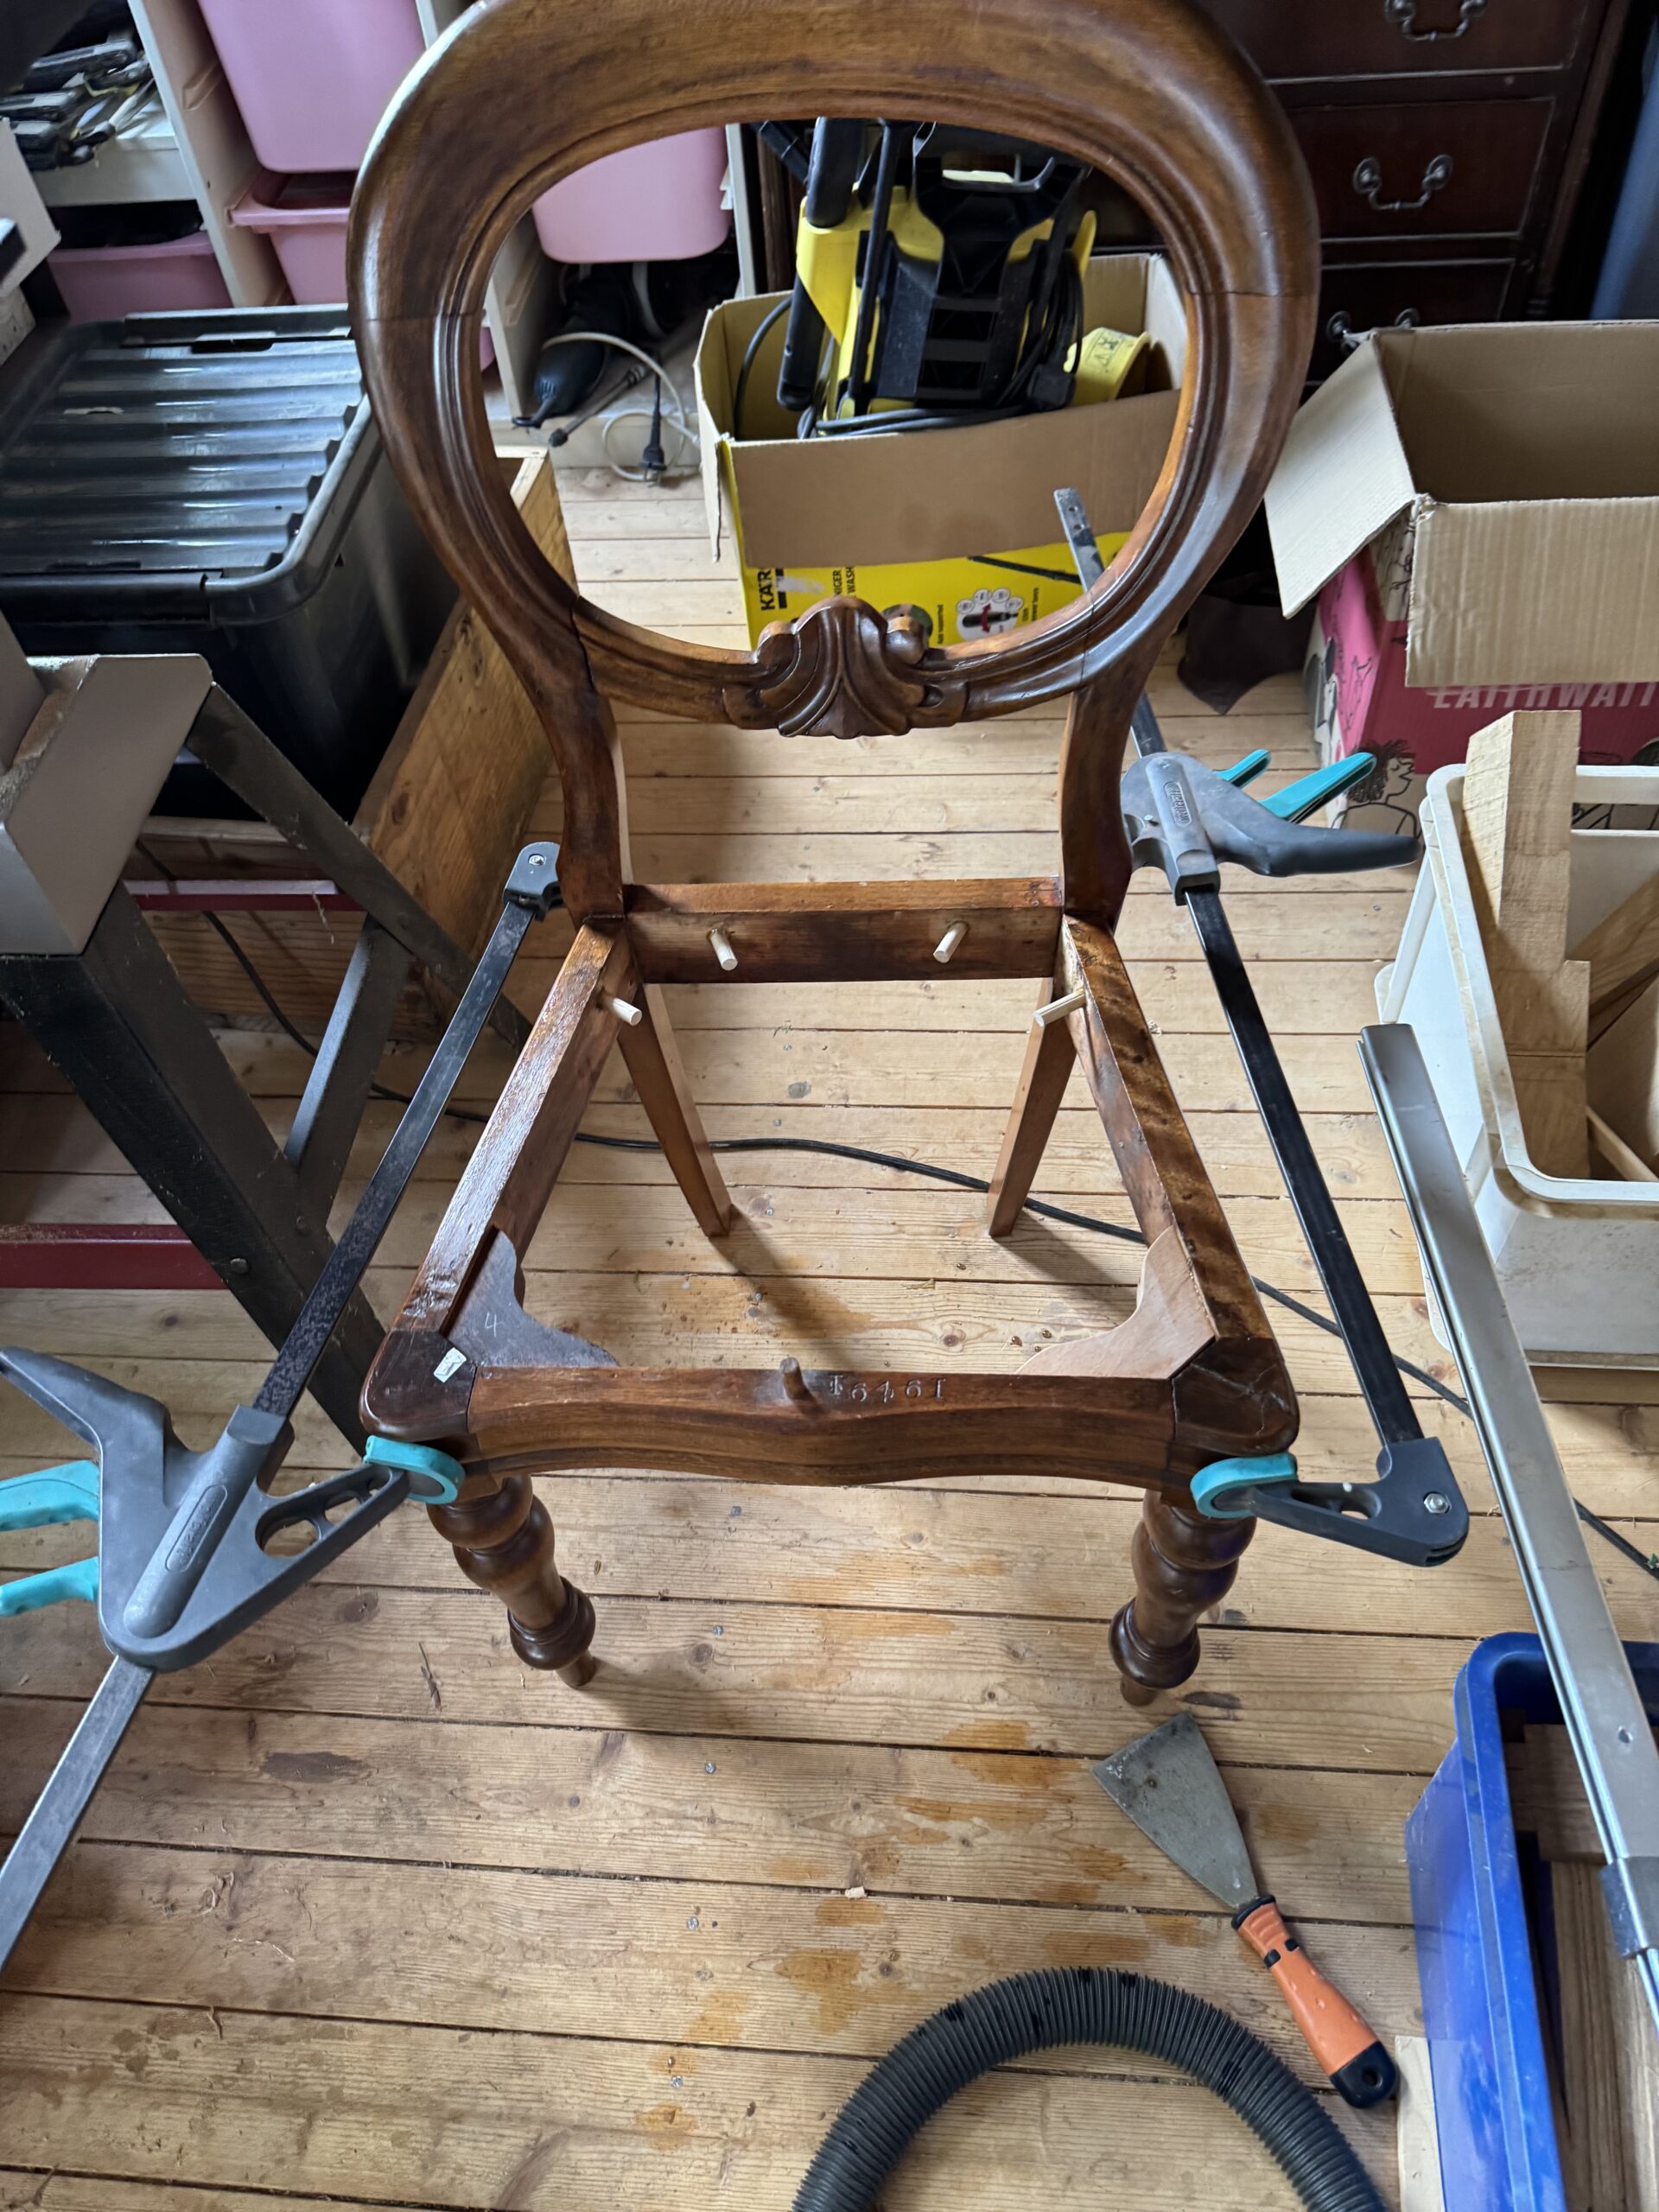
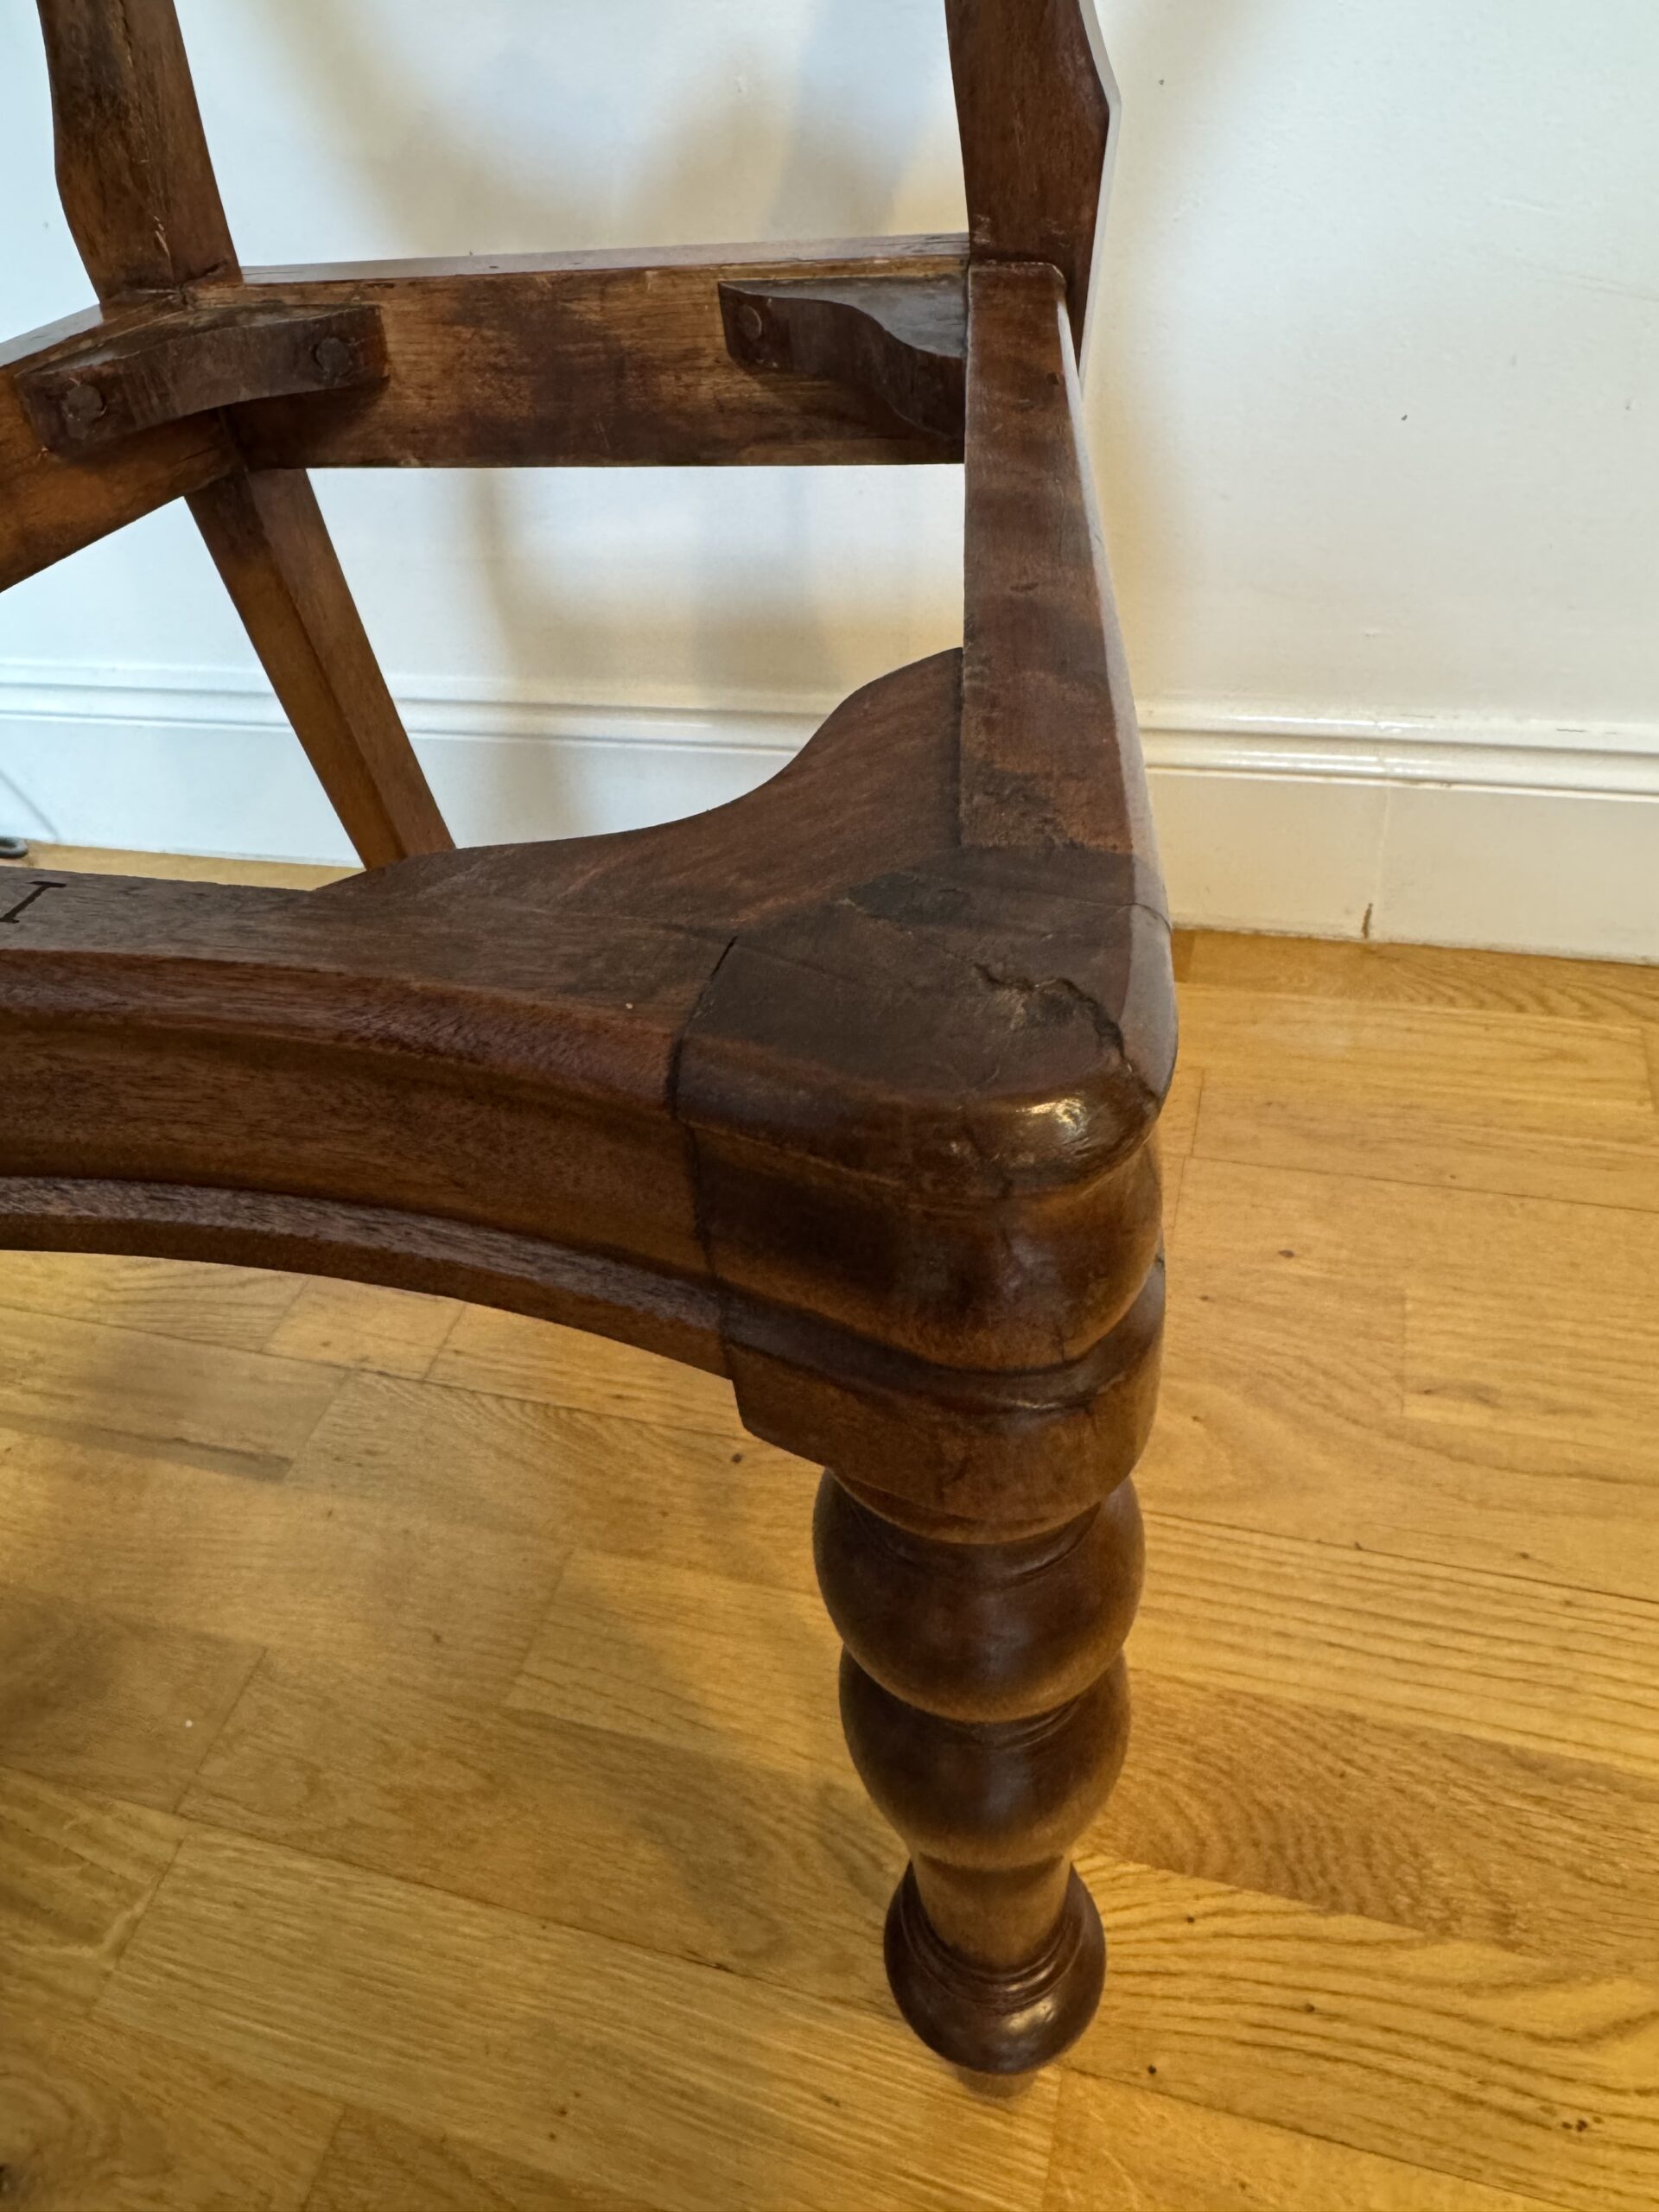
But one poor chair, oh my. This chair had been broken more than once in the past, most notably having the front left leg shattered at the top, the critical bit where it’s jointed to the rails. I didn’t take a photo of the chair in its original state, but take my word for it, this chair needed some love.

The original repair was done by a professional working fast (as professionals must). The two-part break was glued up in one go, and held together by screws. One part remains stuck fast, the other worked its way loose again. All four corner pieces were loose, two of them actually broken at the dowel holes. The one at the broken leg was broken in two places, and had been stuck back together with hide glue.

The rear joints where the rails meet the back were also very loose. They wouldn’t quite come apart without violence, but they had been very clearly repaired at least twice in the past. Two out of three of the ⅜” dowels on one side had been replaced with ½” ones. In the end I had to cut through all the dowels to take the joints apart.

The rear joints had been fixed at least twice: once properly-ish, including replacing those two dowels, and once by someone opening it up a bit, squooging in some white glue, and hoping for the best. They had done the same with the rear corner pieces. Very helpful. Really. Do that with all your nice old furniture. Future restorers will thank you.

This is exactly the kind of fun restoration that is simply uncommercial. There is no way to do a proper job on it in an amount of time that costs less than the chair is worth. I’m not a professional restorer any more, so I had no need to do this quickly. Where the previous restorer did the whole thing in one, maybe two, glue-ups, I did at least eight separate glue-ups. And a bunch of colouring in, as you shall see.

My overall goal is to return the chair to active service, and have the repairs un-datable. There is no way to tell whether they were done the day after the chair was made, or last week. To this end the only glue I use (and the only glue I would ever use on an antique because I’m not an animal) is hide glue (aka scotch glue, horse glue, hot glue, etc.). I cleaned out my glue pot (which took a while!), got a fresh batch warming up, and got to work.

Firstly I cleaned up and re-fitted the front right corner block. This was to stabilise the only unbroken joint while I was fiddling about with the broken ones. Once it was glued in, I re-drilled the dowel holes and glued the dowels in. Doing this in two separate glue-ups makes it much easier to be certain of a perfect fit. One issue with the original assembly and the subsequent professional repair was the old habit of just dipping the end of the dowel in glue and tapping it into the hole. The edges of the hole scrapes almost all the glue off the dowel, leaving it basically loose in its hole. I was careful to use a small brush to get a thorough coat of glue inside the hole, and painted more on the dowel, before knocking them home. Pro-tip: the dowel must have a groove cut in its side to allow glue to squeeze out, otherwise it can pool at the bottom of the hole and stop the dowel getting all the way in. Modern mass-produced dowels for dowel-joints are grooved all round for this reason. But they would date the repair, so I cut my own dowels from clean dowel rods, and cut the groove in by hand with a chisel.

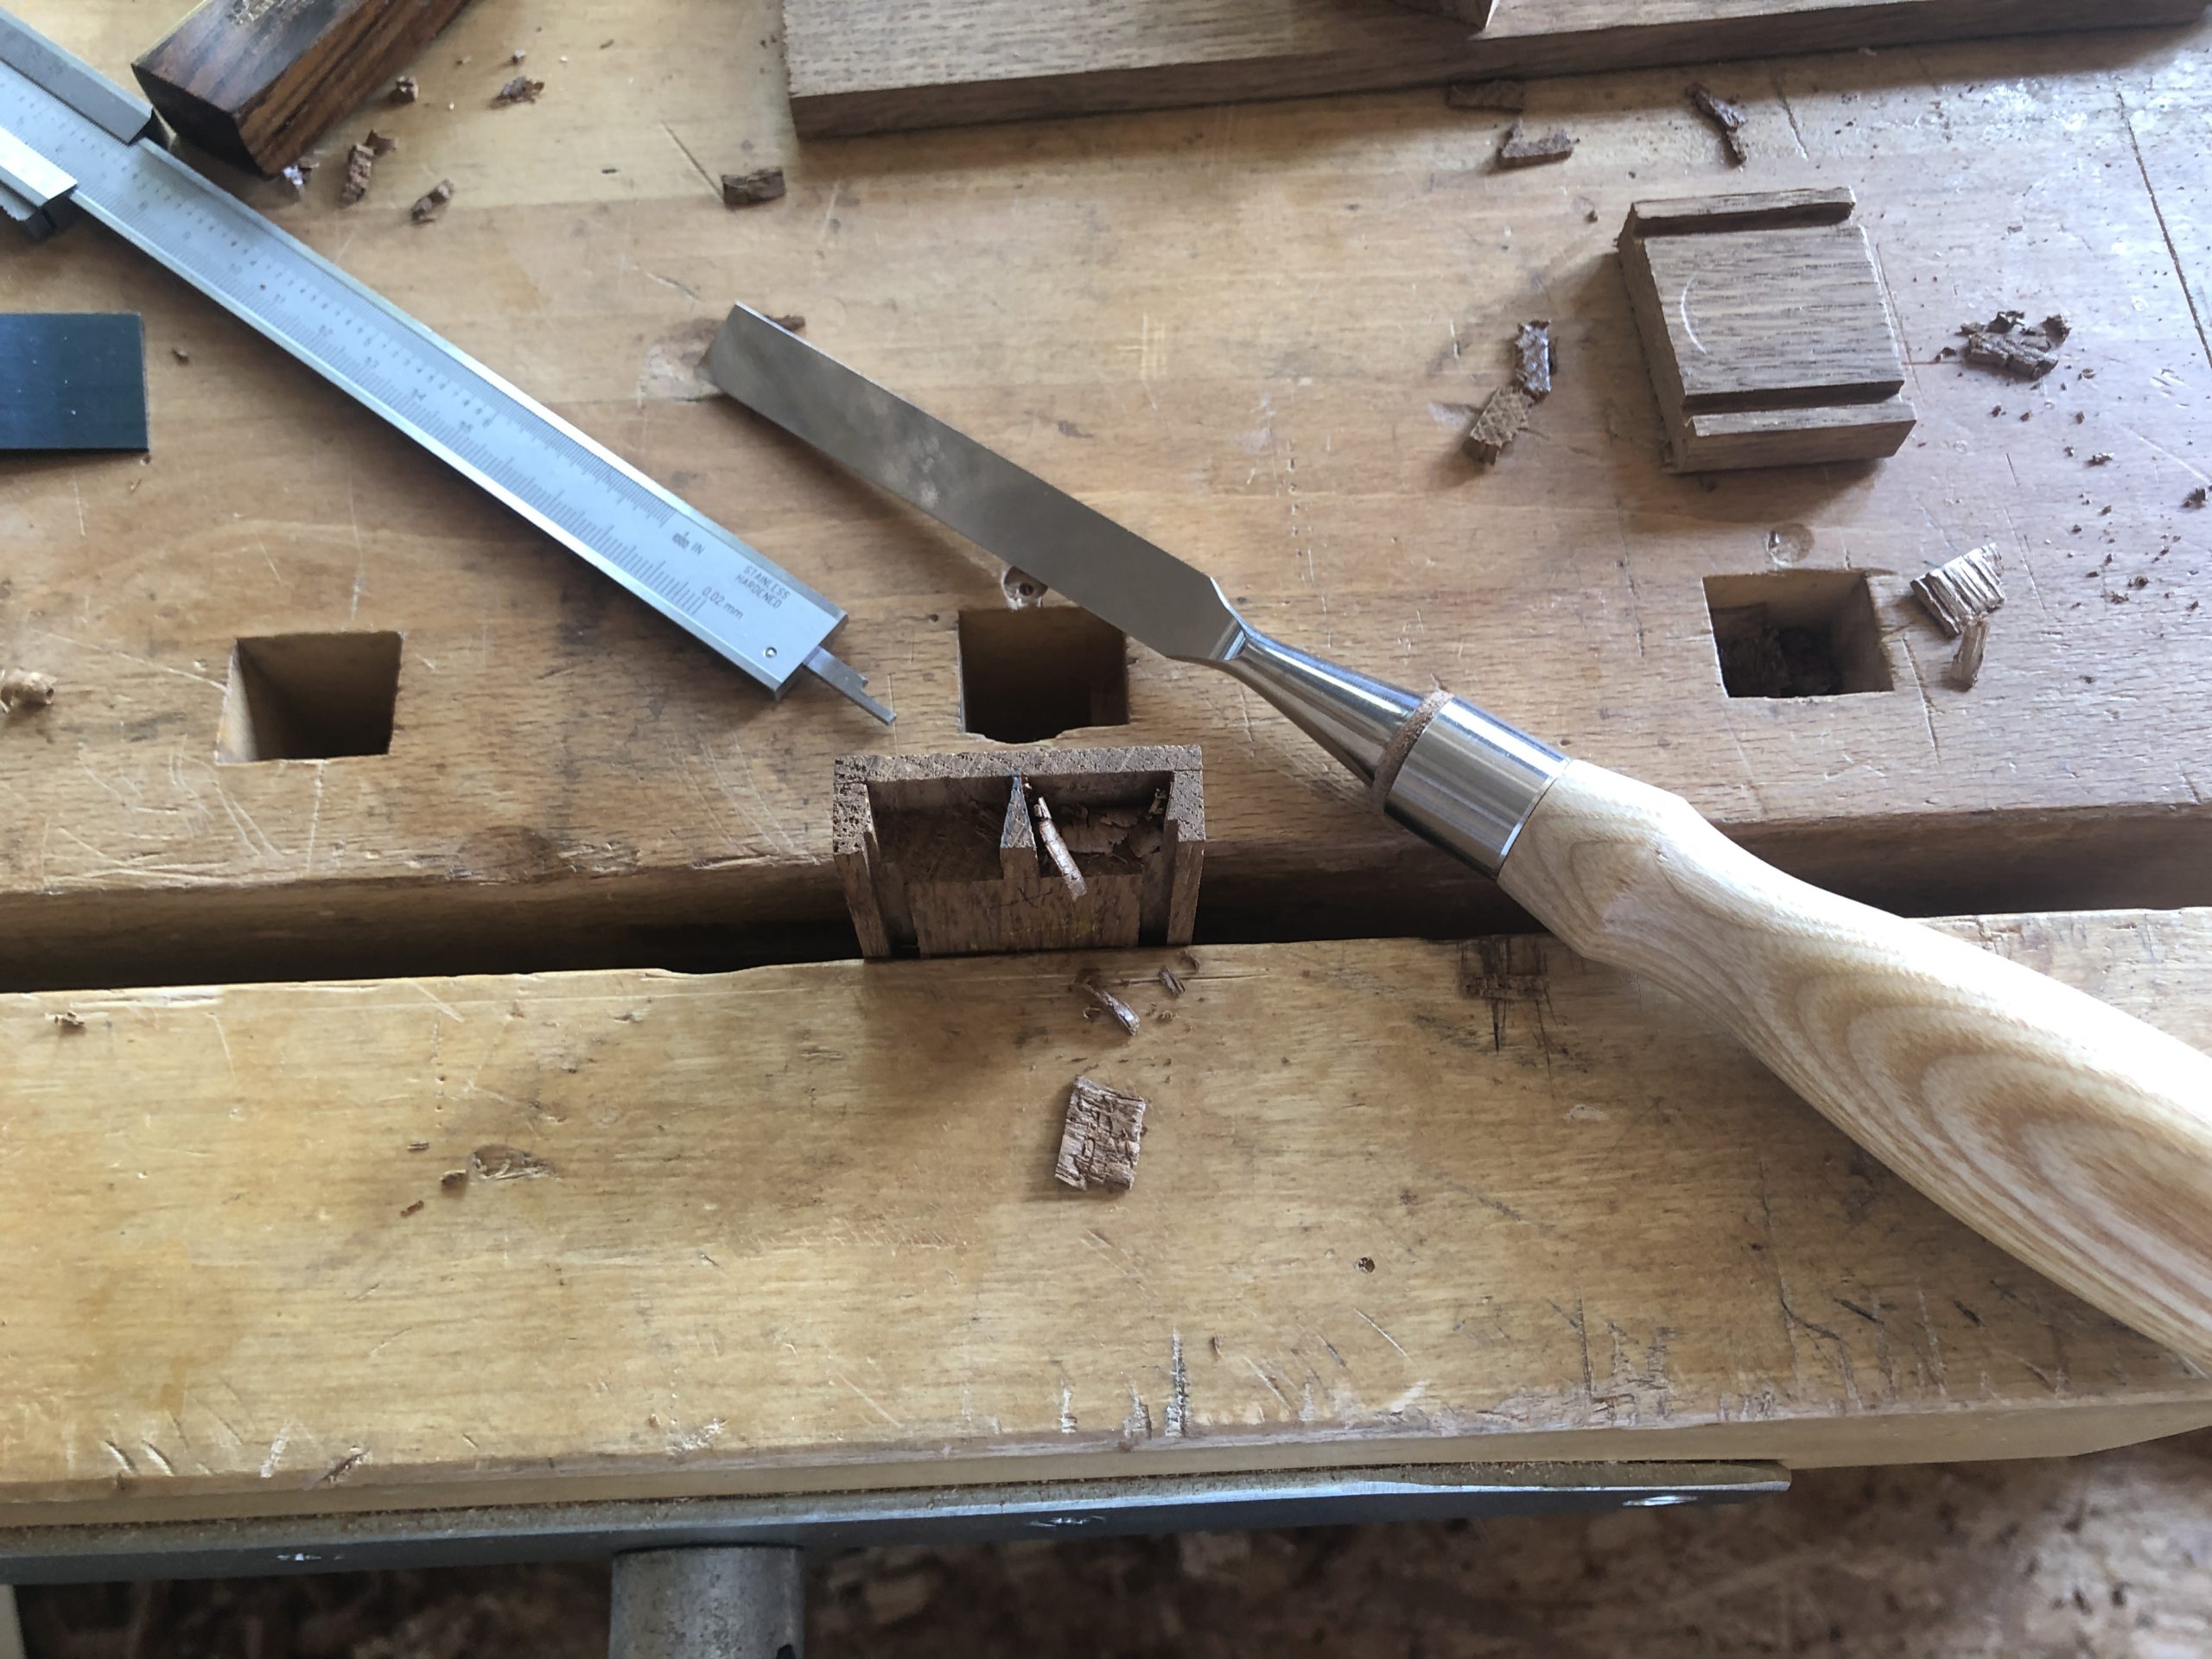
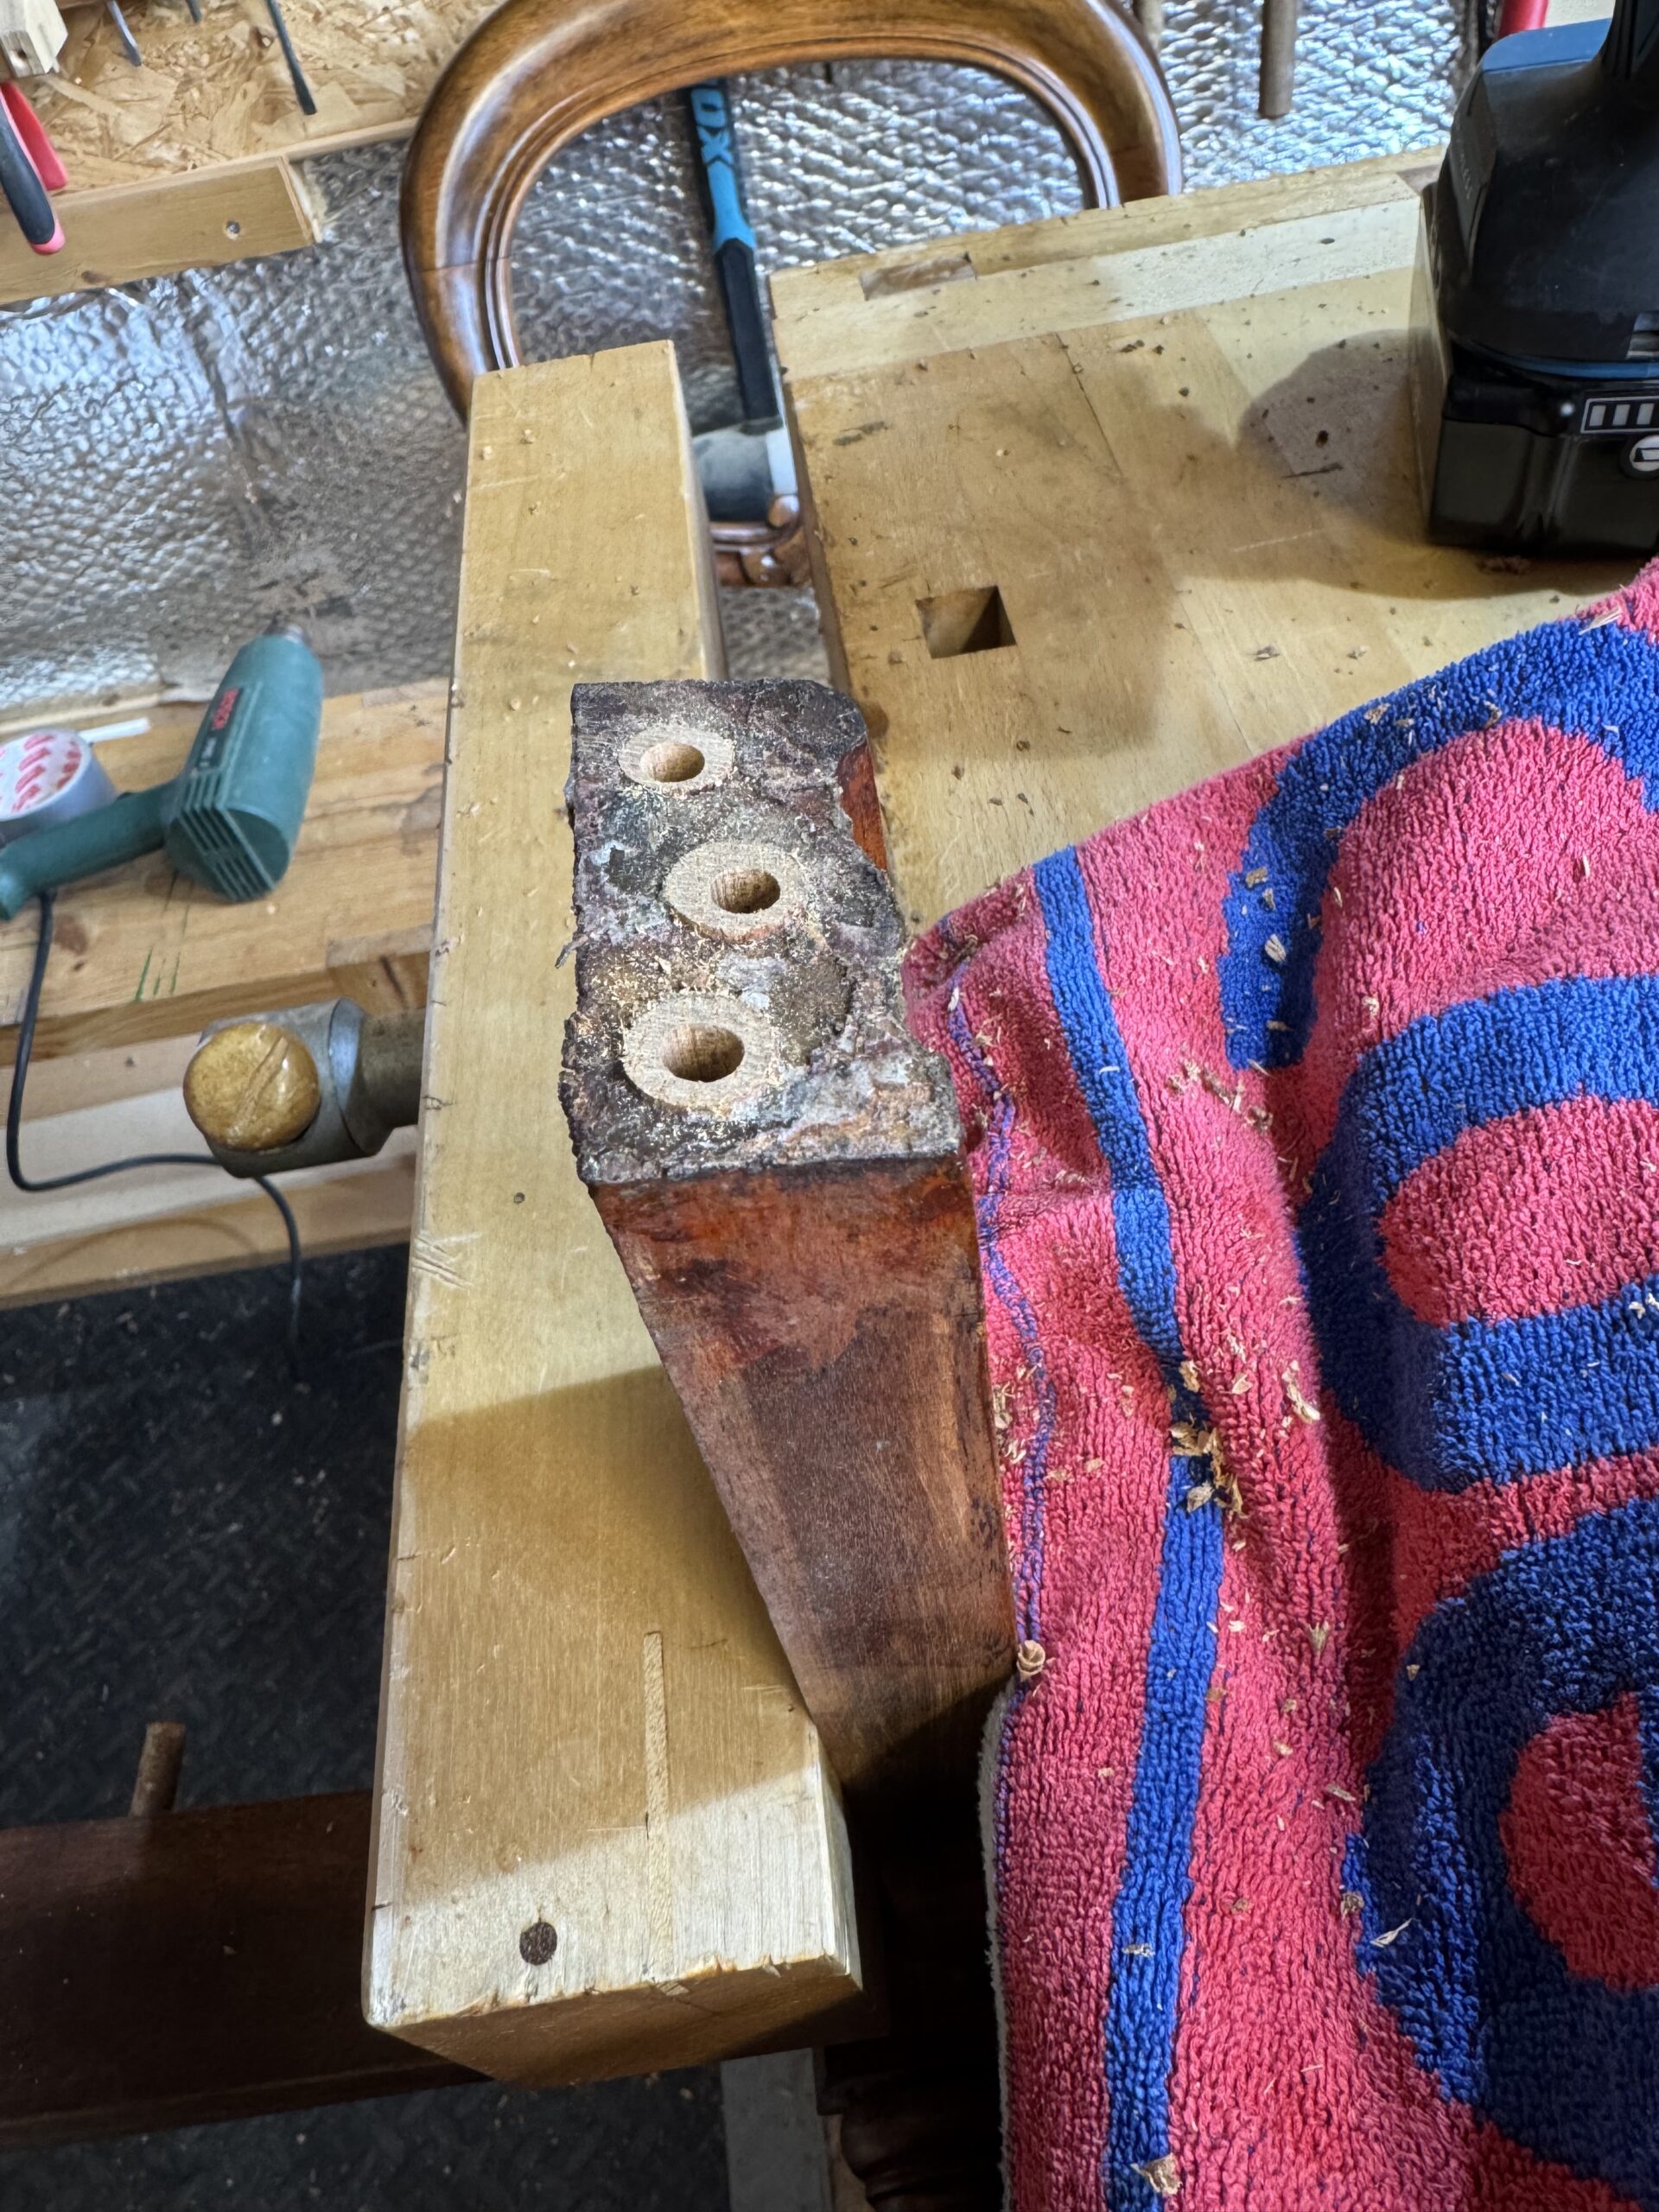
Then I cleaned out all the dowels in the rear joints.

This involved drilling a smallish hole and cutting them out with a small chisel, then cleaning the holes out with a drill. I wanted to do this before repairing the leg break so there would be minimal fiddling with front legs after the break was repaired.

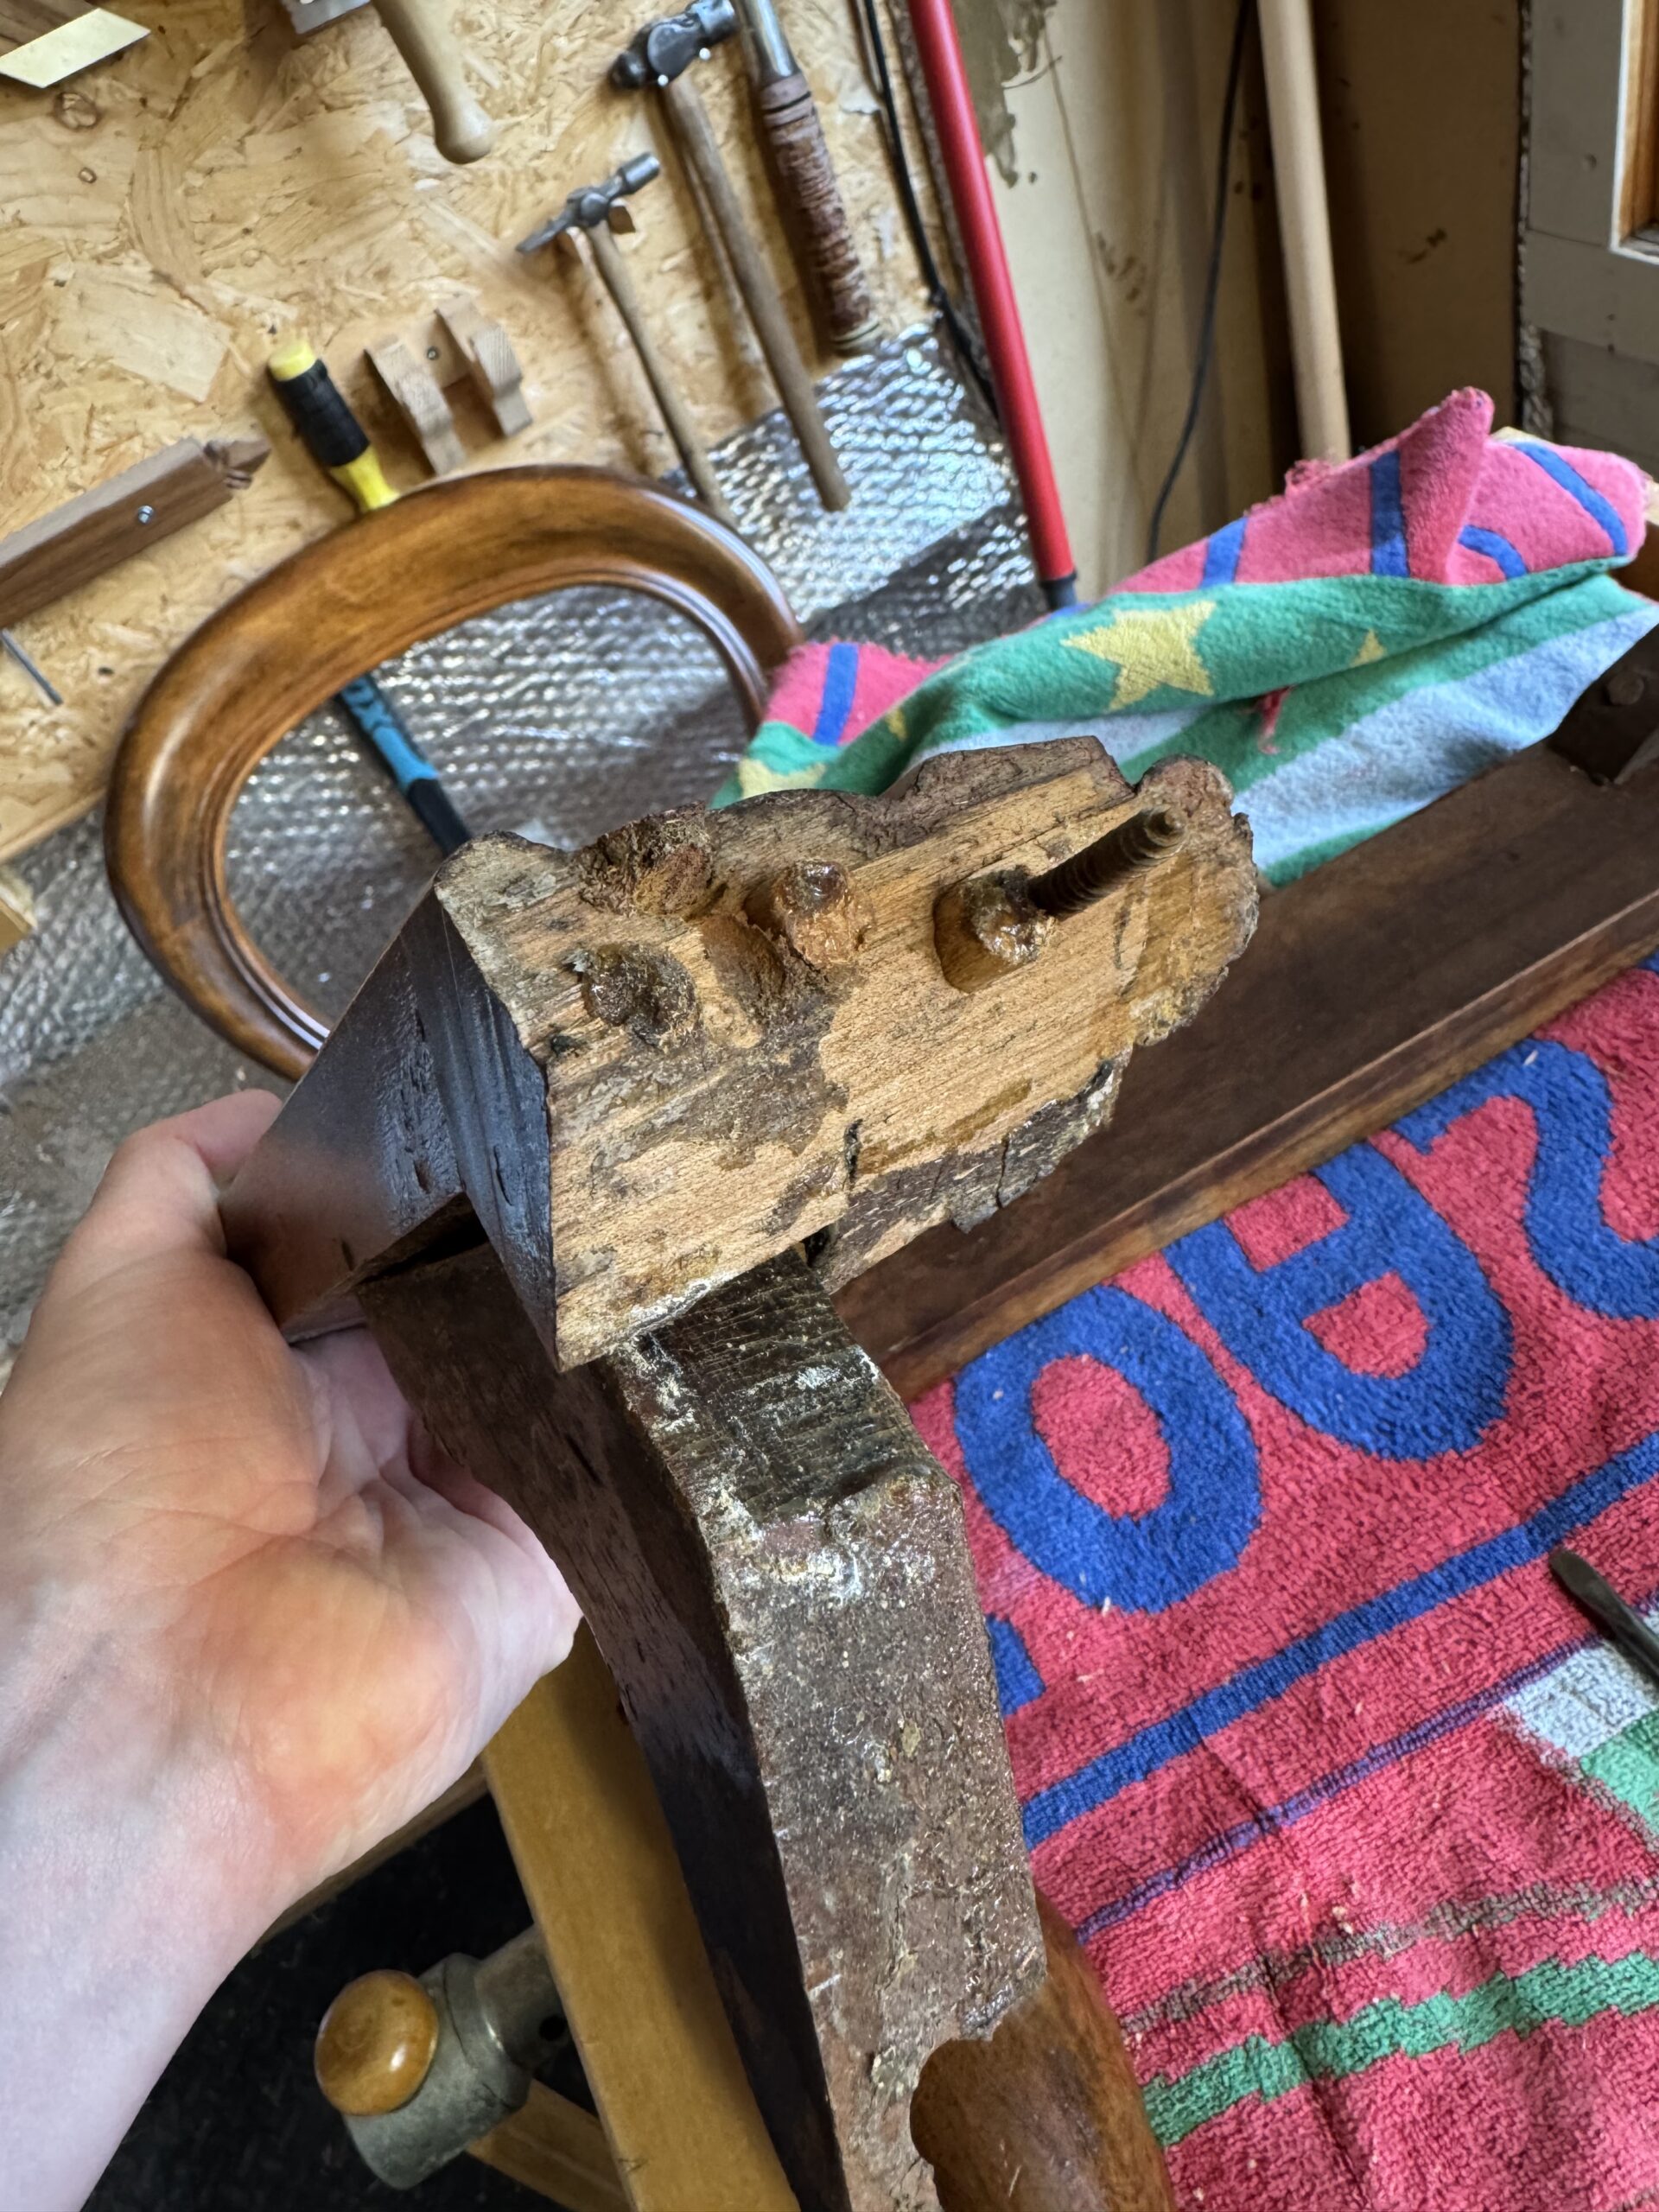
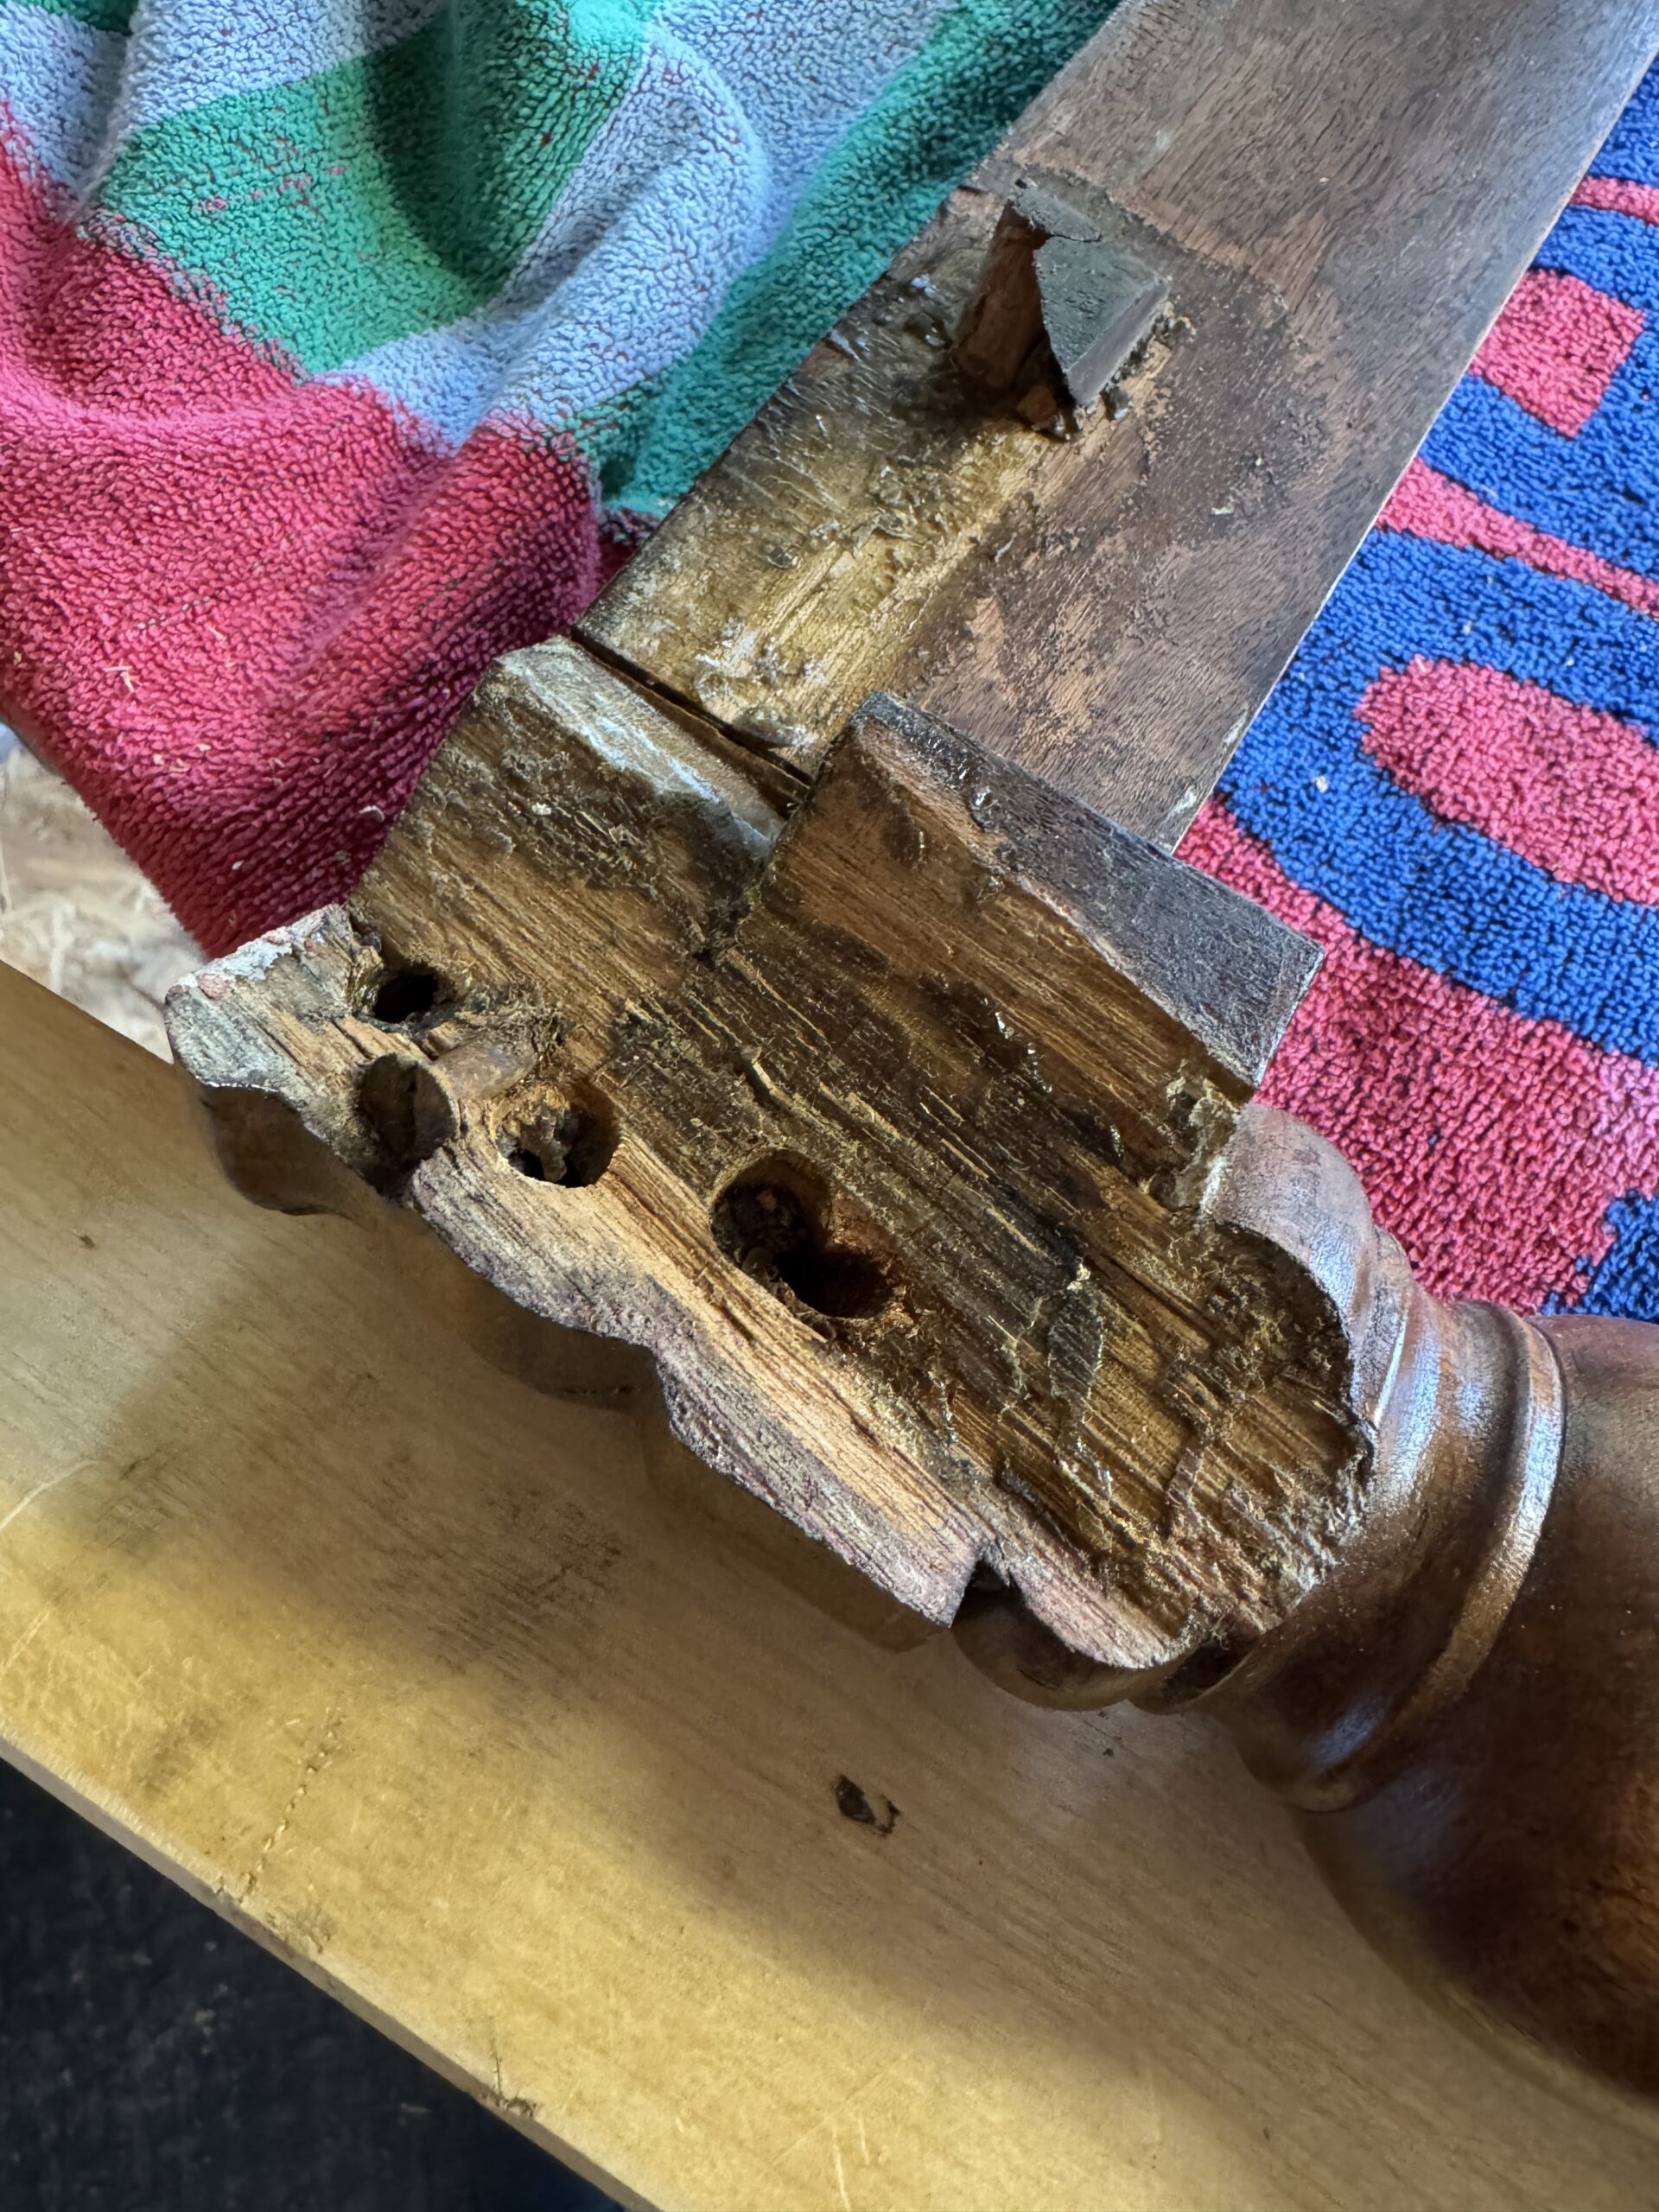
Then I dismantled the big leg break.

One of the screws was absolutely welded in place, so I heated it up with the heat gun and let it cool a few times to break the seal, got one of my biggest screwdrivers out, and it eventually yielded without damaging the wood. Here are the two halves before cleaning off the old glue:

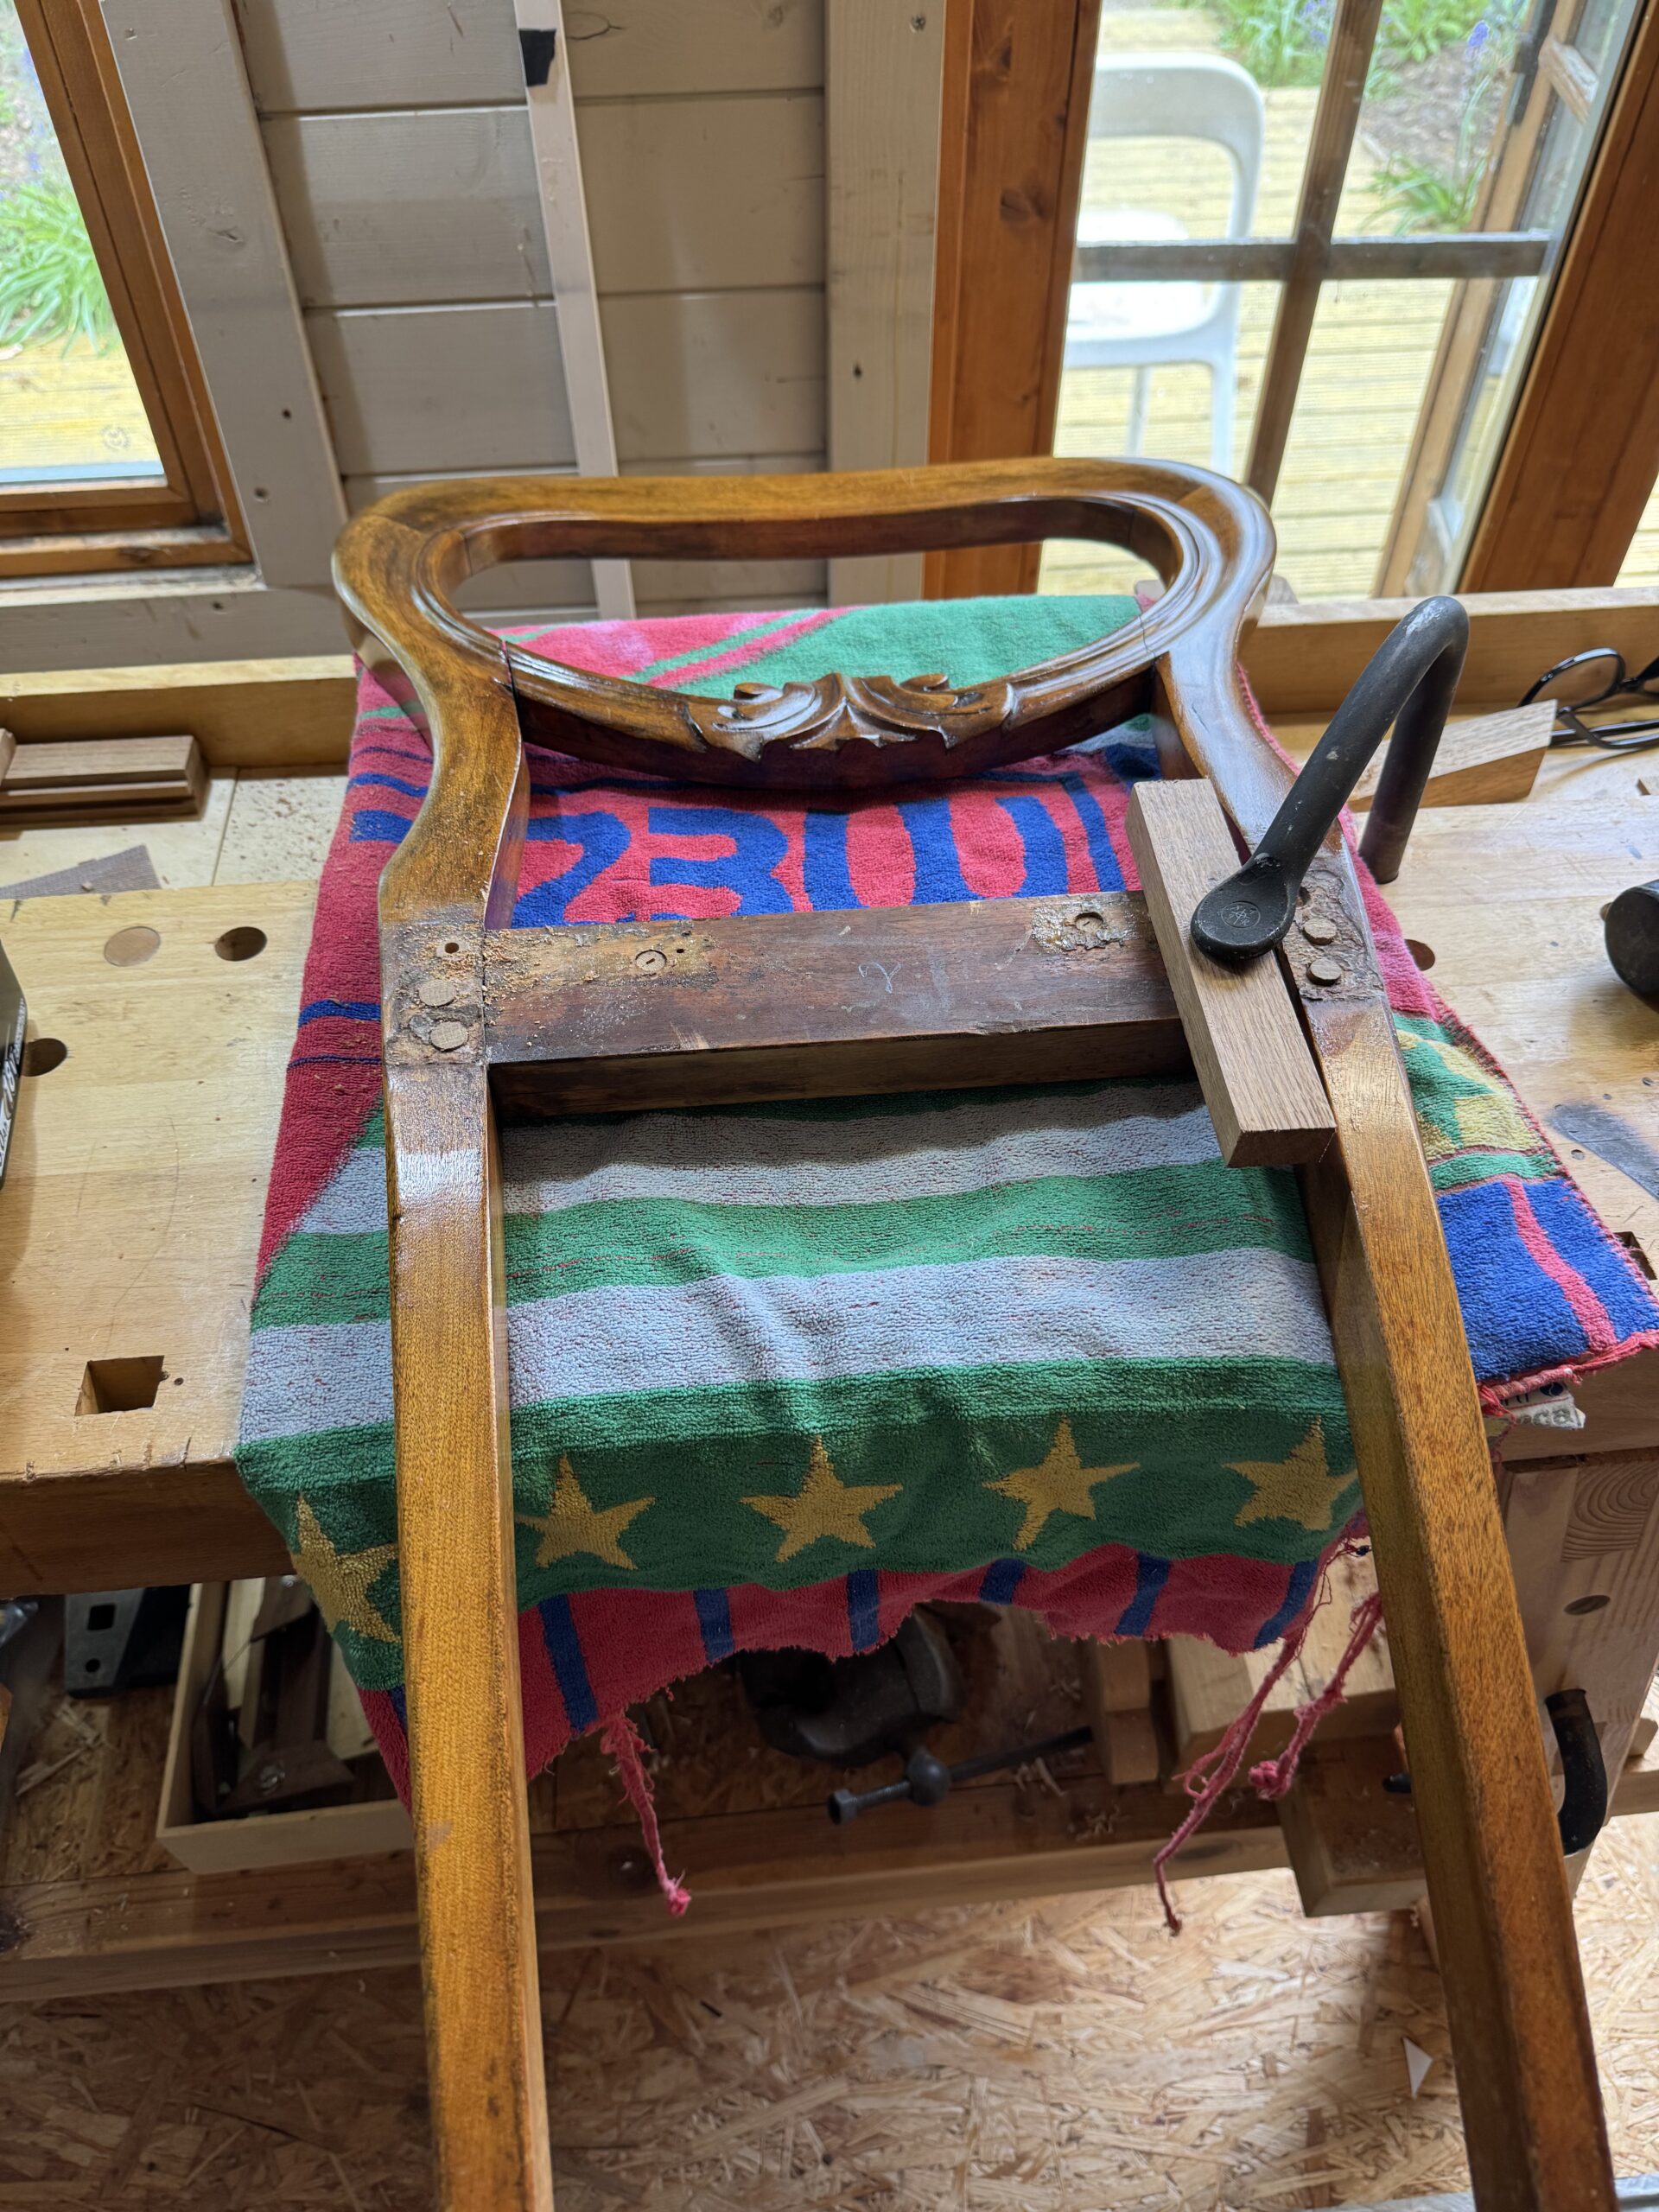
Then I cleaned it all up and glued it back together with moderate clamping force.

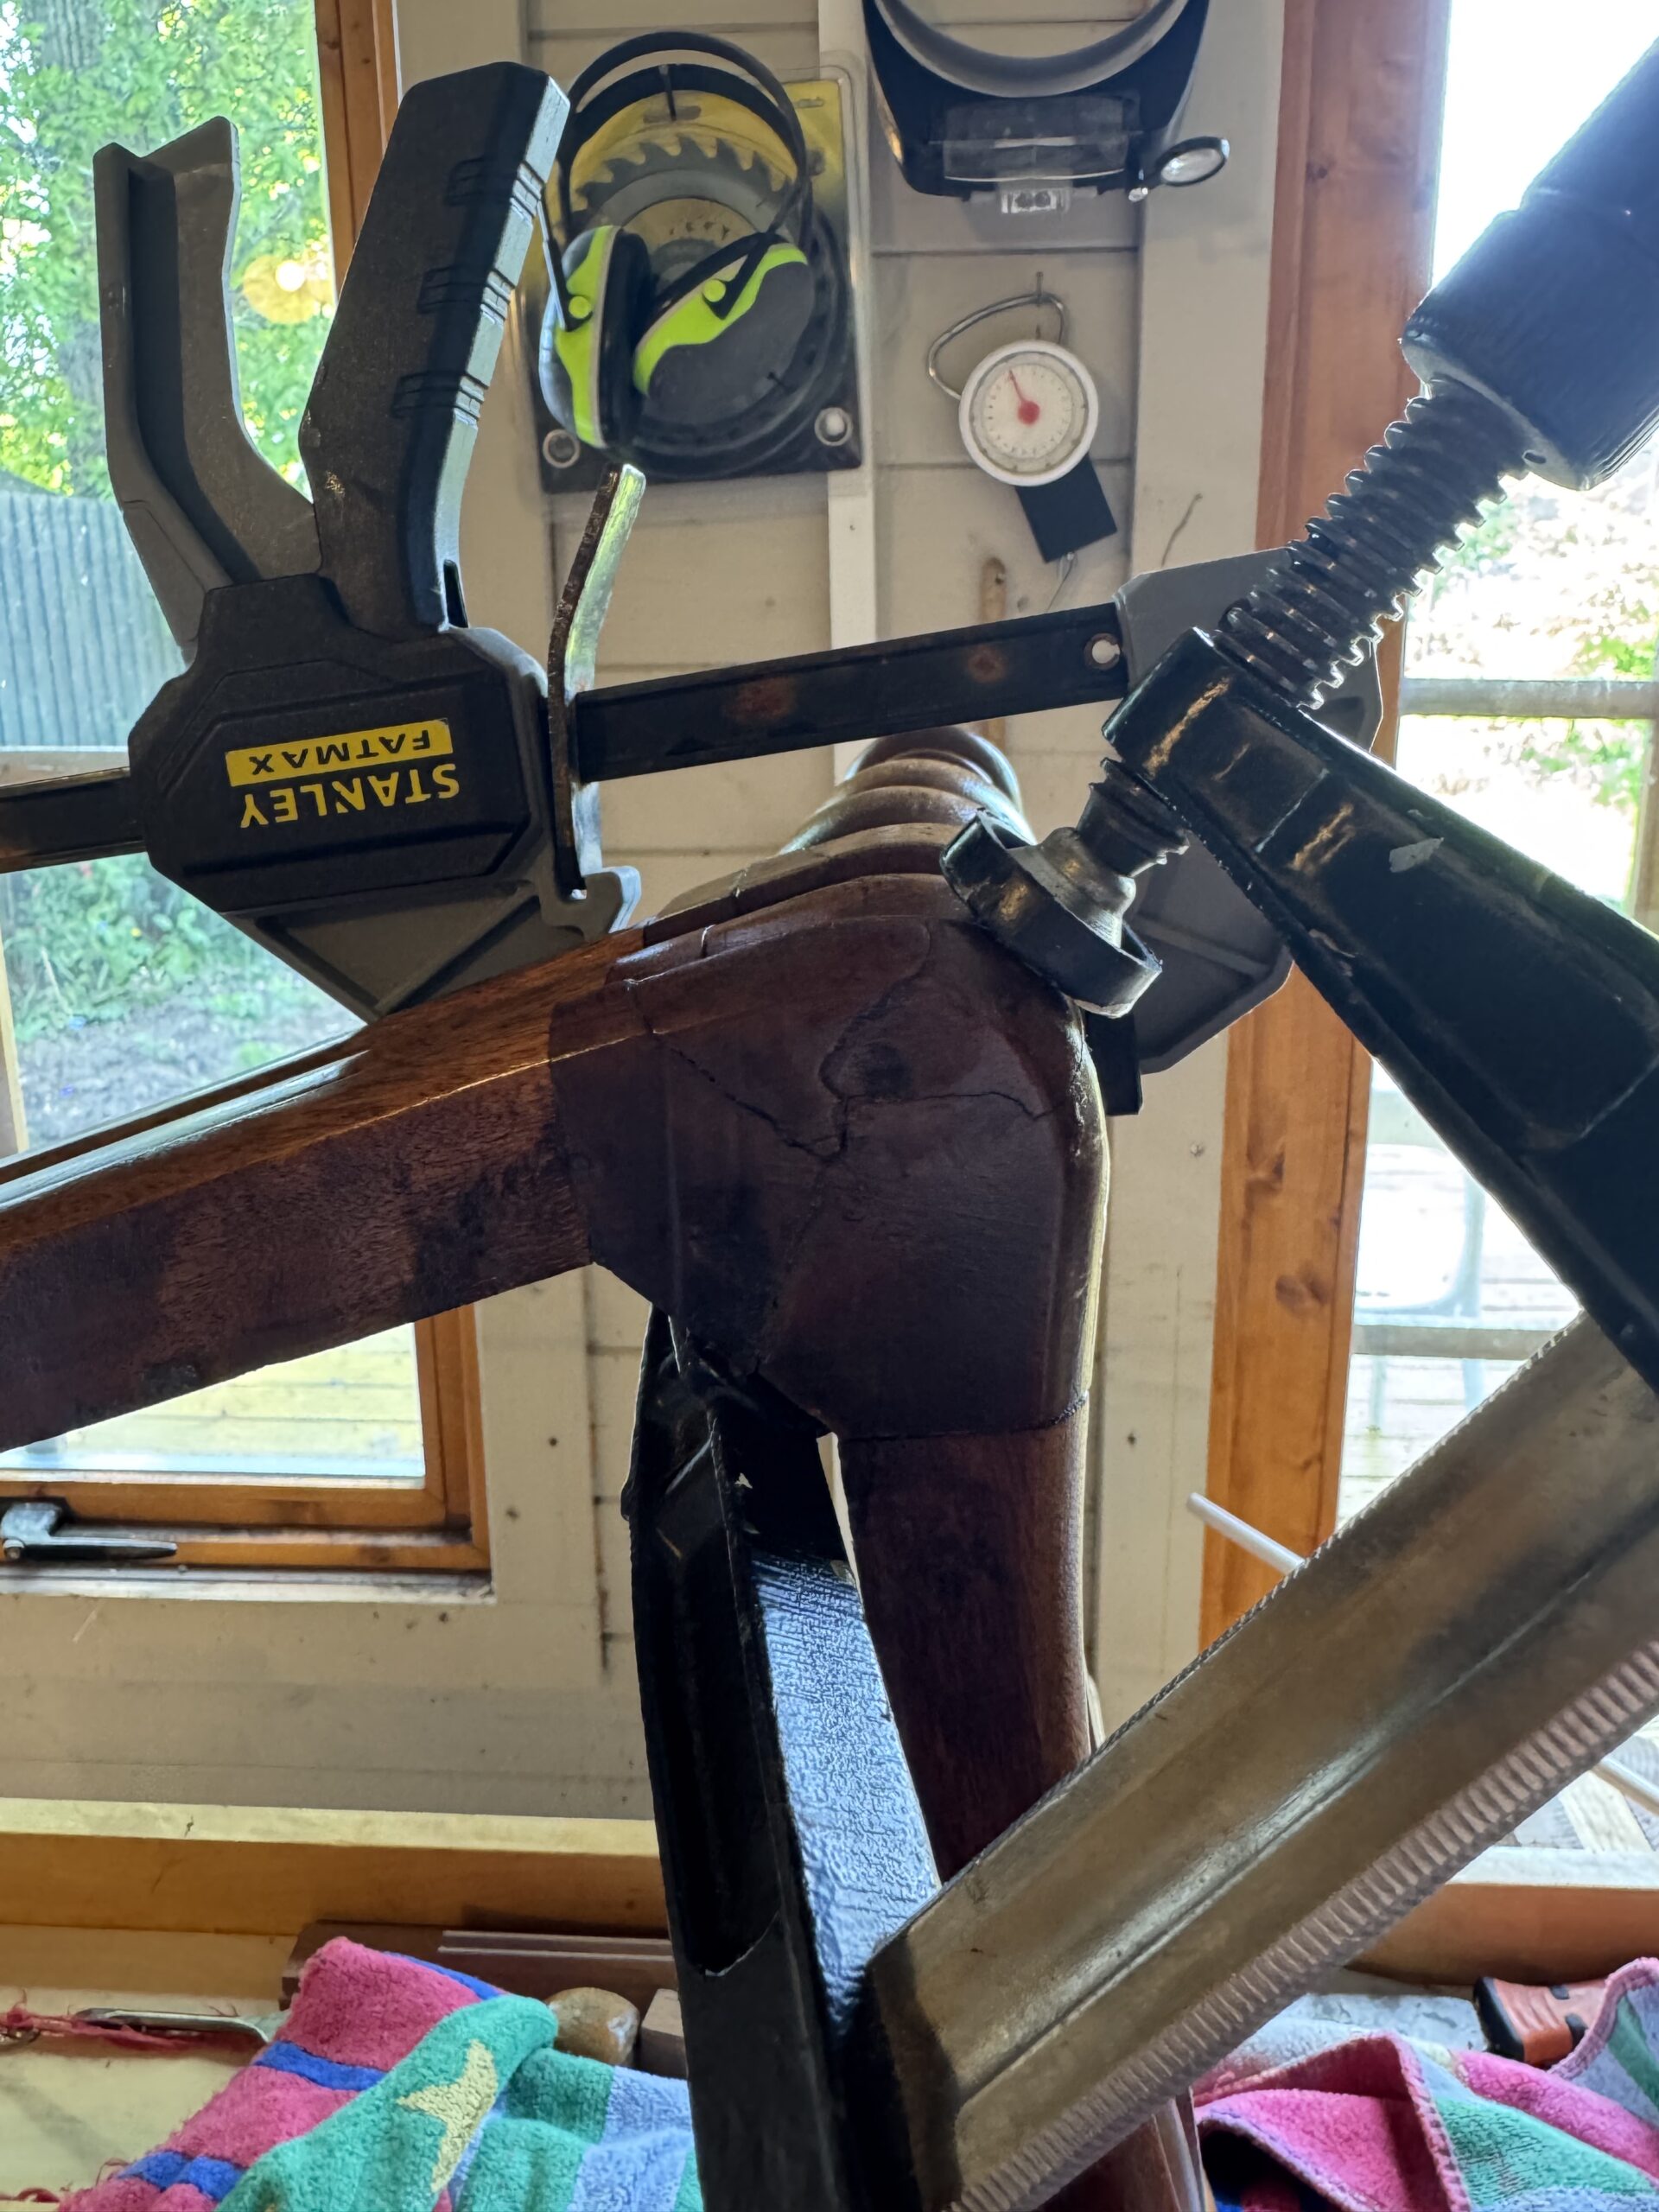
Because I couldn’t open up one part of the previous repair without doing more damage the break is still slightly off, but it’s much more together than it was.

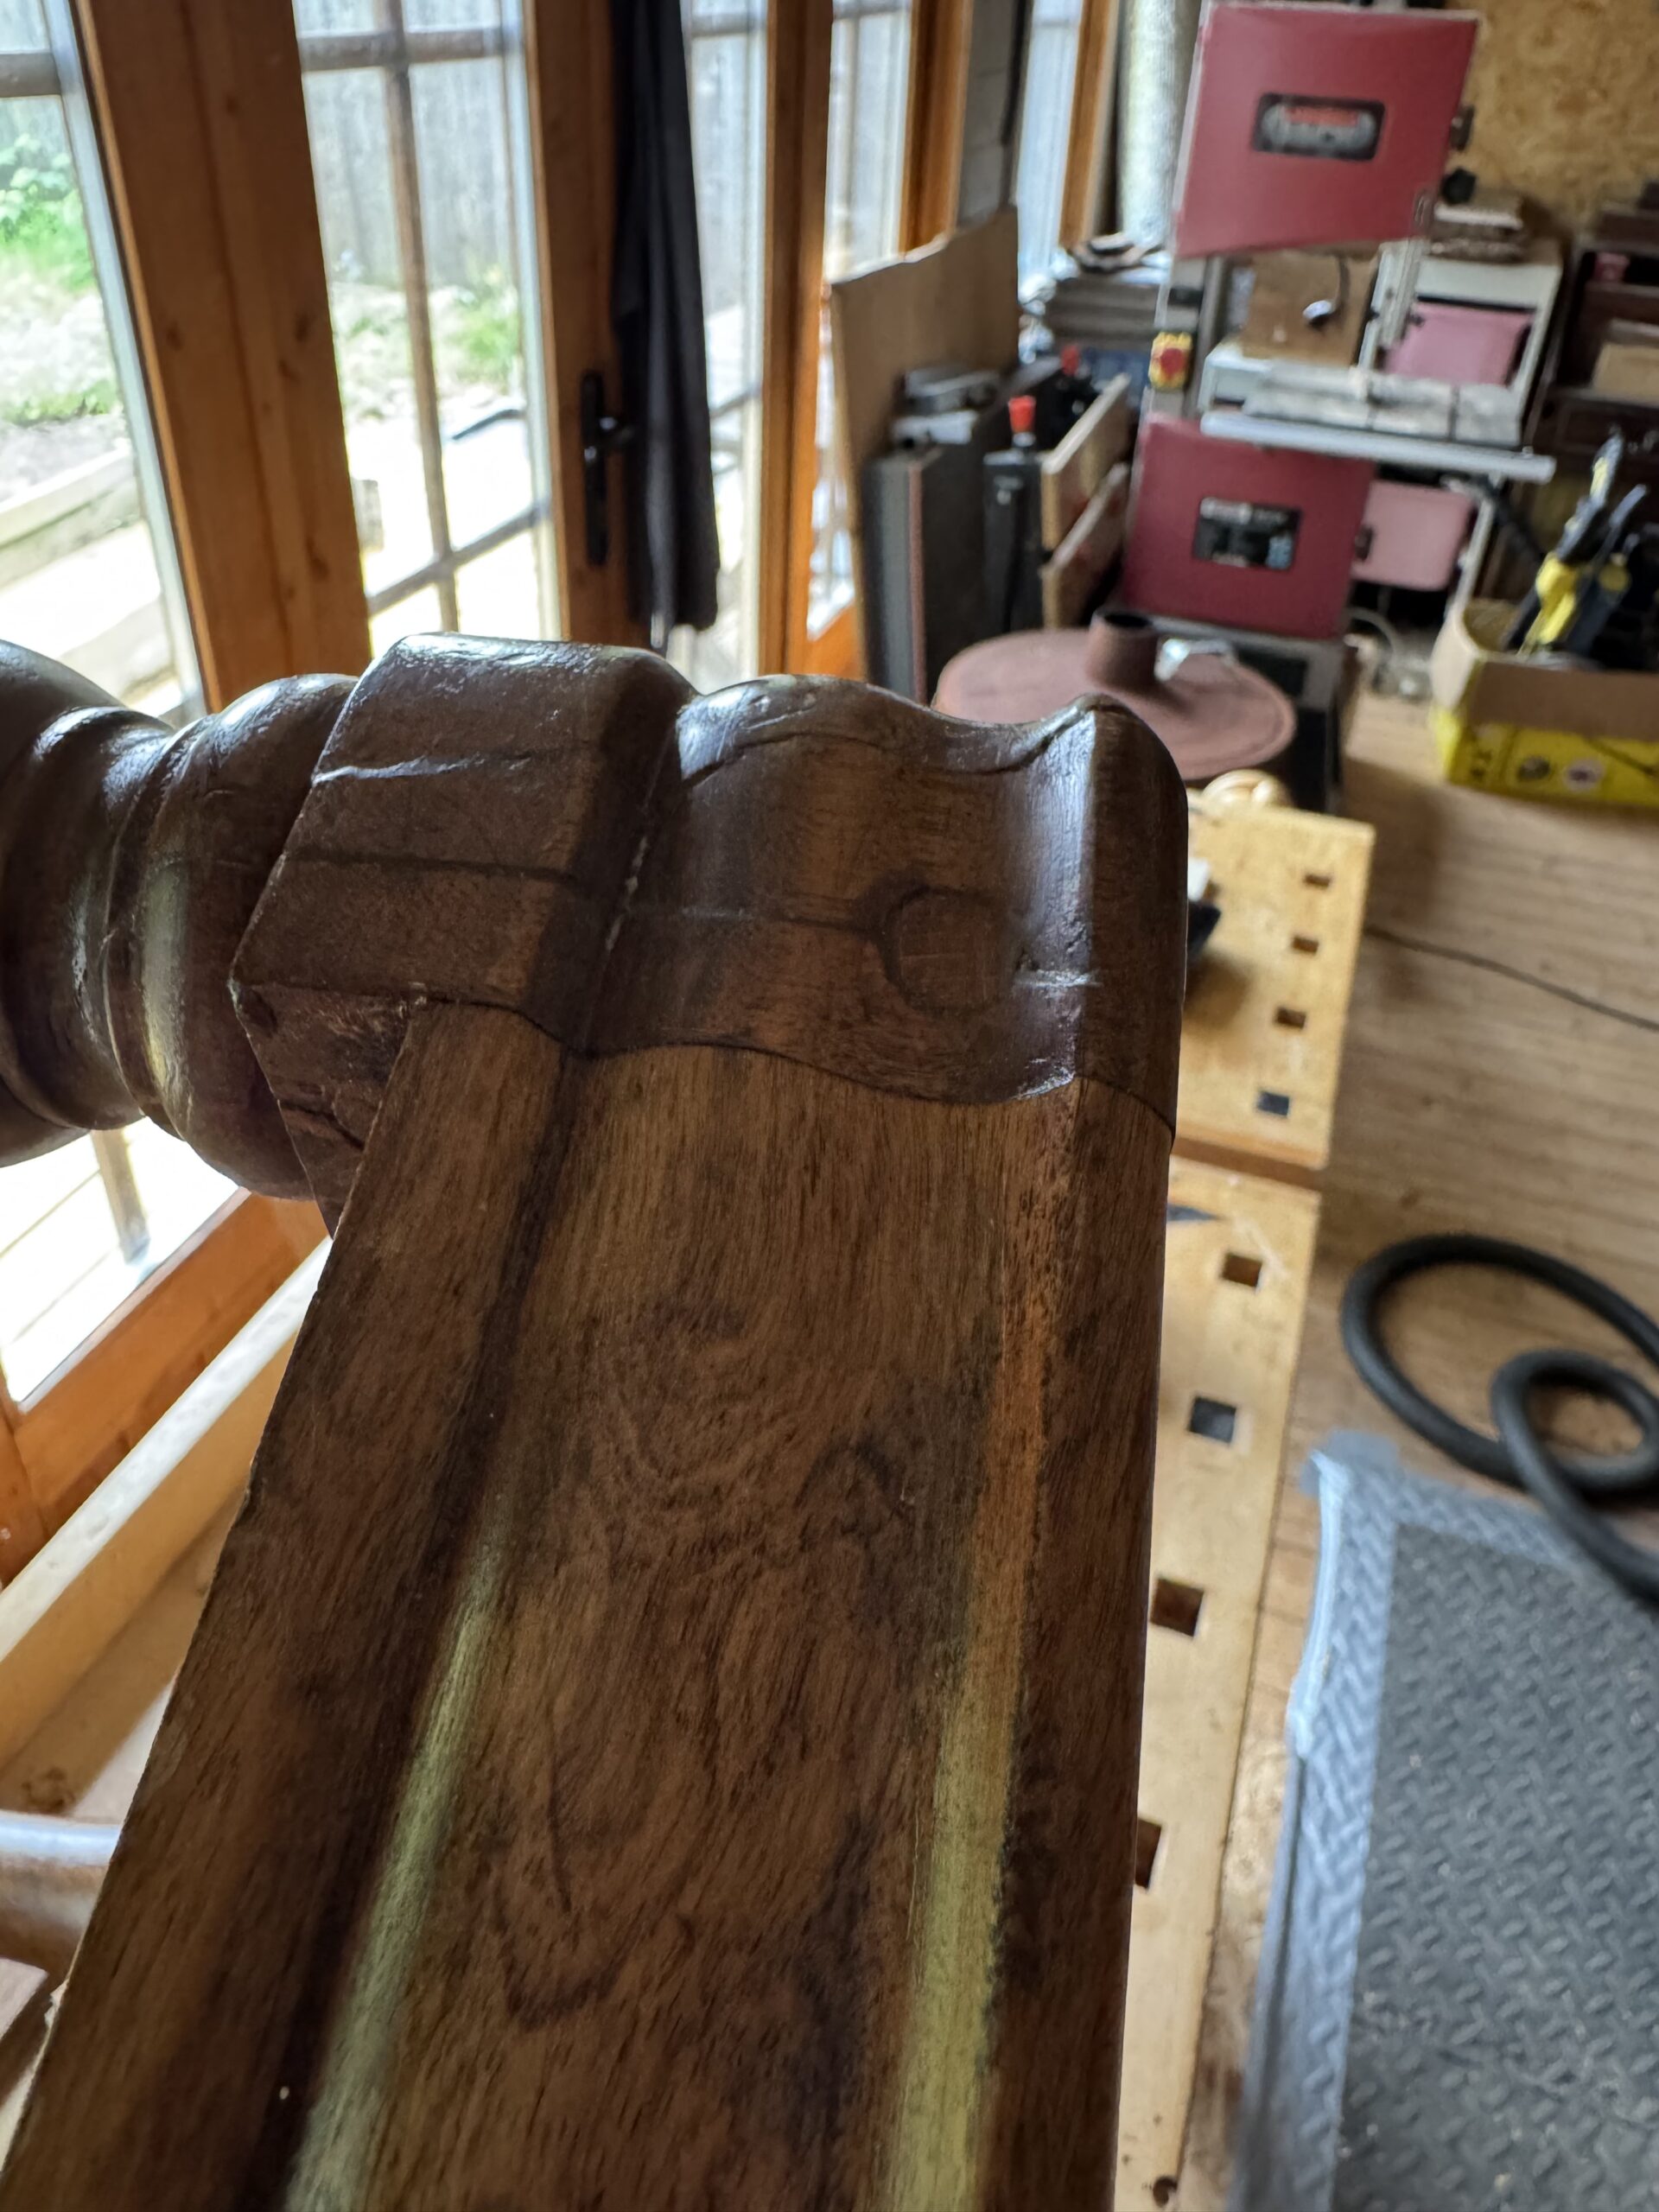
After it had dried I then I drilled 10mm dowel holes where the screws had been, and glued them in. They should make the repair much more stable.

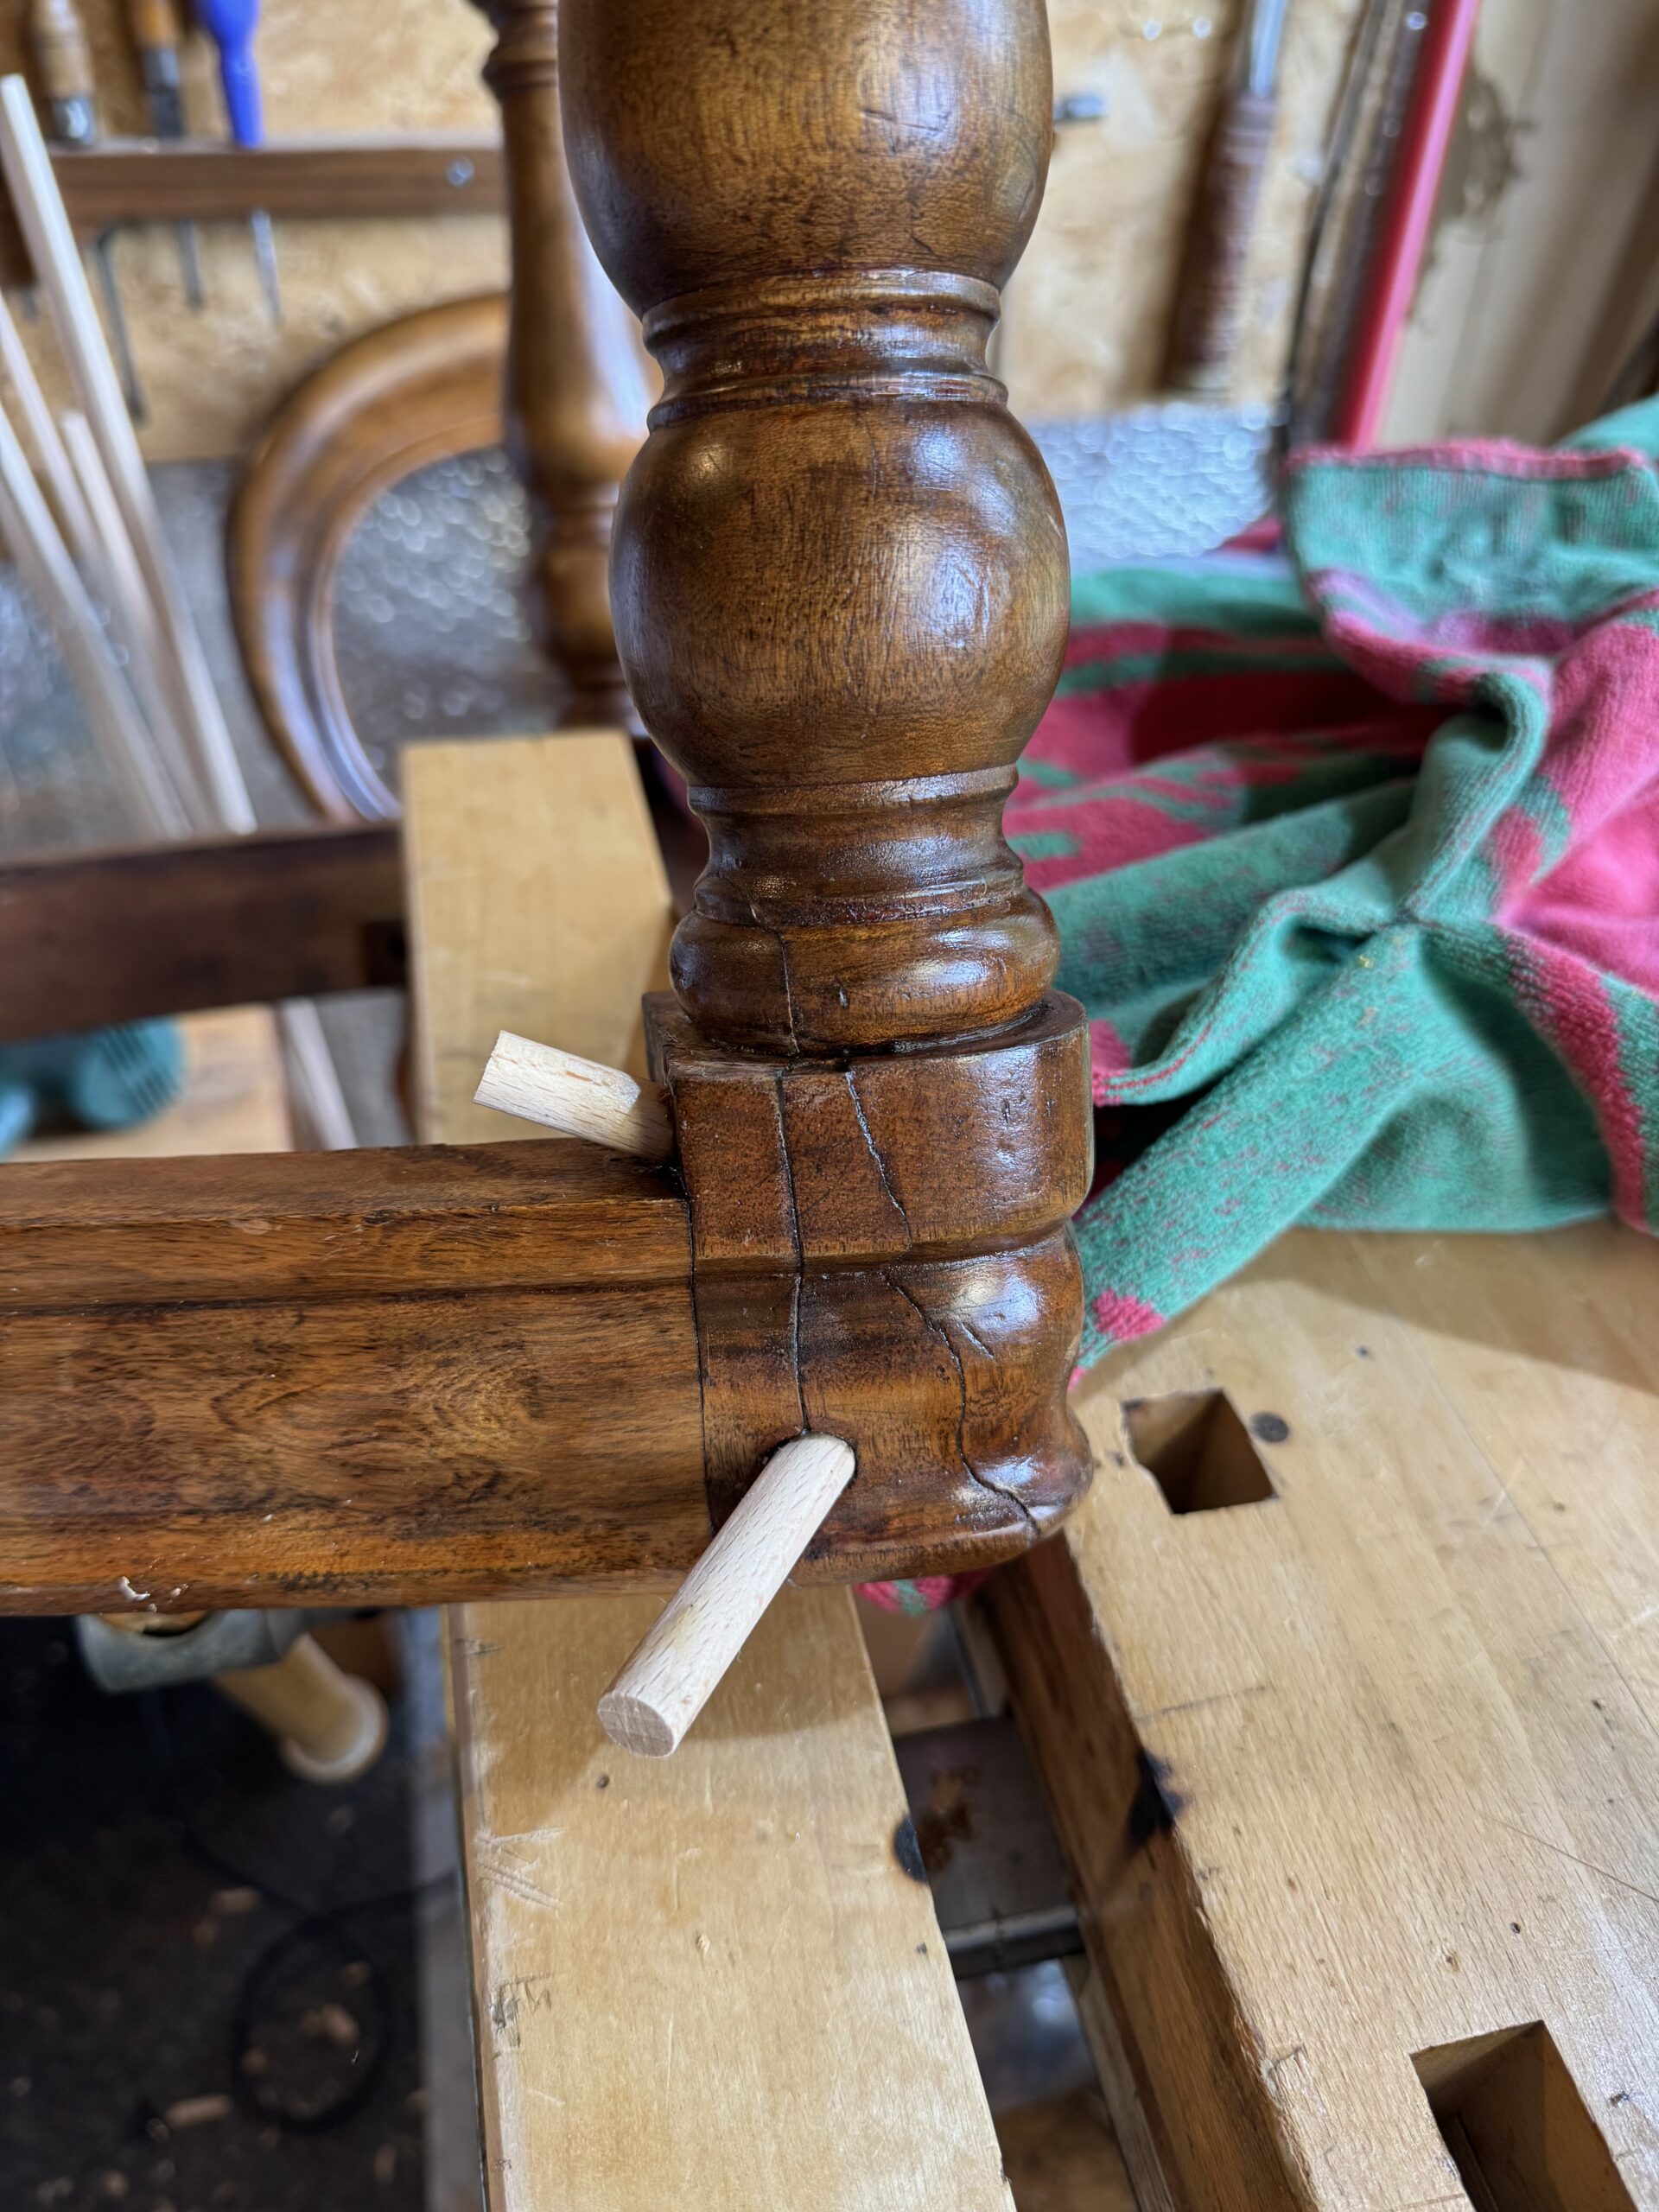
They then had to be cut down, the ends shaped to the form of the rail, and stained and polished. This could have been done at the end of the job, but I felt like doing it then and there. I also disappeared the cracks with some coloured hard wax.

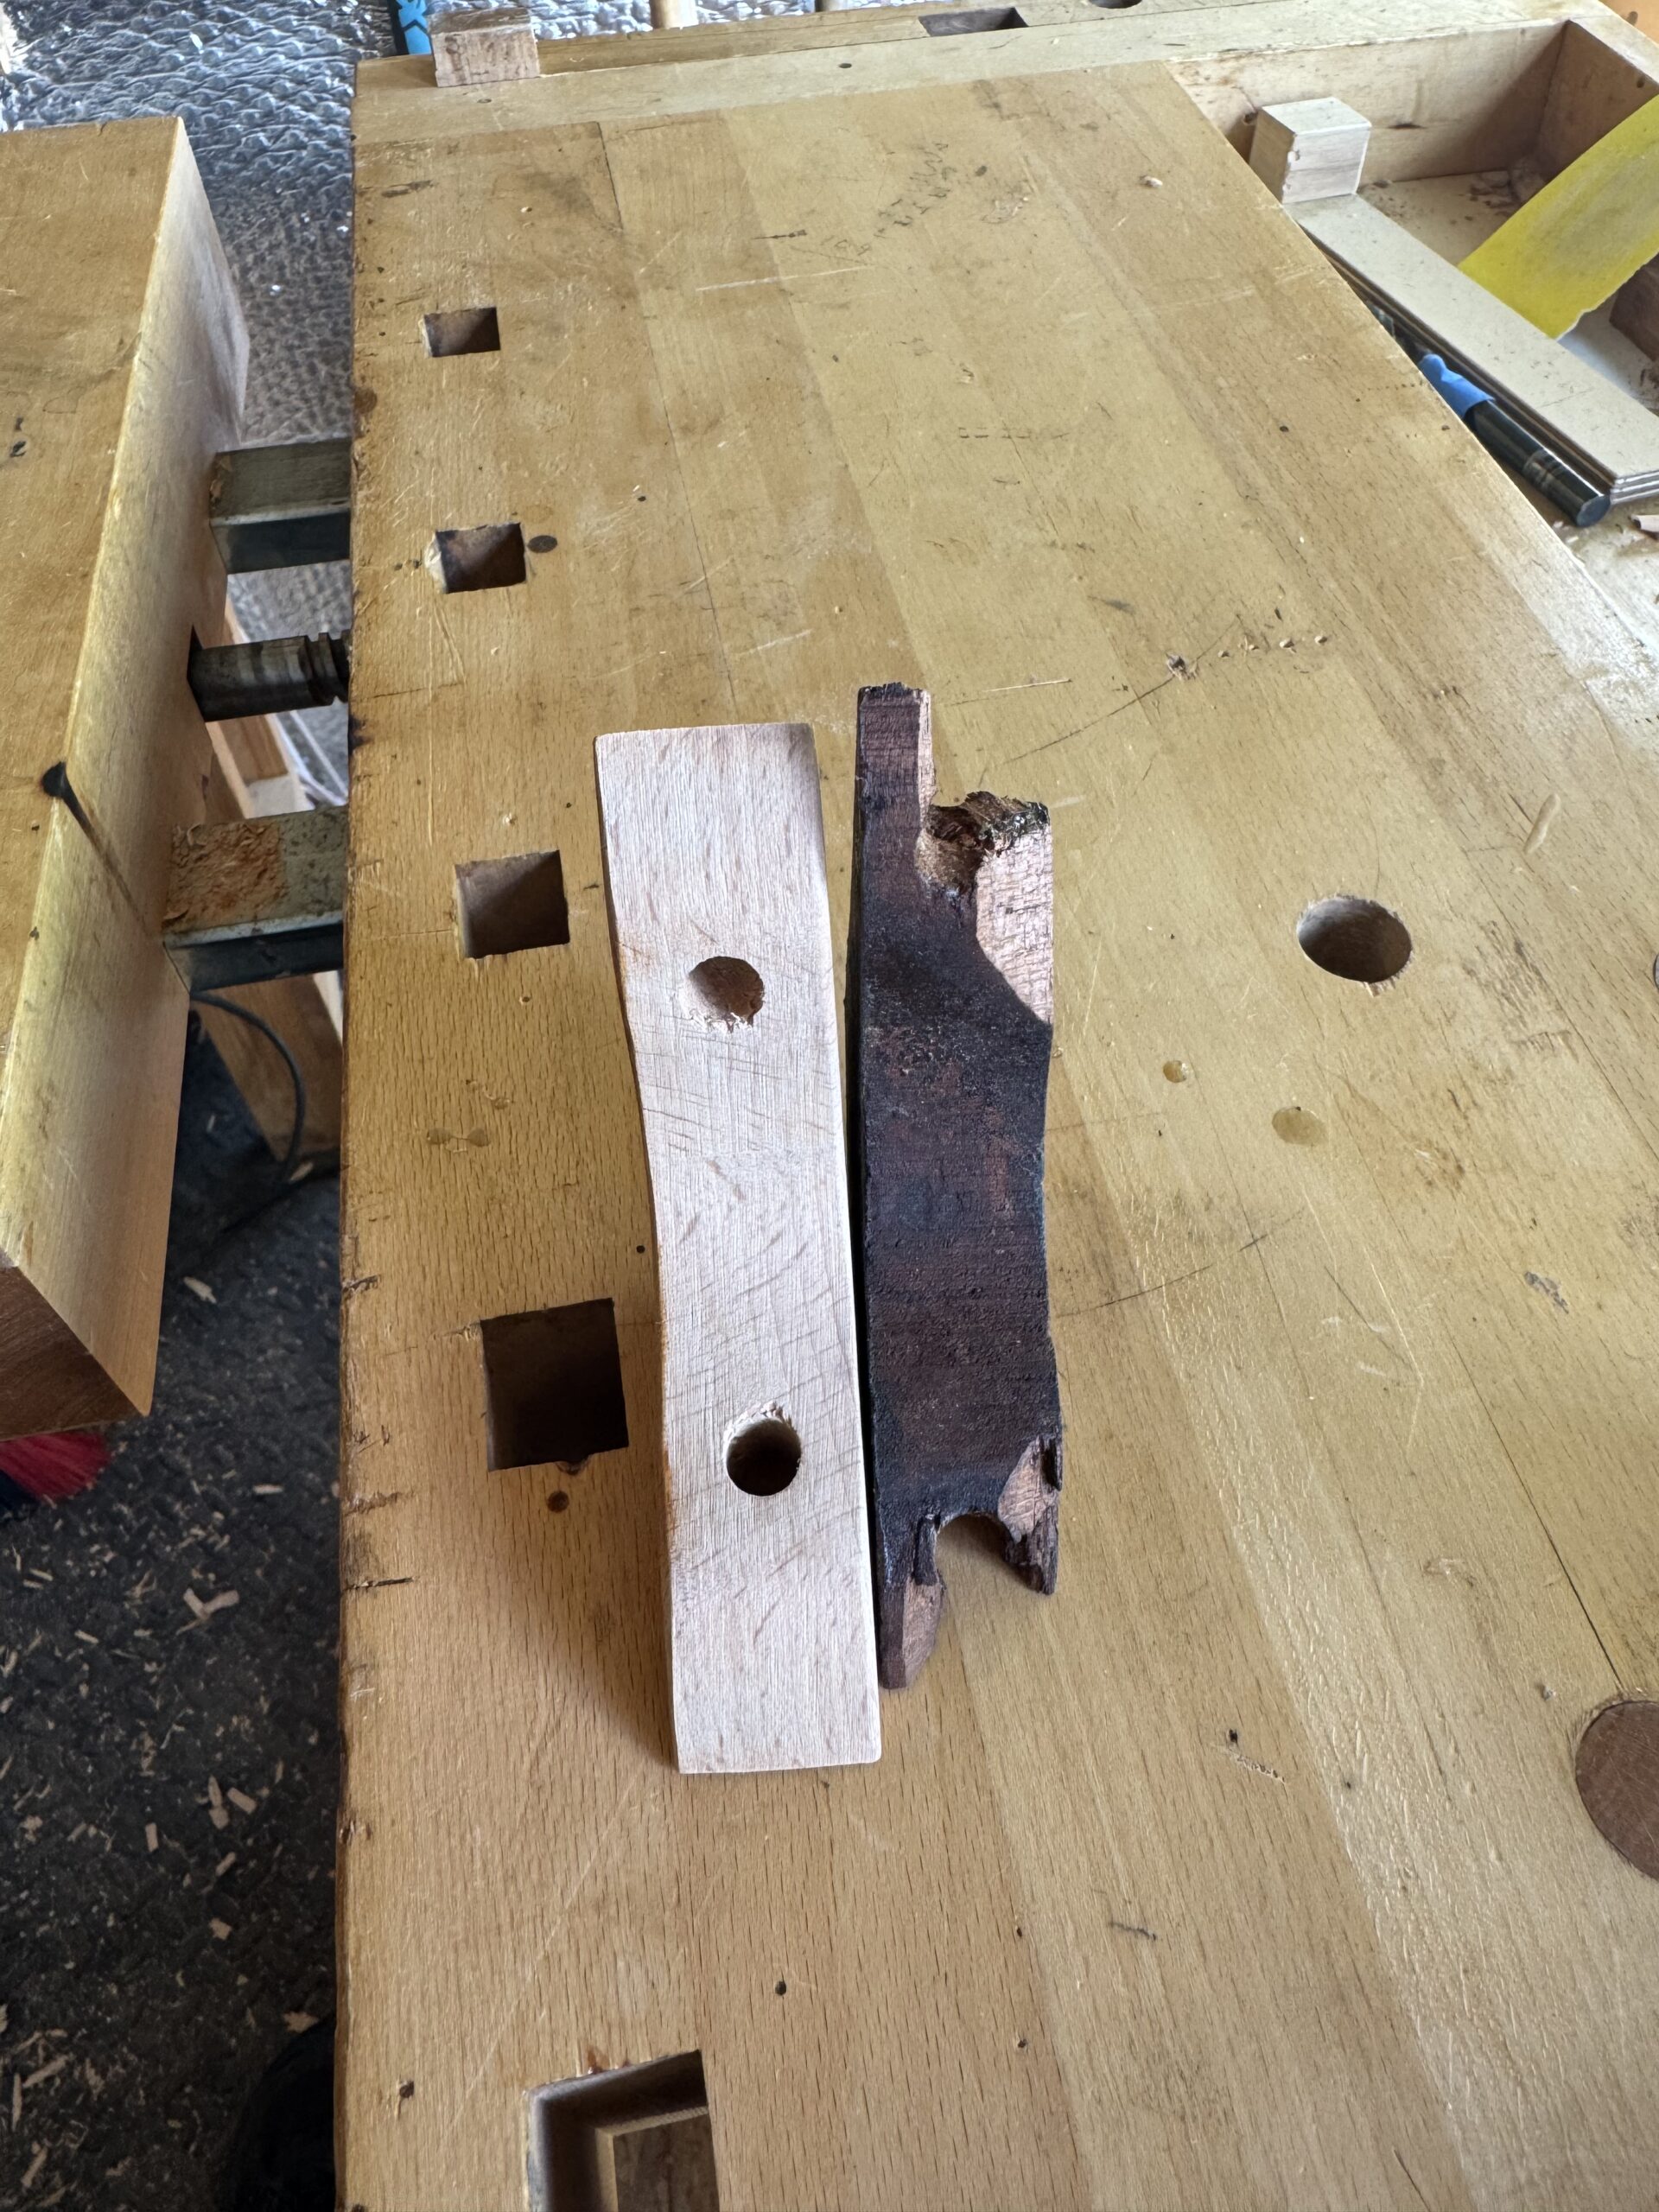
I decided to replace the front left corner block with a slightly beefier version. It will always be a somewhat weakened area, but at least it has a solid, unbroken, properly-fitted corner block helping to keep it together. You can see the new block next to the shattered old one here:

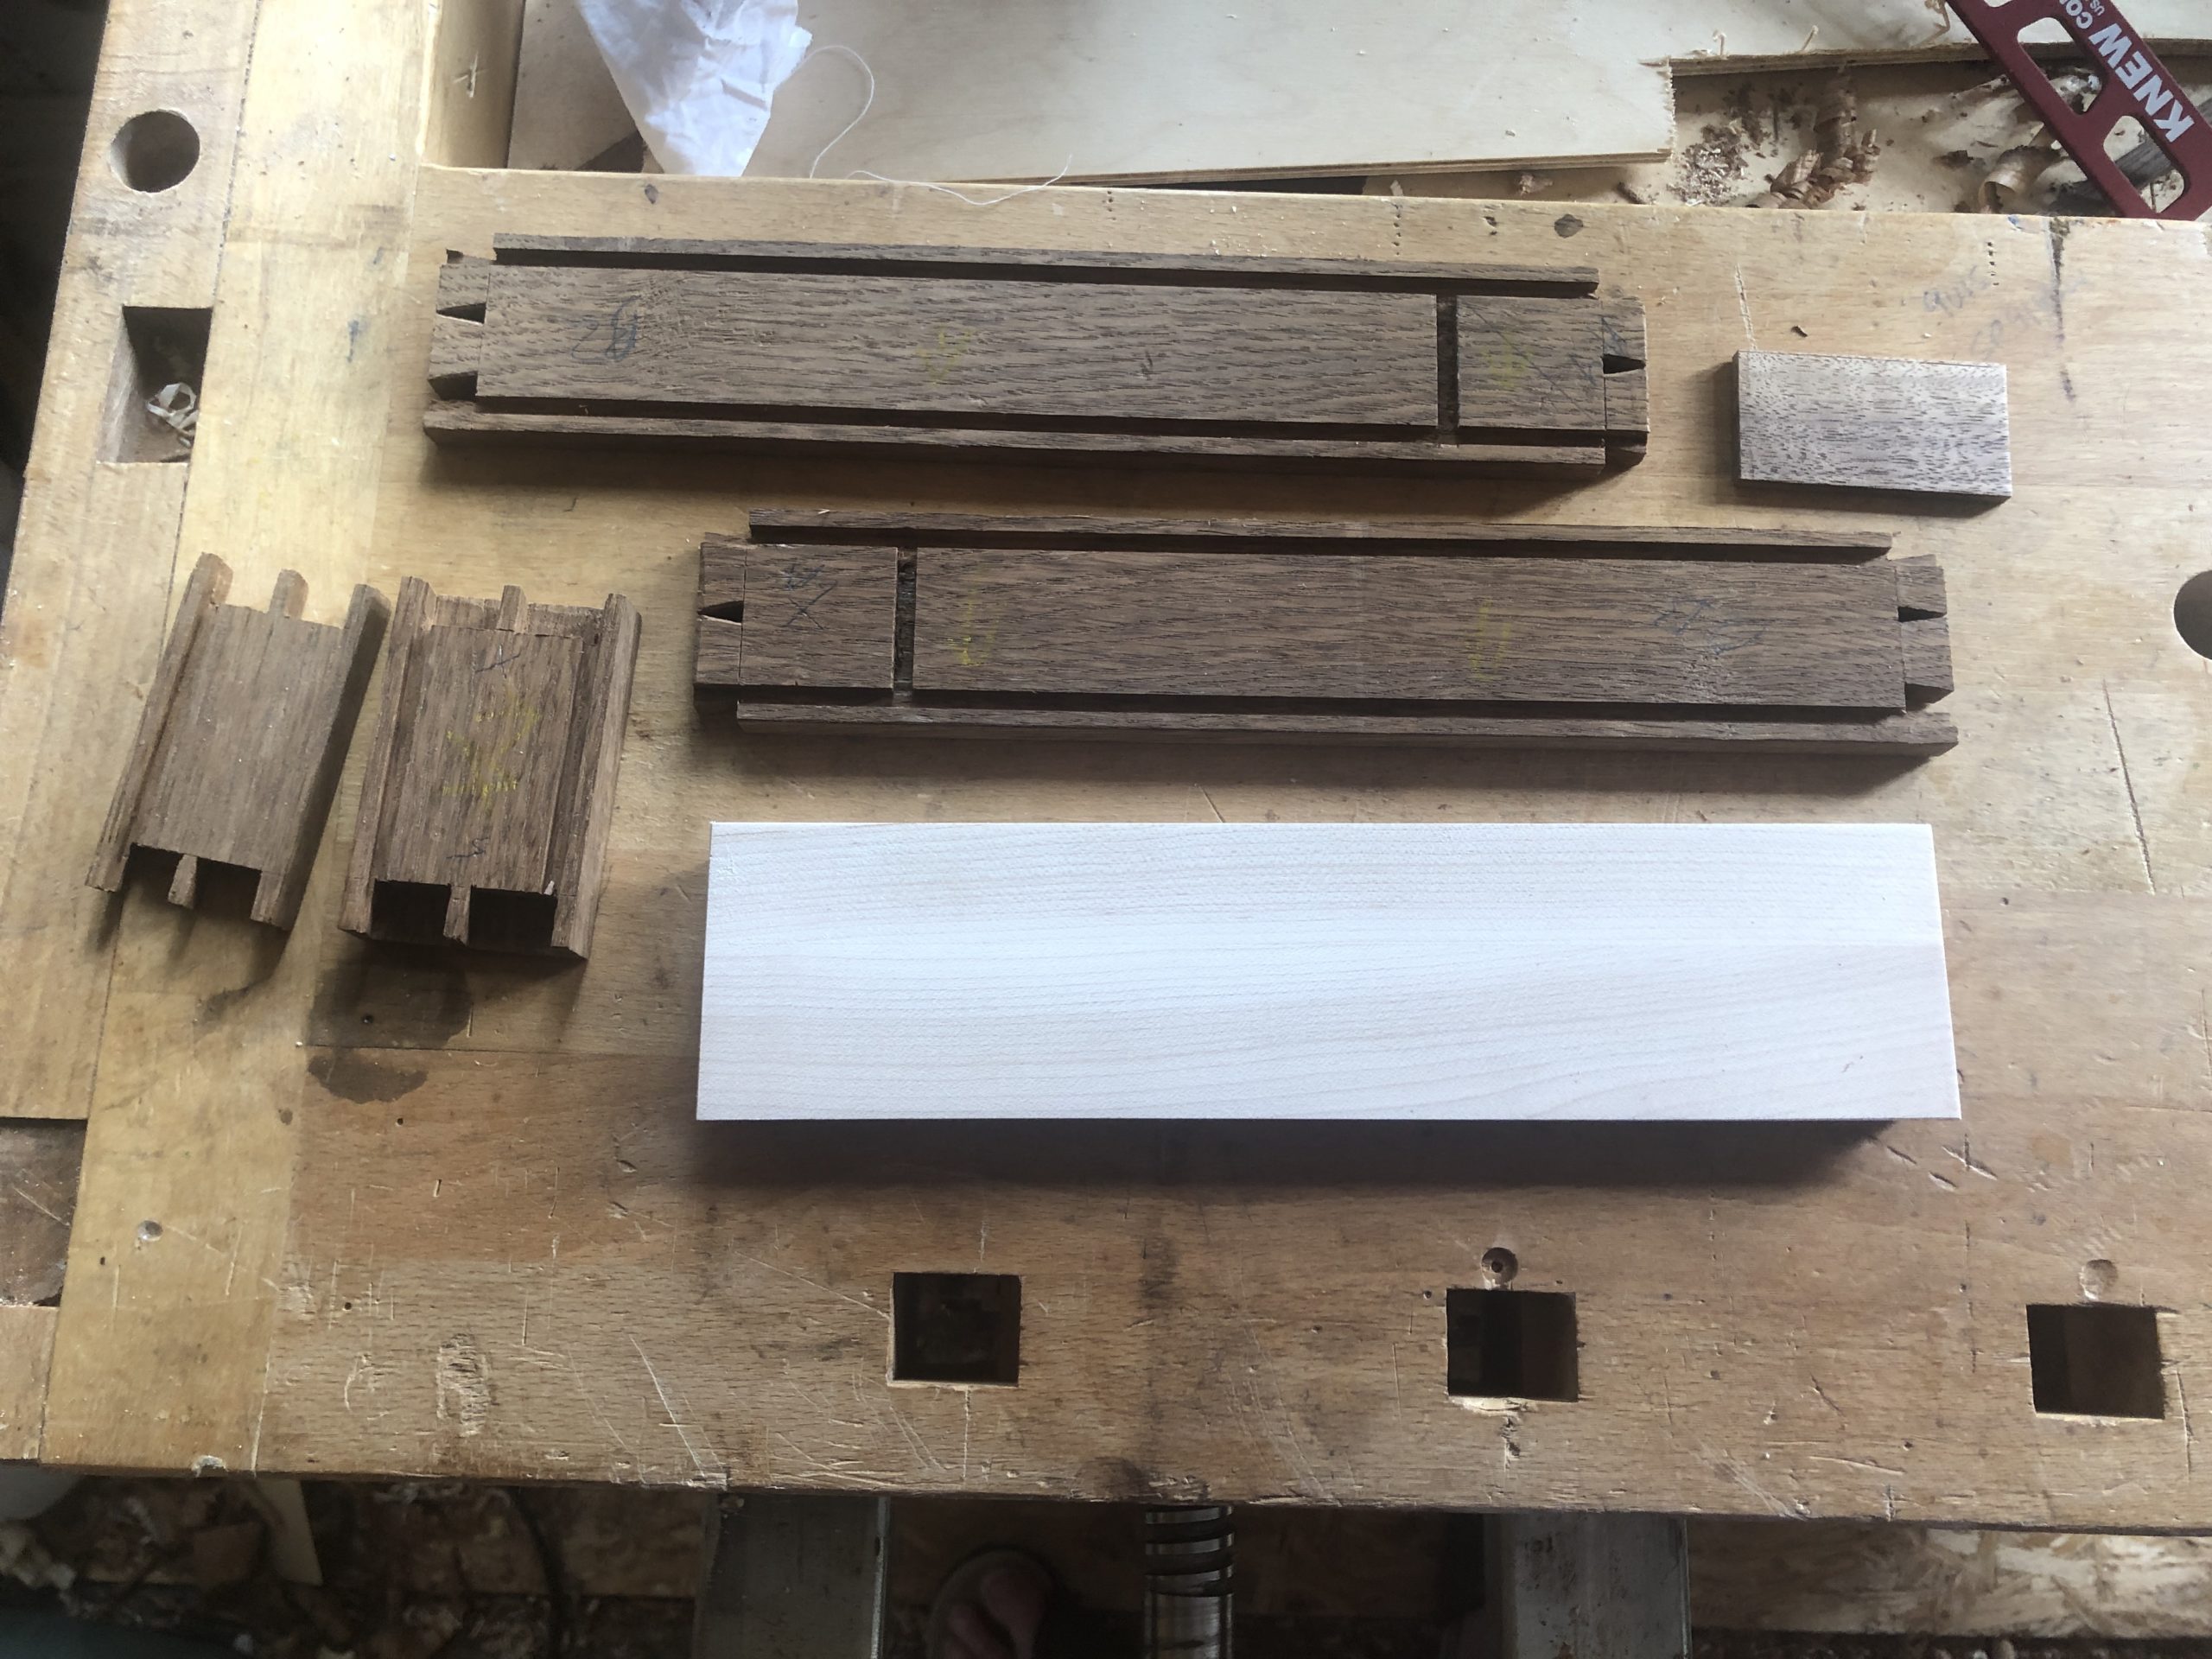
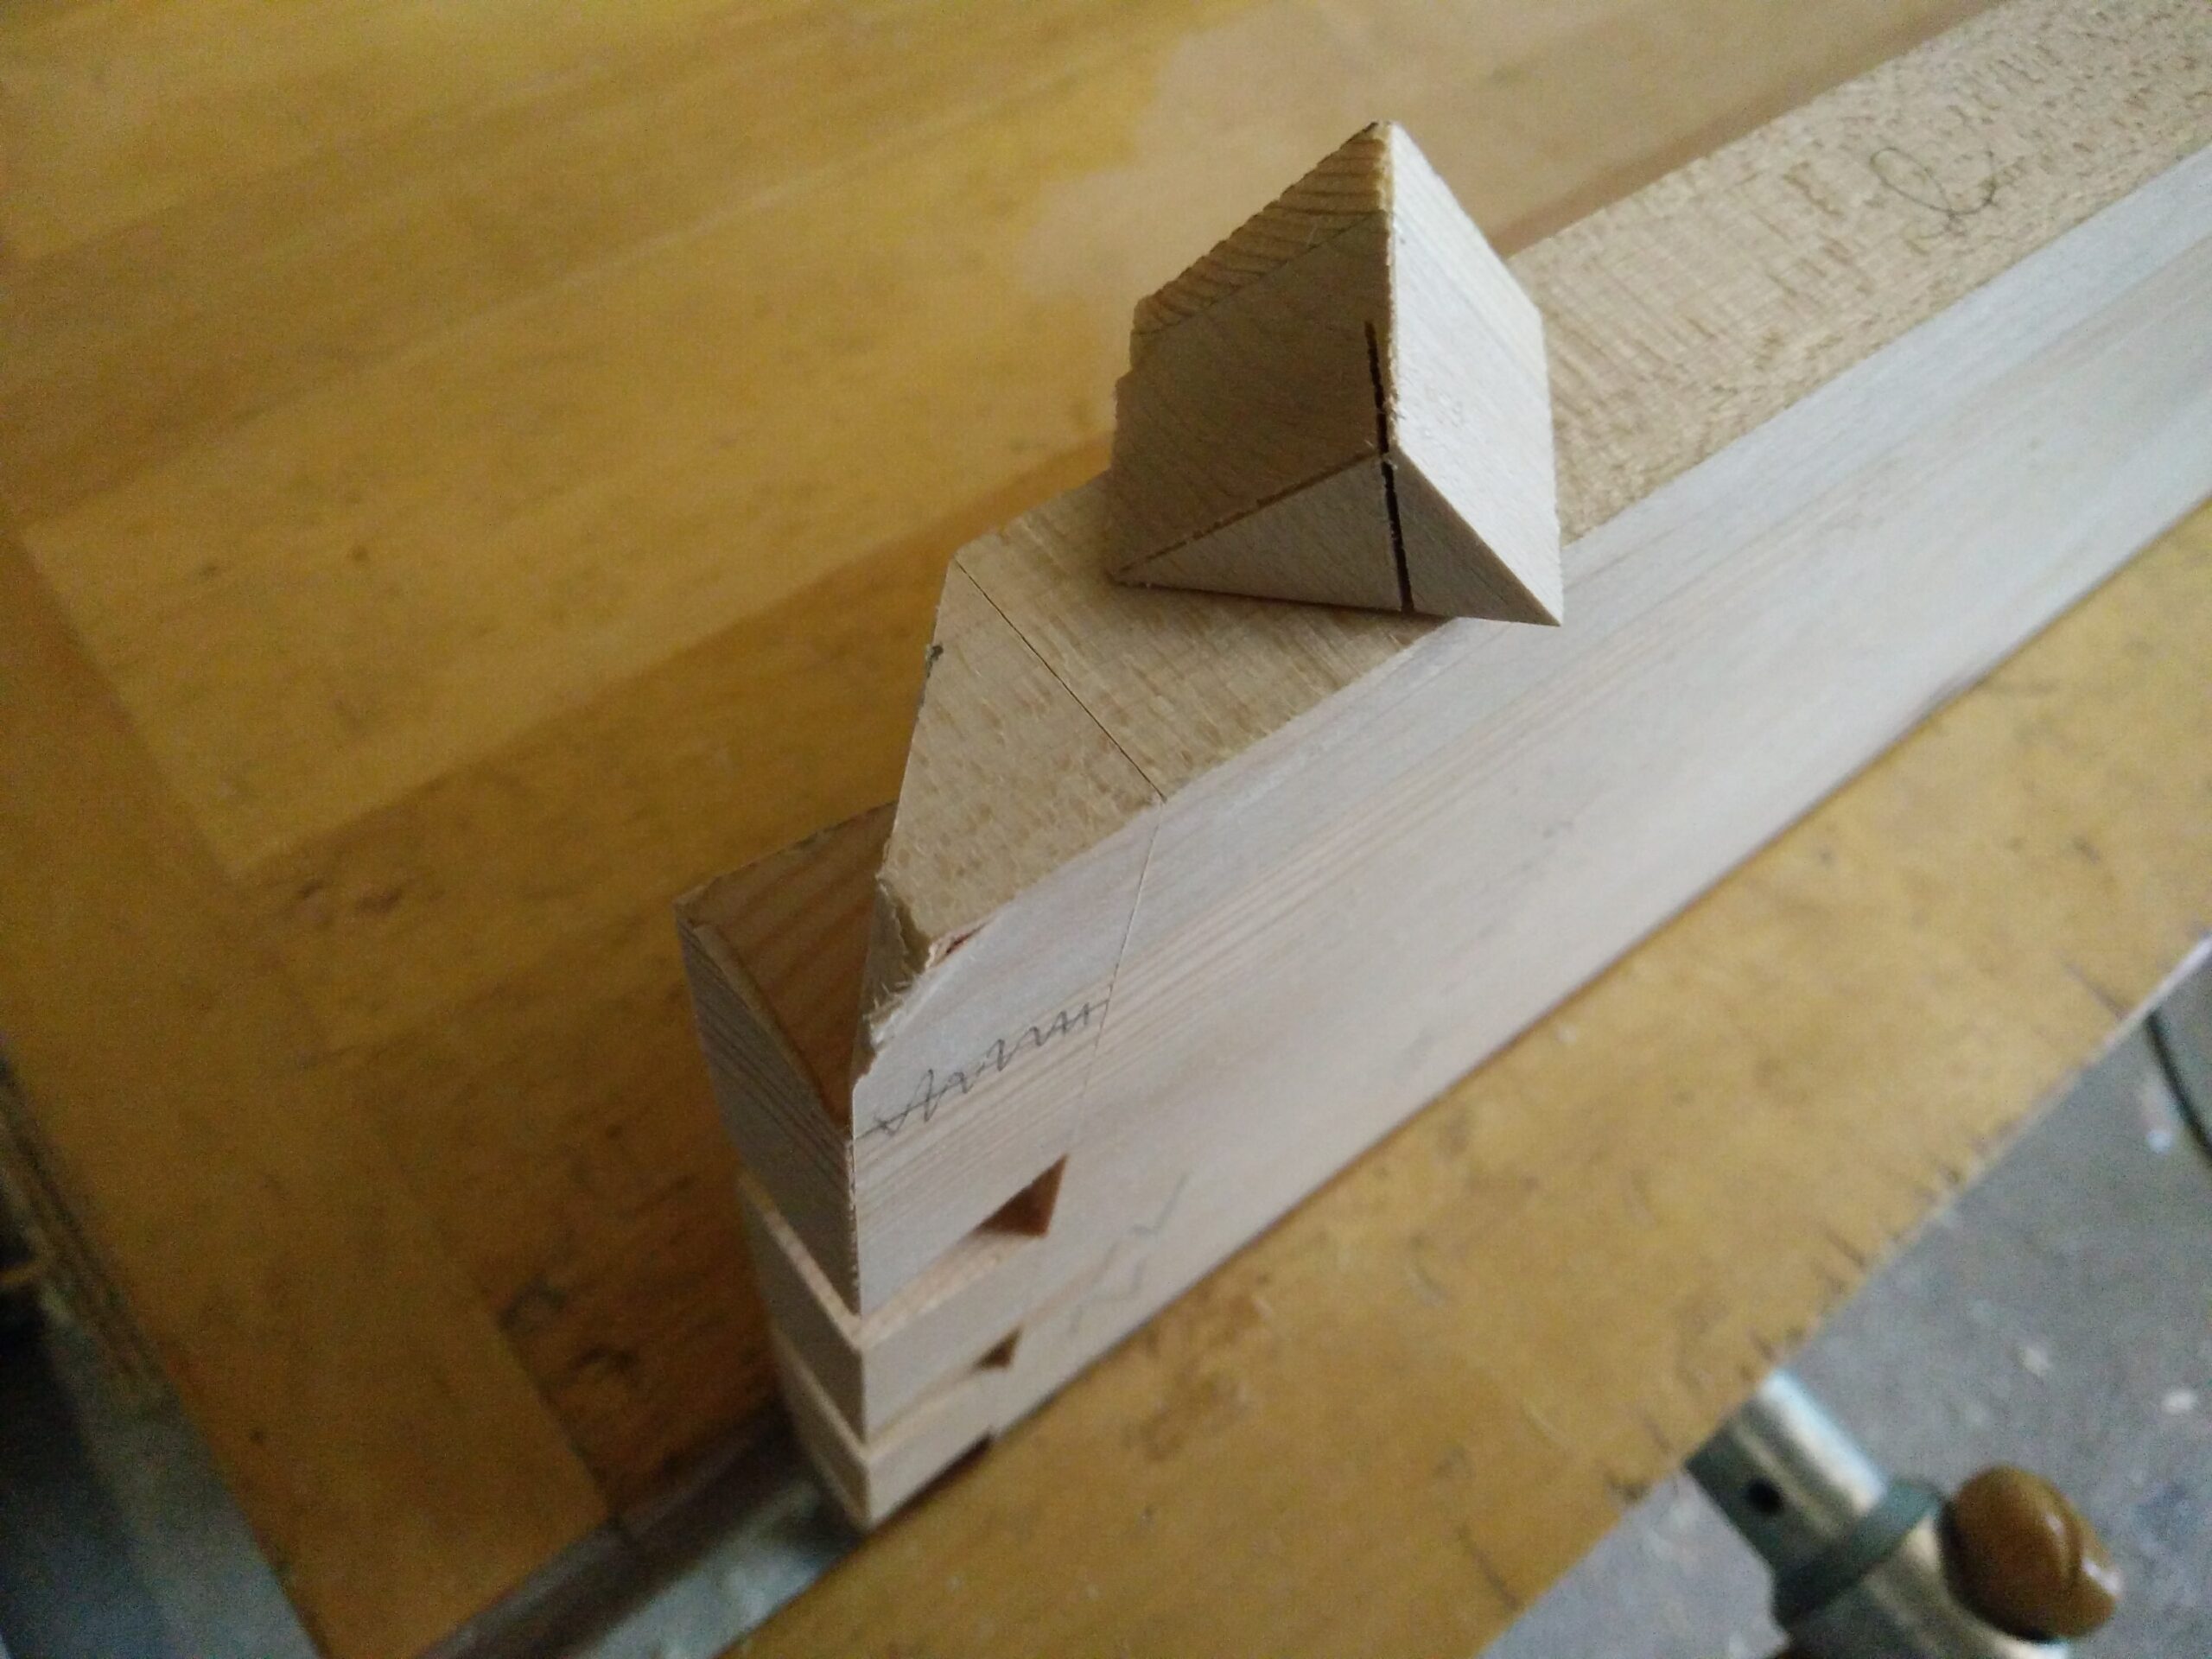
I decided to do the main glue-up in two stages. First I cut and fit the six new dowels, then glued them in to the rails.

You'll notice they're all different lengths. This is because the dowel holes are very irregular. I then did two dry-run assemblies, adjusting the dowels slightly each time to get an immaculate fit.

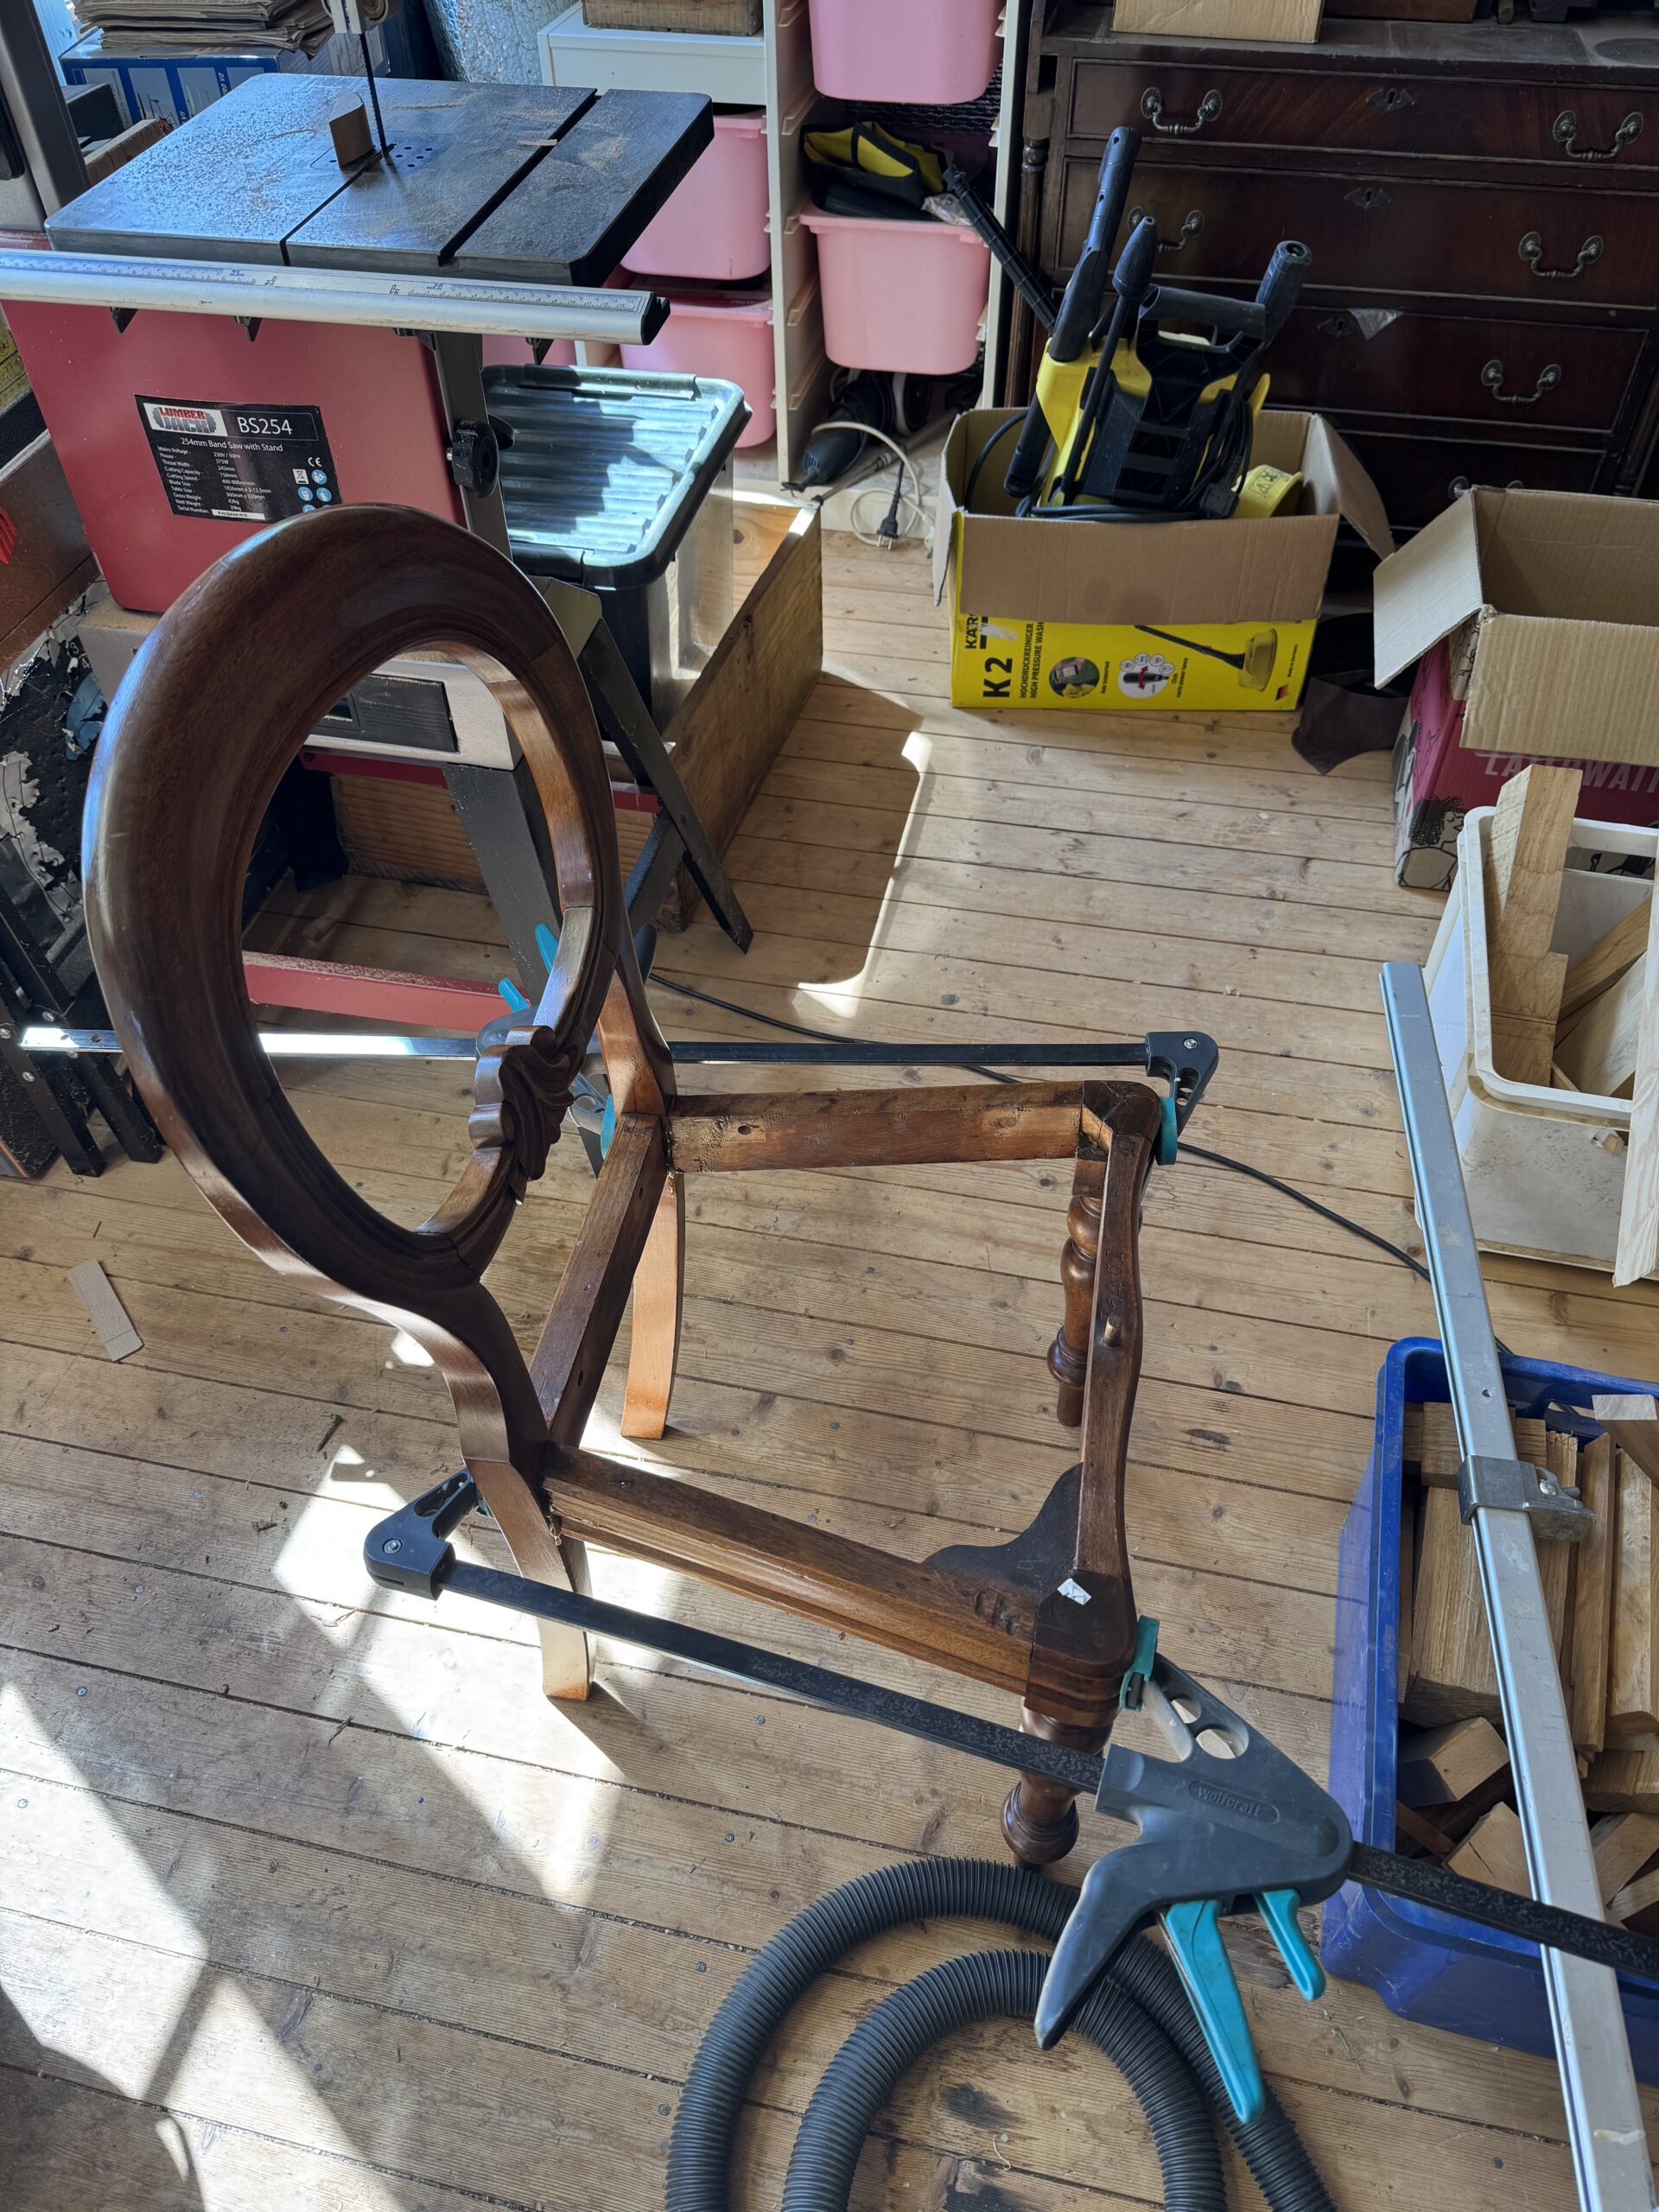
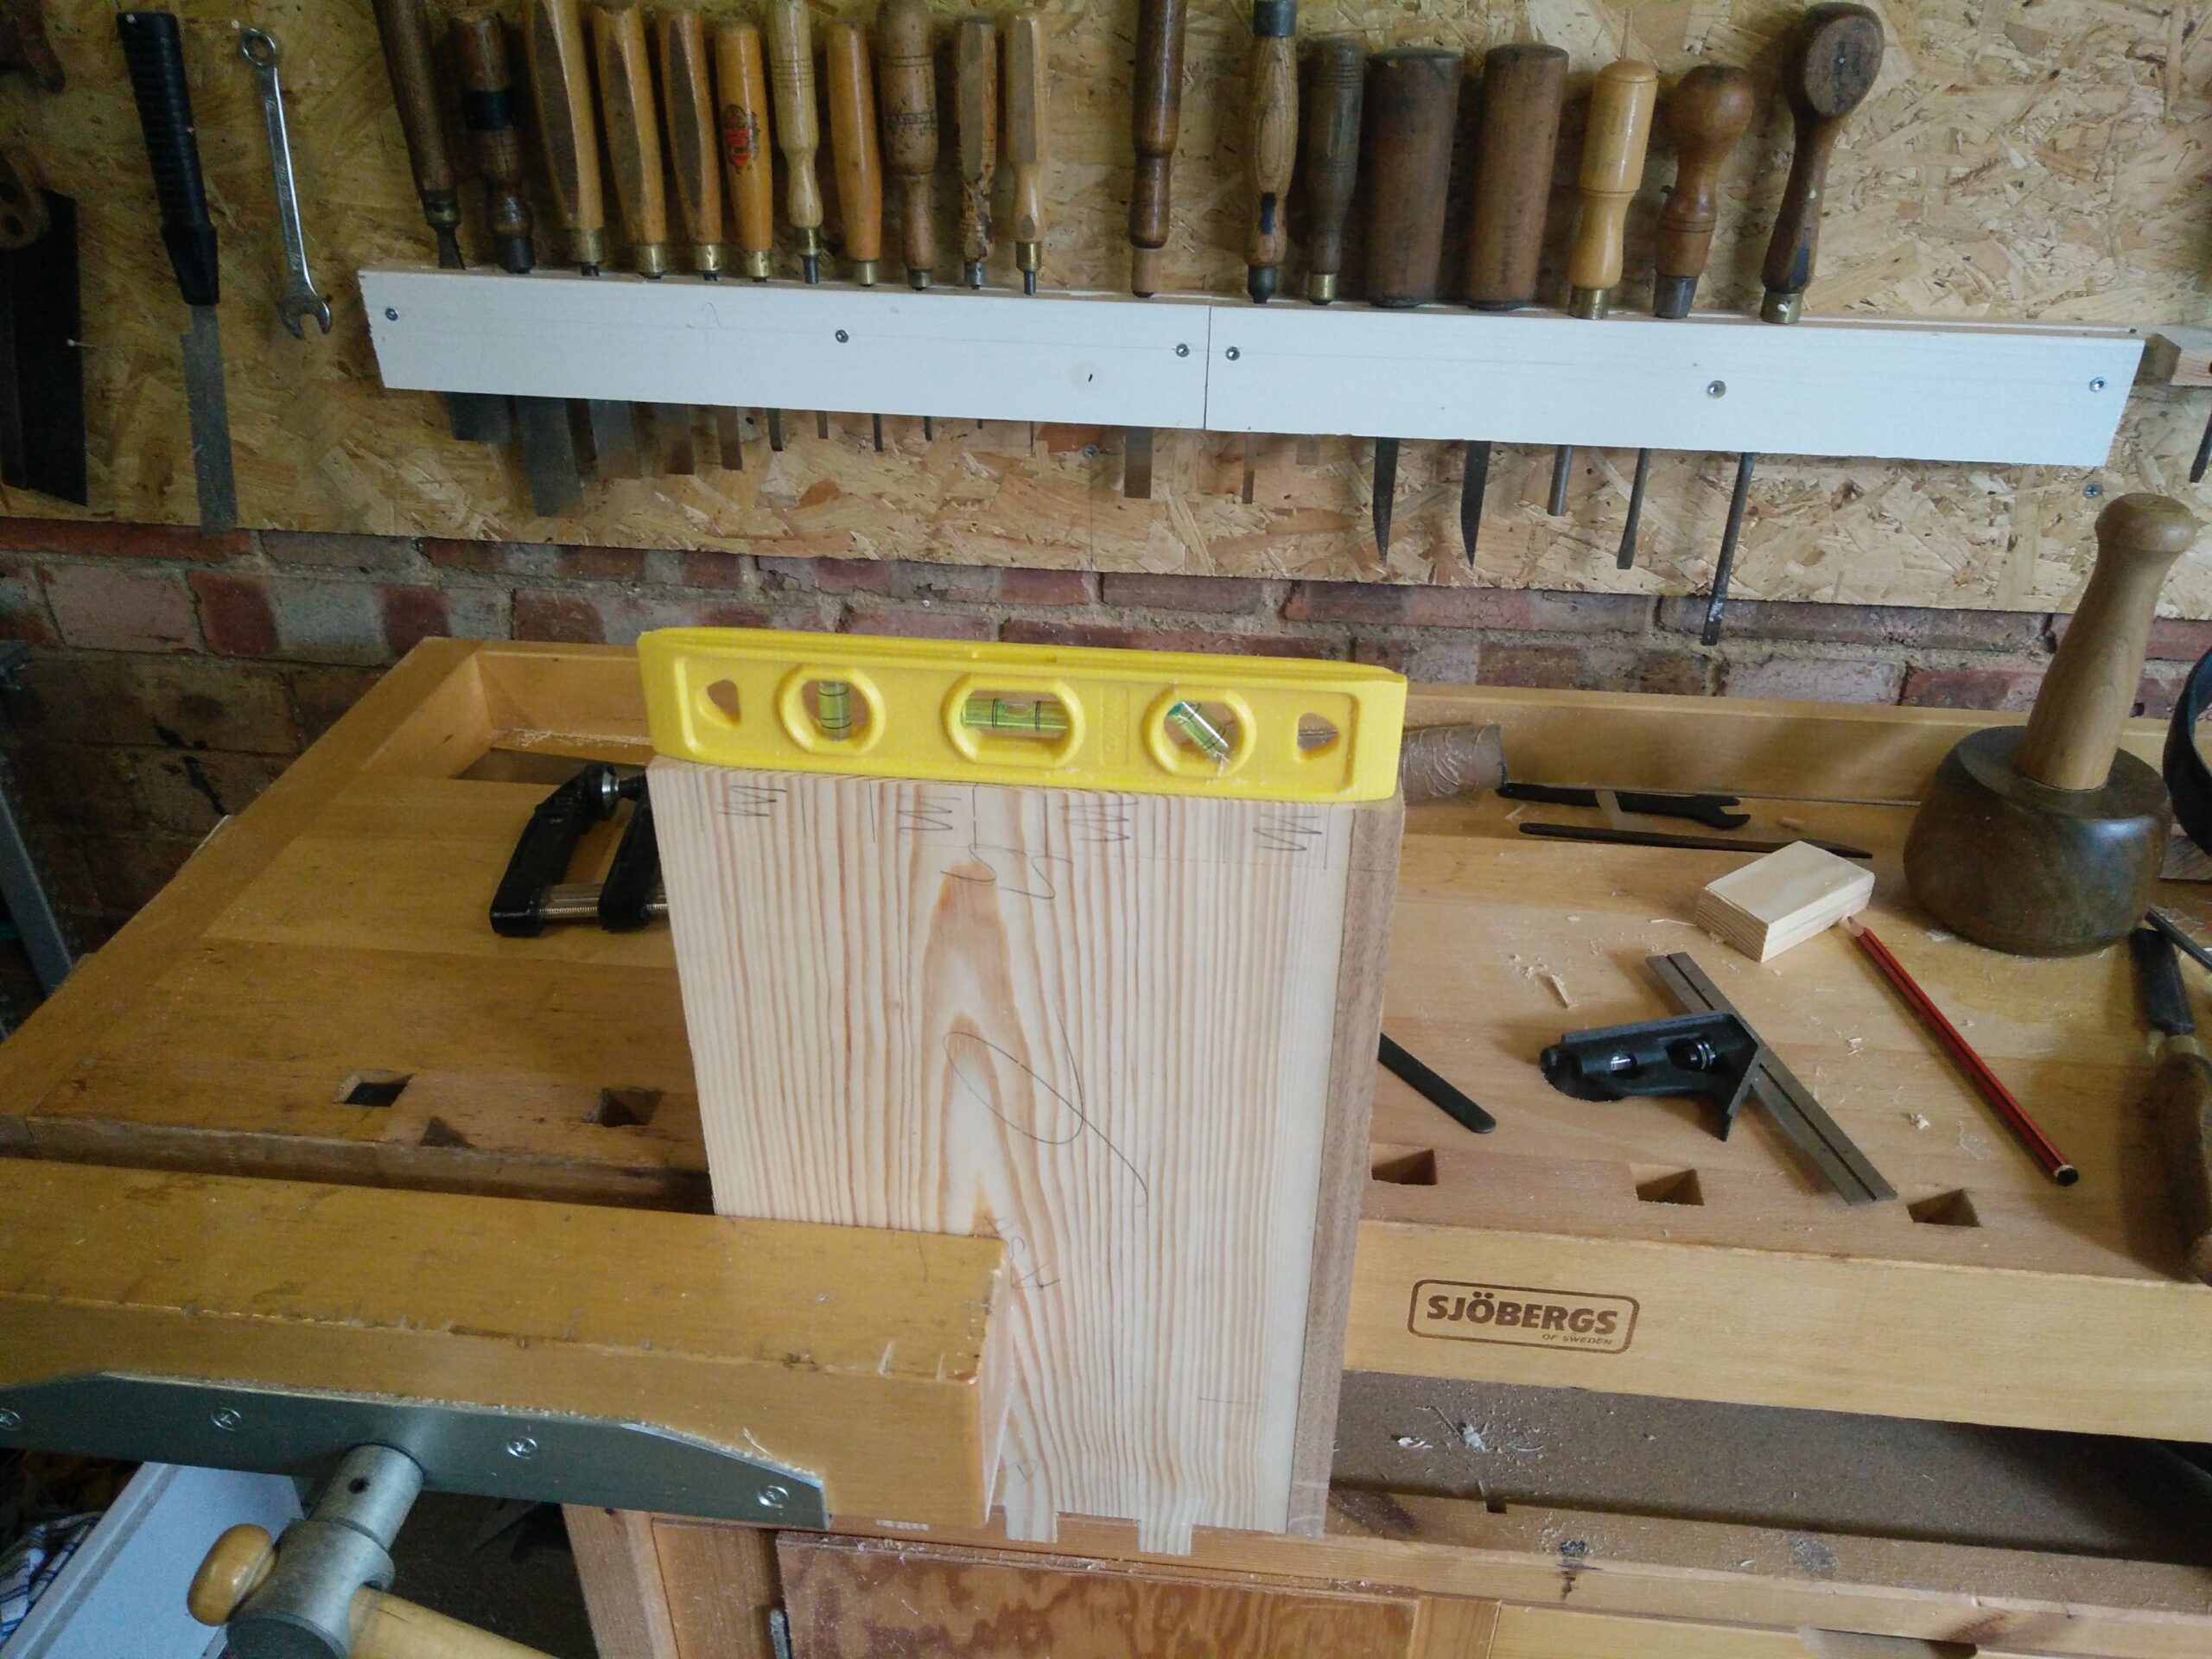
Then I glued up the rear joints. I used light trigger clamps for this, because I don’t want to introduce any tension into the system which will work away at the joints over time.

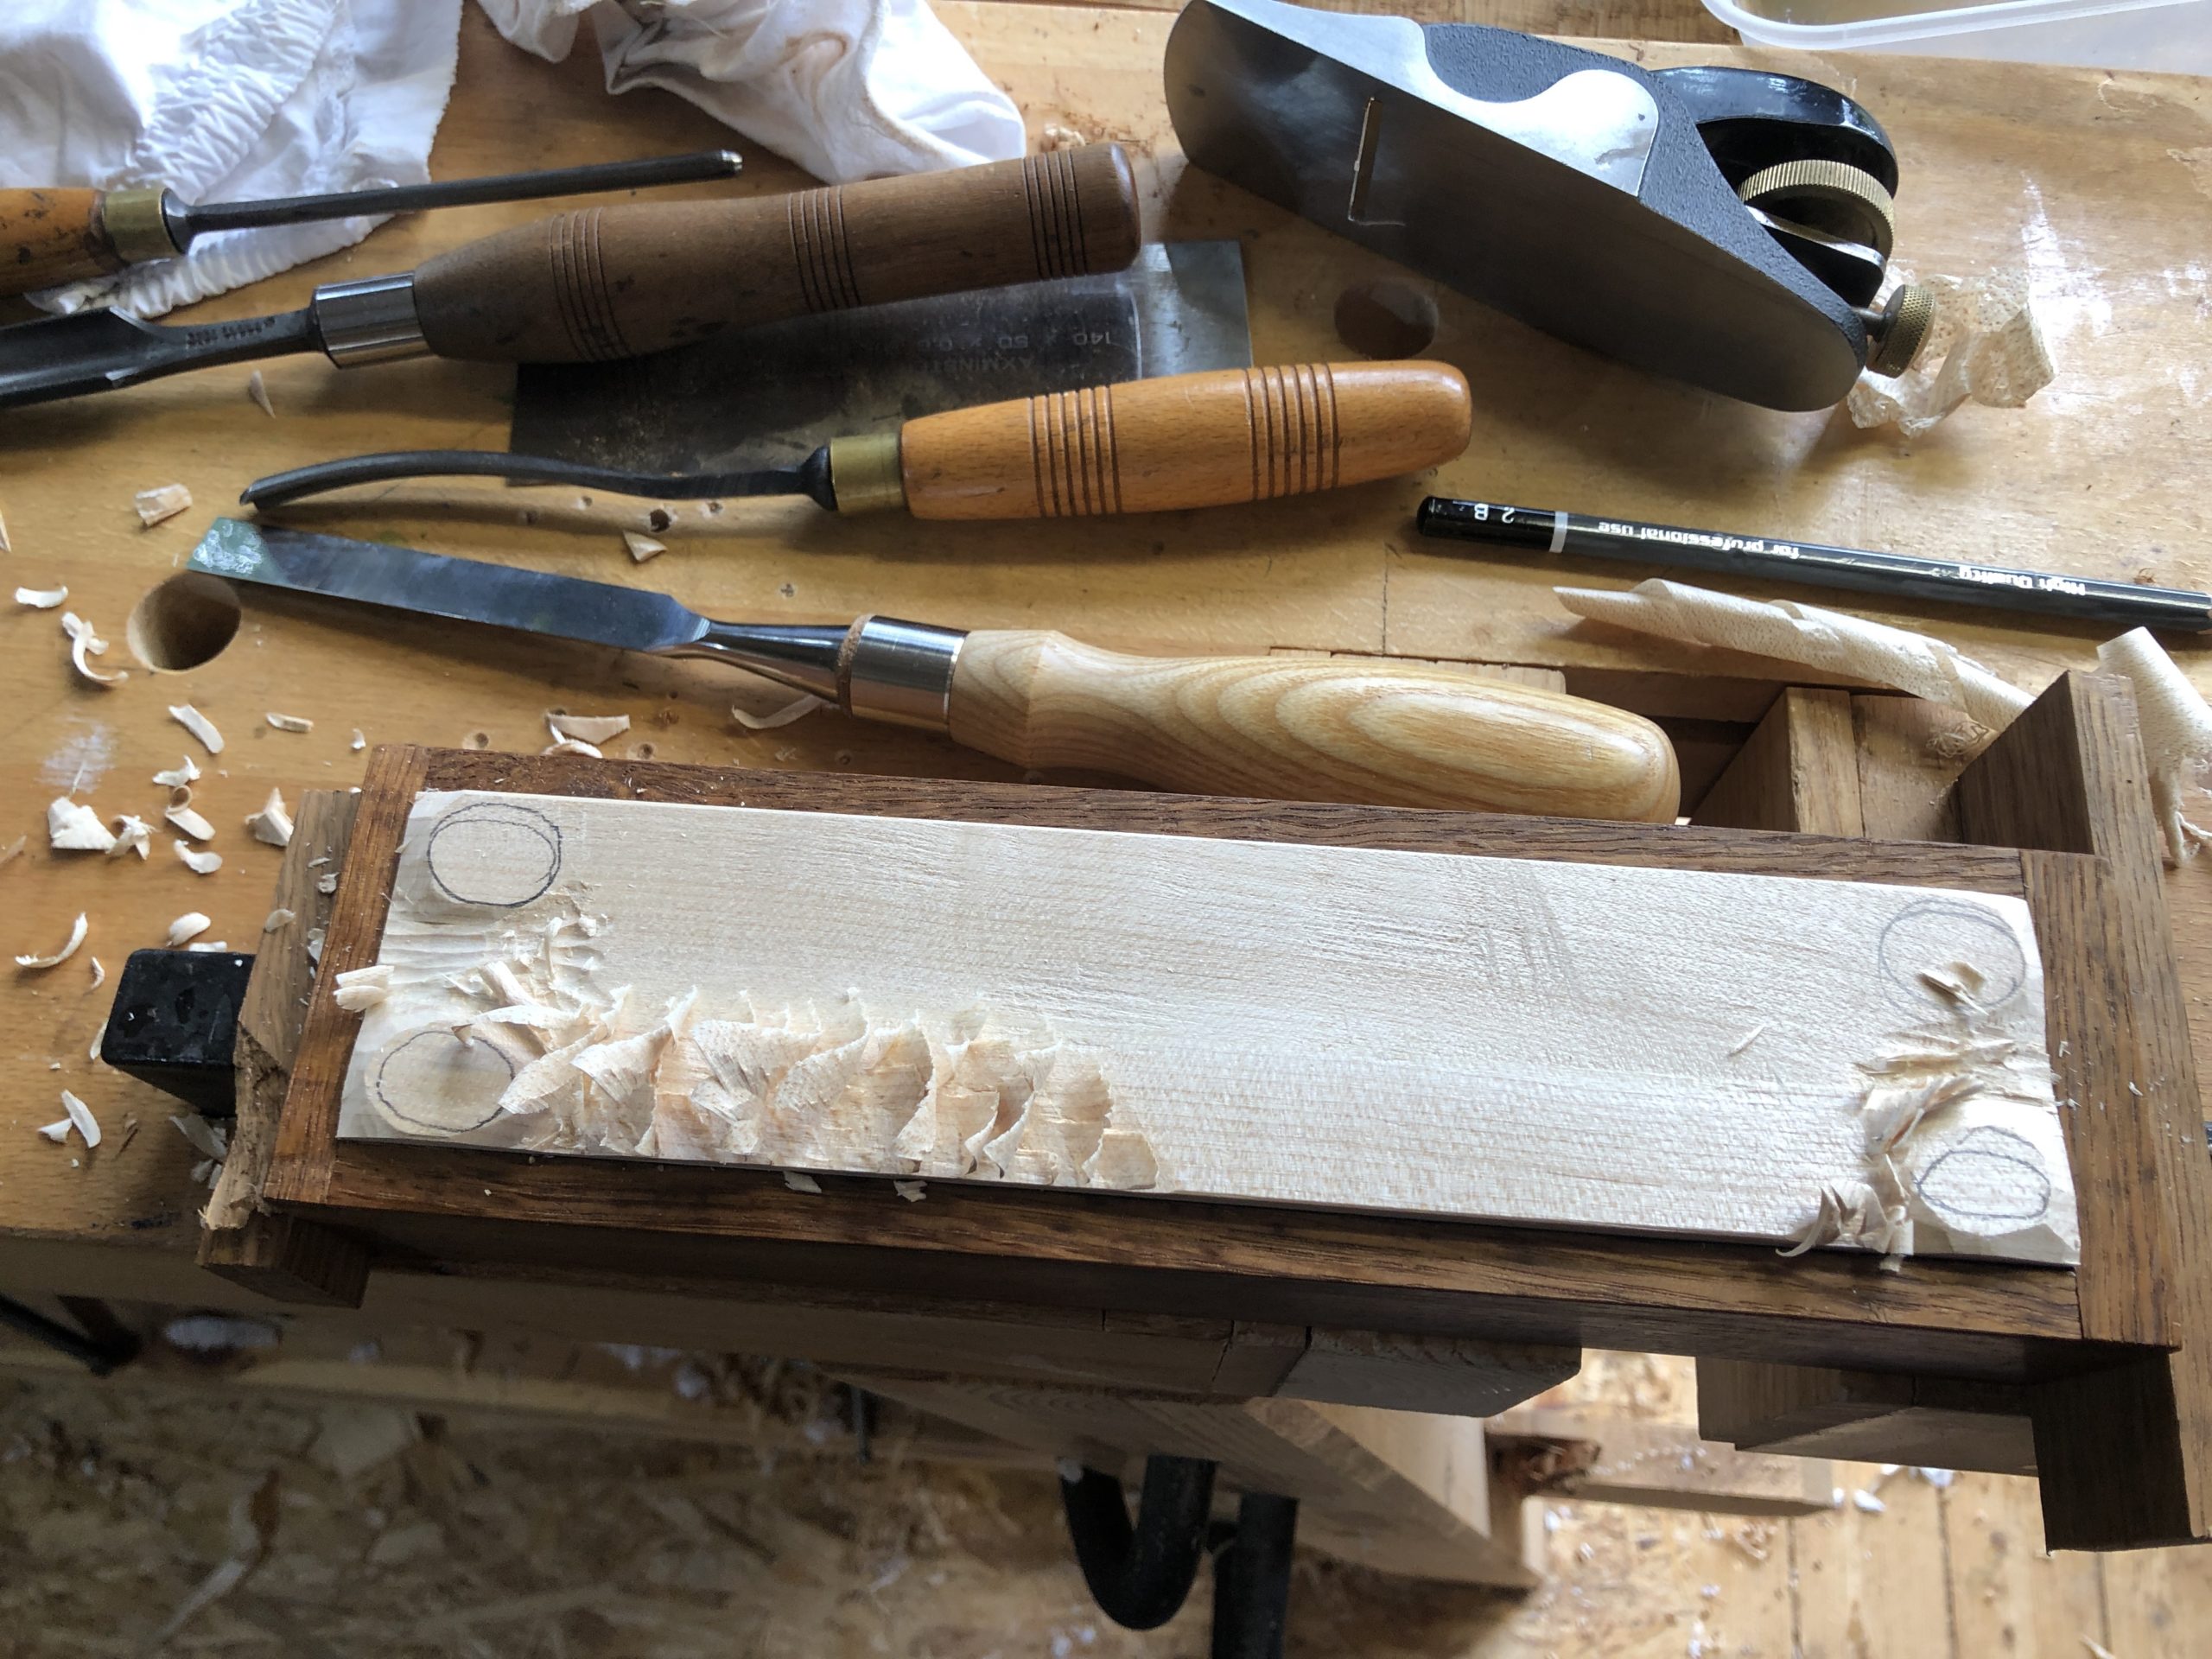
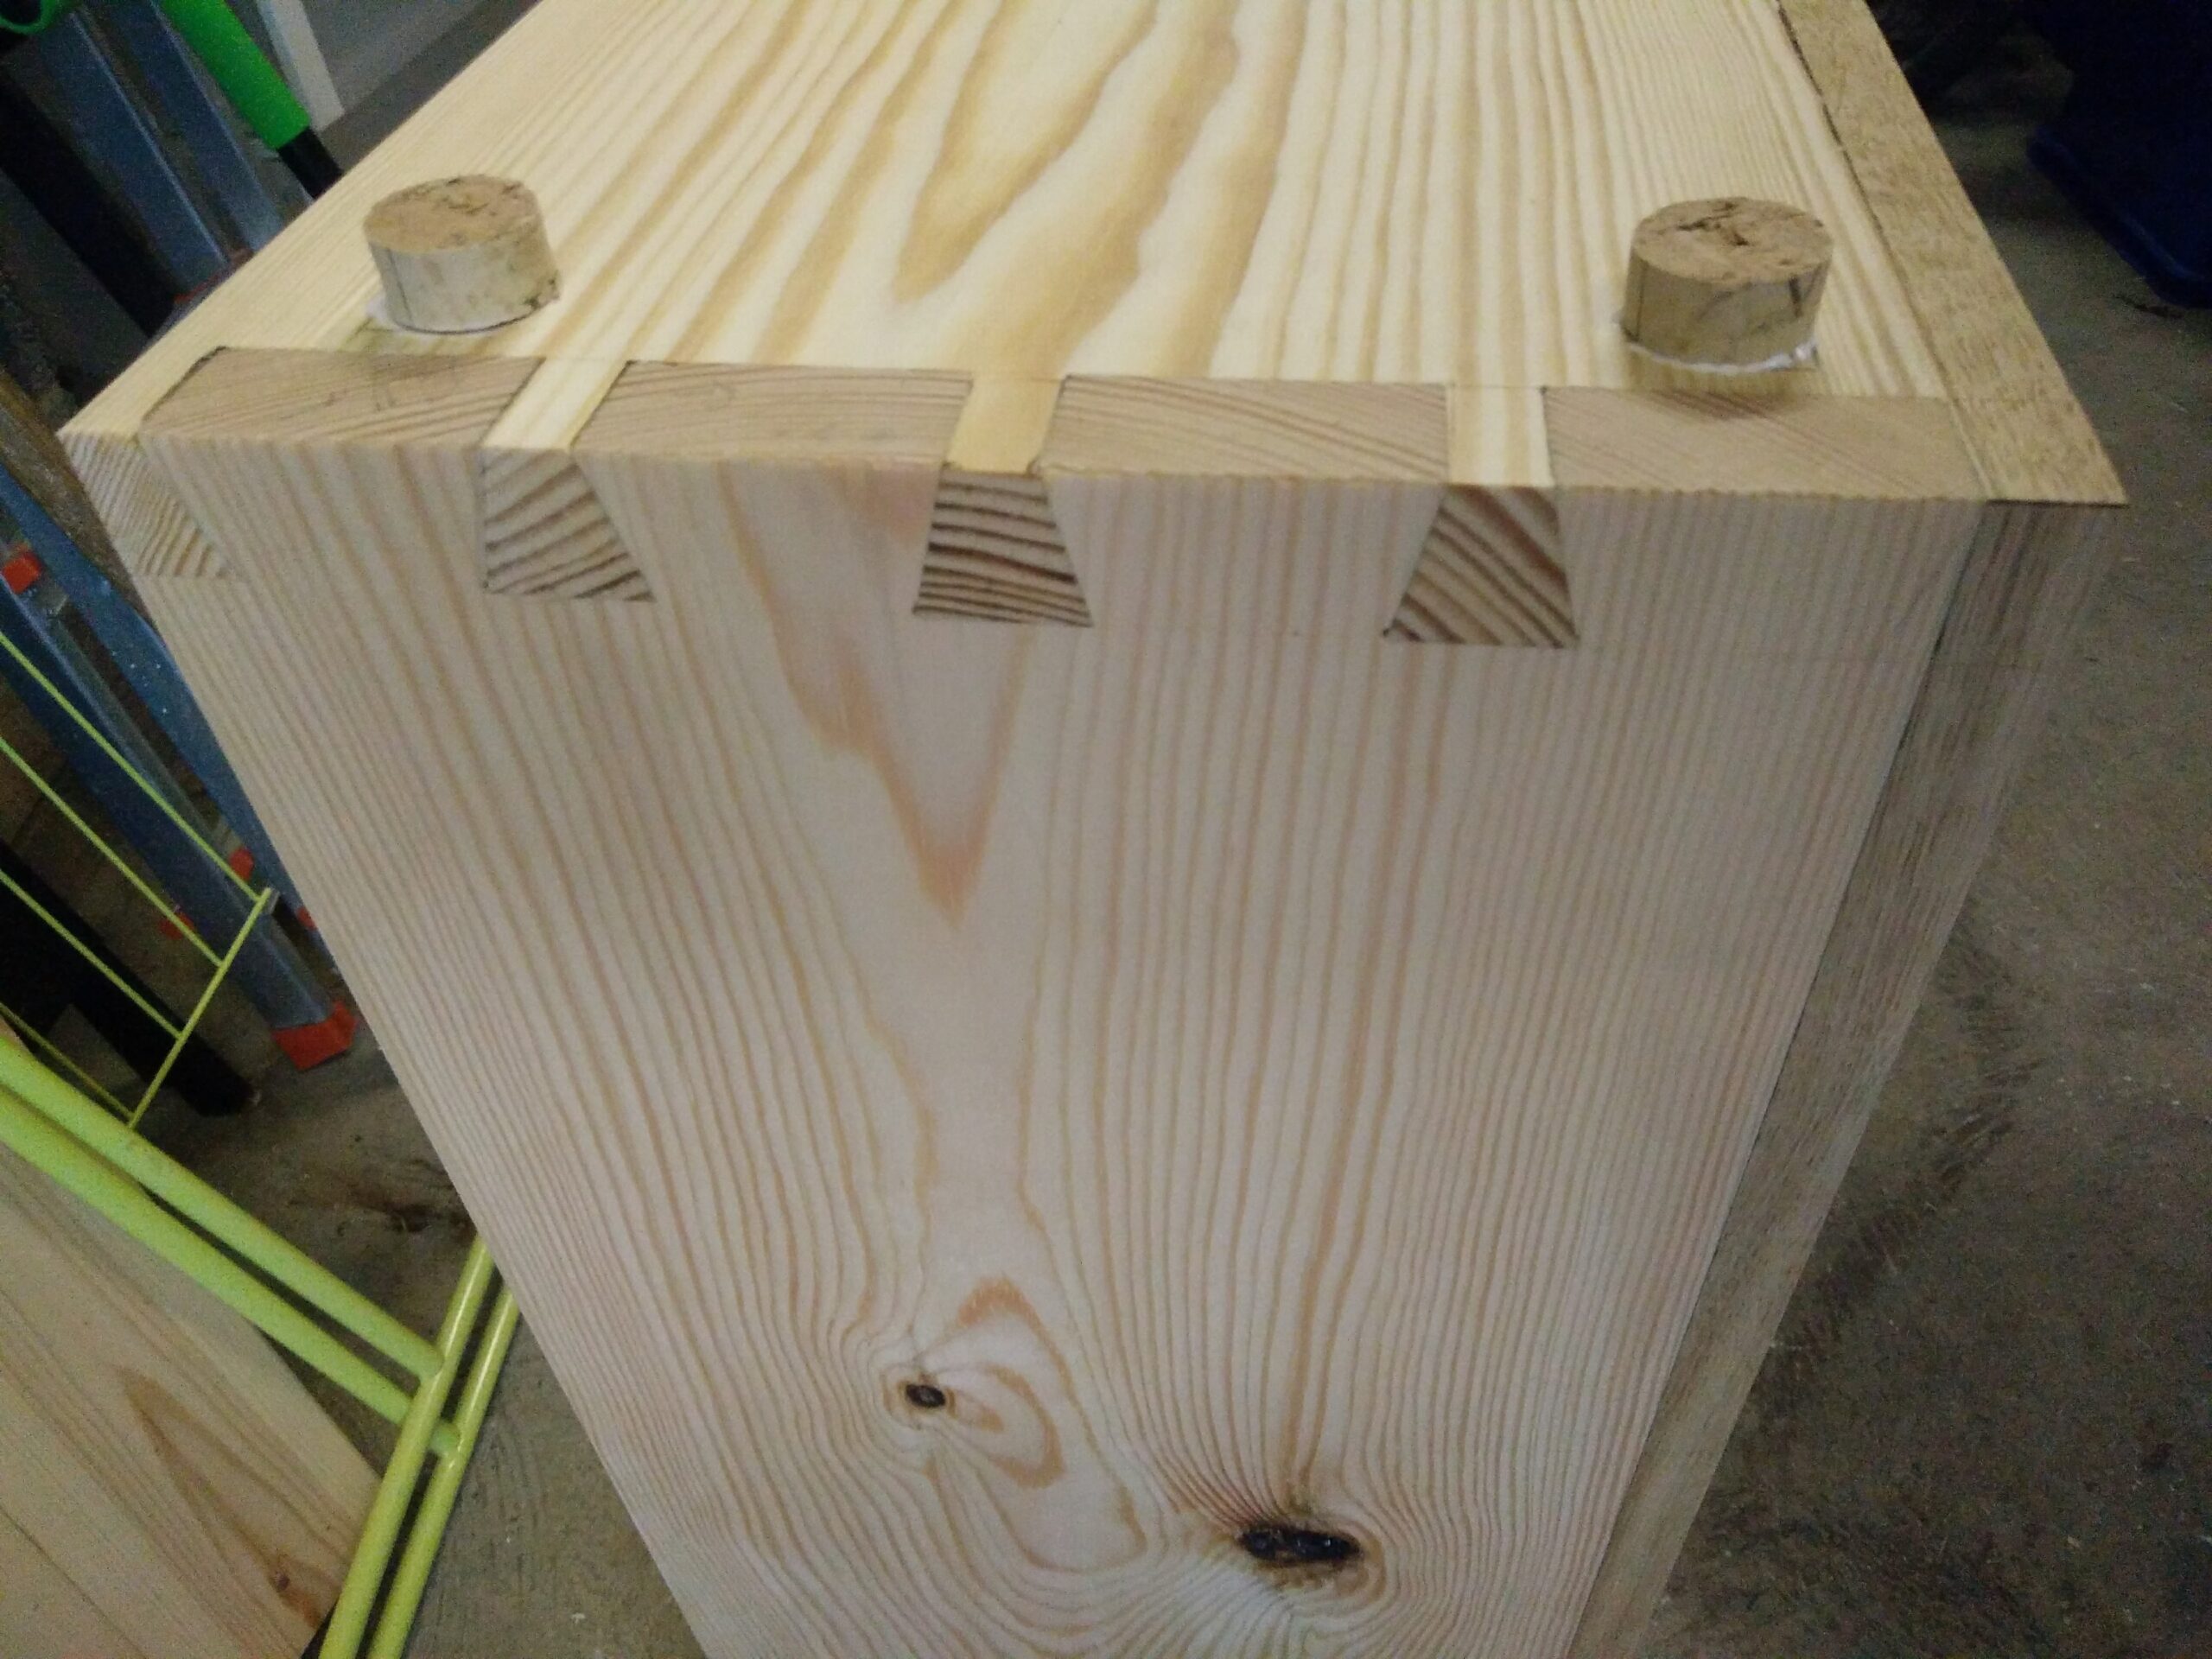
At this point I decided to fill the dowel holes for the corner blocks, by gluing in new dowels and trimming them down. The blocks will be slightly re-shaped to fit, so the original dowel holes won’t line up quite perfectly. This way I can glue them in, re-drill the holes, and the patches will accommodate any shift in the holes so the dowels will fit perfectly.

Having glued in the two rear corner blocks, and the new front corner block, I let the glue dry before re-drilling all the dowel holes, and fitting new dowels. Once the dowels were in, I cut them down and coloured all the new wood, then gave the whole thing a clean and wax.

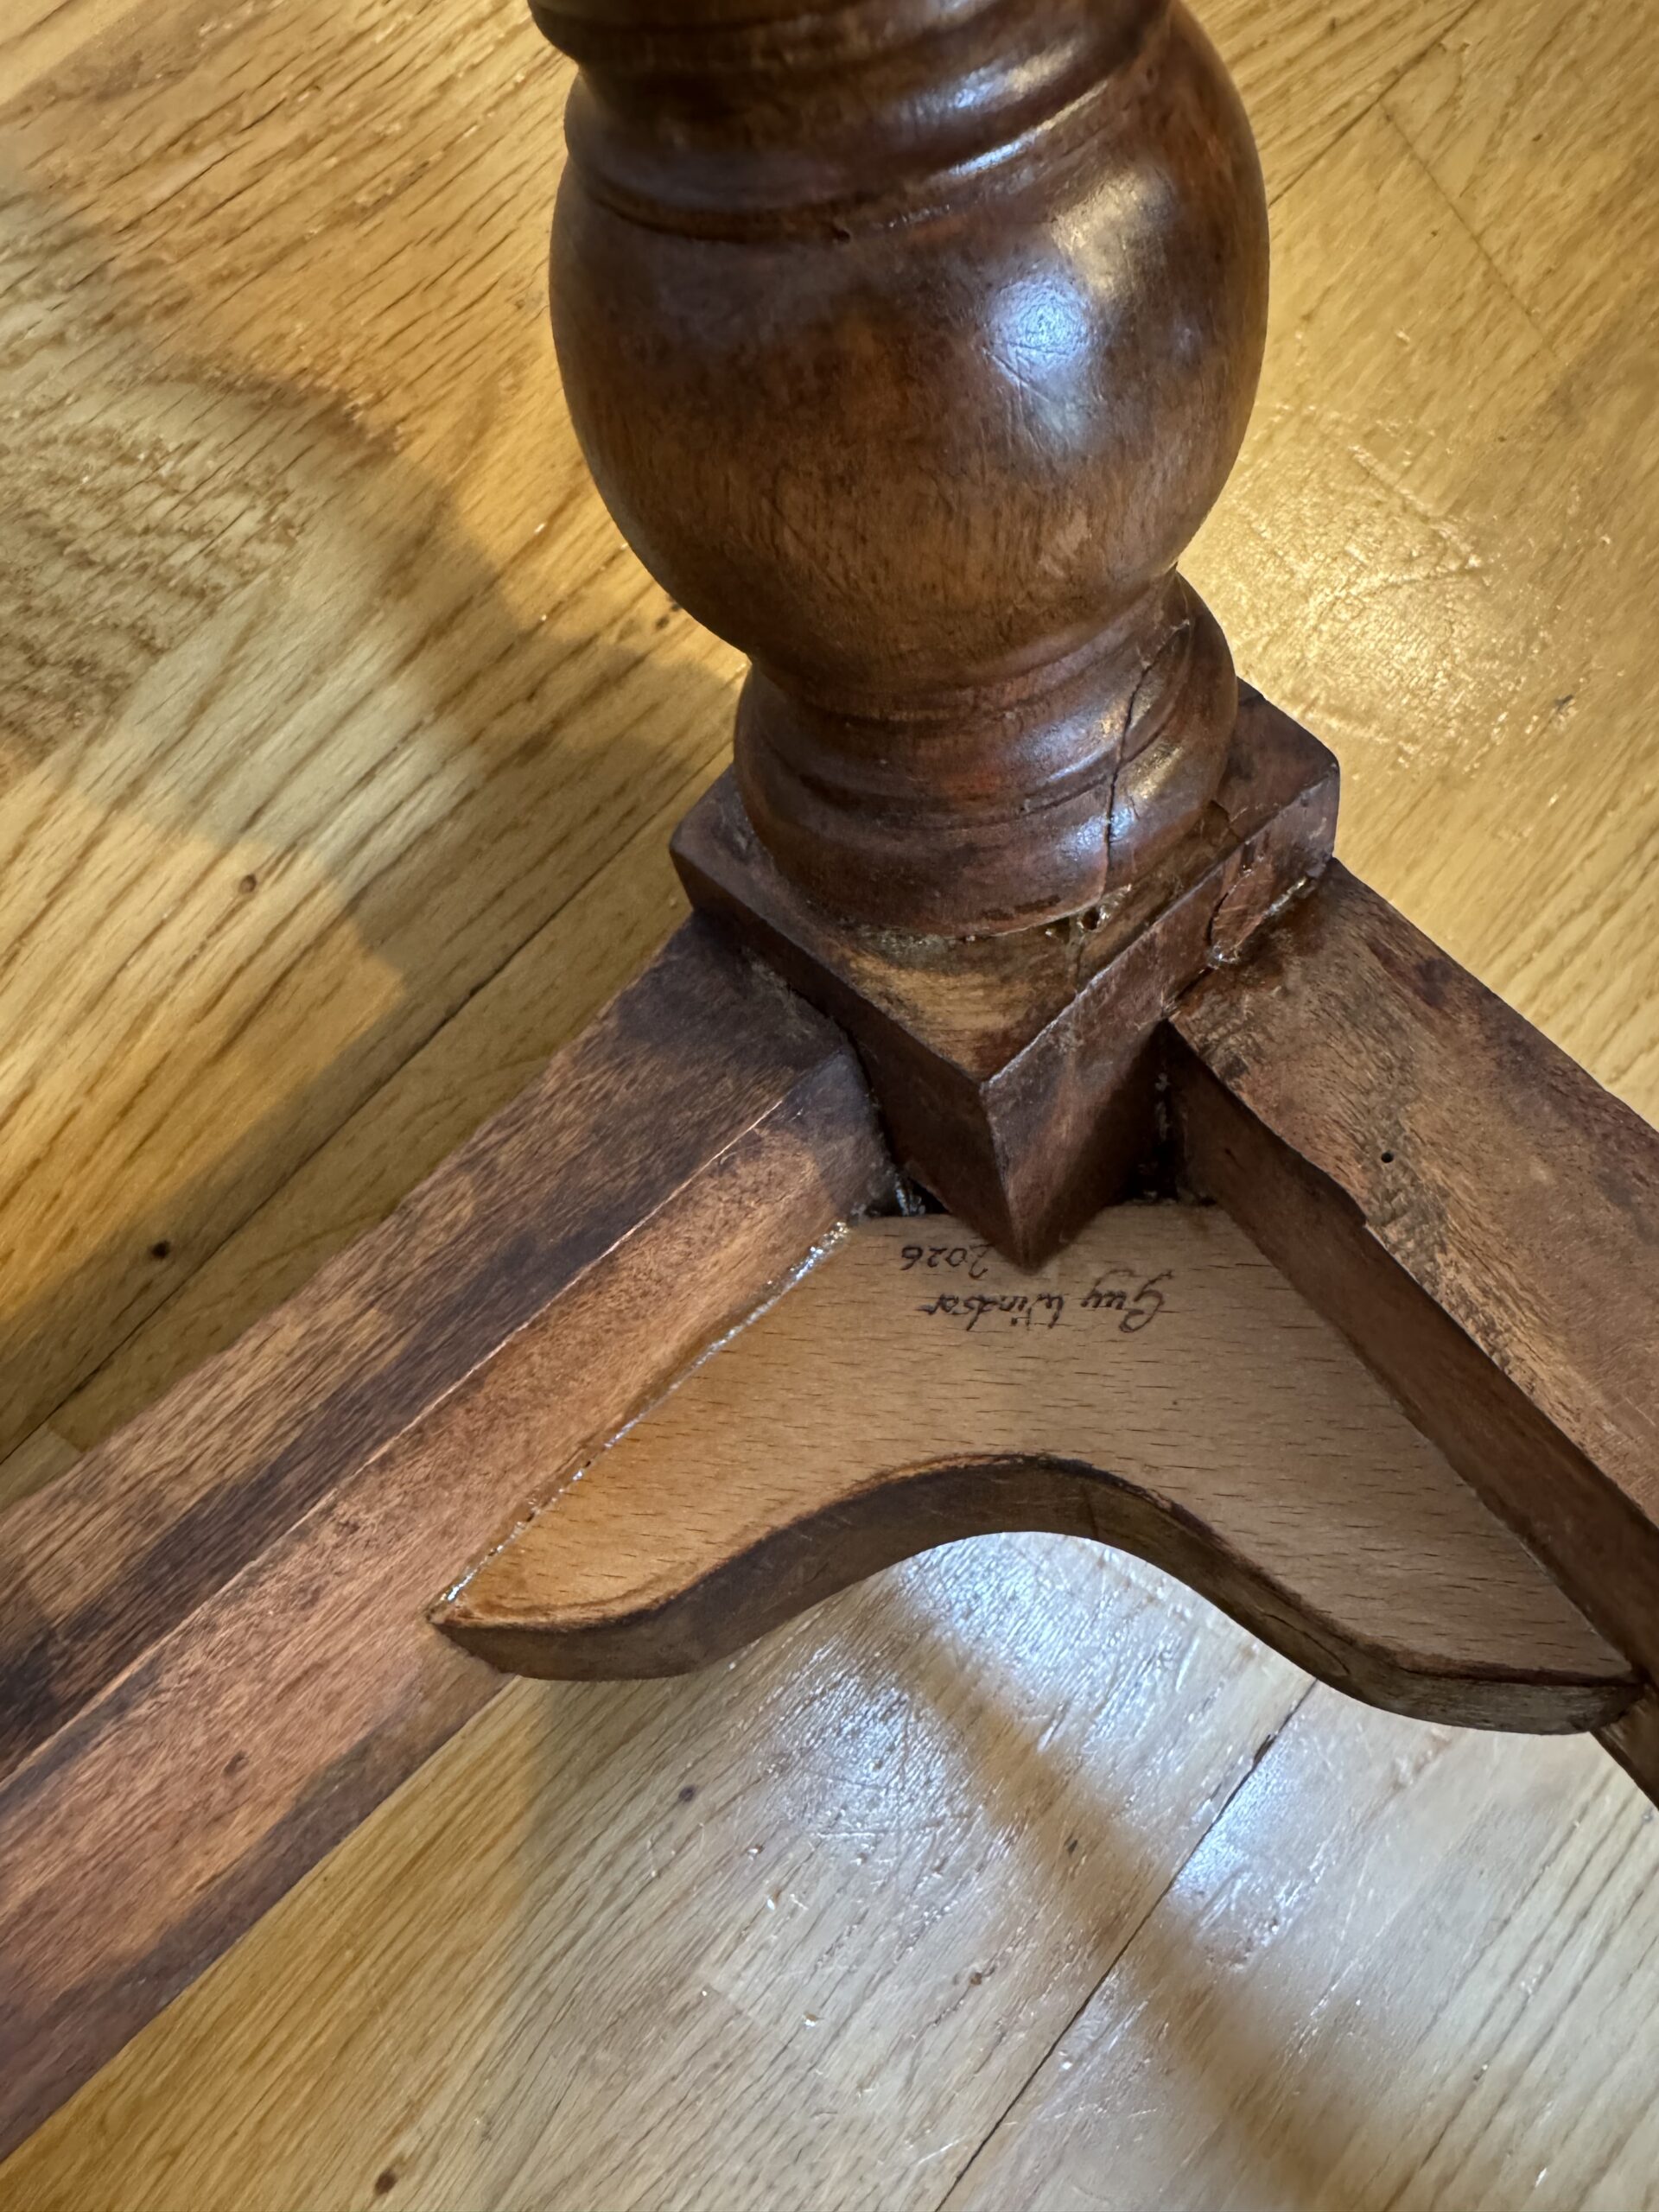
I left the new glue block uncoloured on the underside so it is clearly a replacement. Back when I trained there was a boom in antique furniture, so it was quite common for restorers to get into trouble for faking. Unscrupulous dealers would get you to fix up a nice old piece, and then sell it as being in immaculate condition, which is fraud. The difference between ‘immaculate’ and ‘nicely restored’ could be thousands of pounds. While there should be nothing in the repair itself to date it, any new pieces really ought to be discreetly named and dated. And besides, I’m quite please with how this chair turned out, so don’t mind putting my name to it!

If you’re on my mailing list you’ll be aware that I’m currently on compassionate leave. I’ve had no brain for dealing with proper work stuff (books, courses, podcast, etc.) but having a project like this to tinker with has been very good for my mental health. It’s straightforward, you can see your progress, and it’s very satisfying to see a nice old chair brought back to life.

Dan demonstrating on the anvil

I recently turned 50, and my sister gave me a “ Forge a Viking knife” day course at the Boneyard forge in London for my birthday. I went a couple of weeks ago, and it was great fun. I’ve done a couple of similar courses before (I wrote up the first one here: https://guywindsor.net/2020/01/forged-in-fire/), so I had some experience, but most of the group had no craft background at all. There were seven of us in total, and it was as fascinating to me to see how our very skilled and experienced instructor Dan (shown at the anvil in the photo above) kept everyone safe and made sure everyone went home with a decent knife that they had done a lot of work to create. As a teacher of dangerous skills myself, it was fascinating to see where his attention went, and why.

Crafting the knife

We started out by drawing out the tang,

then shaped the blade,


ground the back and the cutting edge, shaped the handle:

Heat treated it, and sharpened it. (Not shown!)

With so many in the class, and my hands full with hot steel, I didn’t get much in the way of photos, but I do have a pretty little knife that is almost all my own work. It required exactly three expert taps in just the right place from Dan to get it straight, and the inside curve where the blade meets the handle was done for us all (I’m guessing because it’s the bit of grinding with the highest risk of an accident).

I’ve now sharpened it to a somewhat more refined edge, and made a simple saddle-stitched sheath for it.

It’s a coming-of-age present for my godson (who almost certainly never reads this blog, so it’s pretty safe to post this, I think!).

Don't tell anyone I said this, but there's more to life than swords. Pens are important too. As are chisels, saws, planes…

Pencil Box in Brown Oak, Maple, Cherry, Walnut, and Resin

On my recent trip to the USA I was sitting in my friend Heidi Zimmerman’s garden when she dropped a truth bomb on my head. We have been close friends for a long time, but she doesn’t have anything I’ve made in her house. This unacceptable state of affairs had to be rectified, and we settled on a pencil box. I had complete artistic freedom, it just had to hold pencils. Oh, and a sliding top, not hinged. I’ve never made one before so I bashed out this in plywood:

It’s just butt-jointed and glued, nothing fancy. But it gave me the dimensions, and an idea about order of operations. I made the box out of brown oak (because I have tons of it. Literally. A dead tree in our garden had to come down and I had it sawn into planks, the thinner of which are about ready to be used).  I used lap dovetails at one end, and through dovetails at the other, just because. I decided to make it long enough to have a section for sharpeners and rubbers.


I chose a scrap of walnut for the divider because it had an ombre effect, light to dark, that I thought might tie the dark sides to the light base.

The base was a piece of maple I’ve had lying around for about five years, too small for most projects, but too nice to throw away. It was way too thick though, so I decided to leave it full thickness, and carve feet out of it when the box was assembled. Using such a pale wood should make the inside of the box lighter, making it easier to see what’s inside. 

The sliding top came from a leftover bit of cherry that I had used for experimenting with resin. I like the idea of a translucent window into the box.

I have no idea how long it all took- I did everything by hand (including sawing to thickness, stock preparation, etc.) because that’s more fun than firing up the machines. The only exception was the grooves for the lid and the base. I didn’t have the right size blade for my plough plane, and didn’t want to grind one to fit, so I slummed it with the router. I think it turned out ok!


Pen Tray in Pine, Brown Oak, and Leather

A while ago the philosopher and swordsman Damon Young (prof, dr, etc. Also guest on my podcast) posted a photo on Twitbook of his pen drawer. A small drawer in his writing desk with his pens in it:

They looked very sad in that crappy cardboard tray, and I couldn’t help but share a photo of mine:

But not being a total arse, I softened the sting by offering to make Damon a proper pen tray. He’s in Tasmania, and I’m in the UK, but all I needed was an accurately cut template of the inside of the drawer, and it should slide right in. Prof. Dr. Young is an accomplished writer and philosopher, but not a craftsman, as the template rudely attested. A bit gappy sir! In fact, as gappy as the plot in most Marvel movies. But I made some educated guesses, and made this:

It’s pine, with grooves routed out, spaces for the drawer handle screws (which are in huge saucers for some reason), covered in goatskin and edged in brown oak. The edges are just pinned on so if the insert was a bit too big, they could be easily popped off. The whole thing took maybe two hours, not including waiting an hour for the glue holding the leather down to go off. I posted it off to the far side of the world, and turns out if fits ok!

Now I really should get on and make the next bookcase…

 My friend Eleonora Rebecchi has designed several covers for my short ebooks, including the entire The Swordsman's Quick Guide series, and my Swords in the Time of Corona

So it seemed apt to me to show her that I can make book covers too! 

And I thought that putting her initials on the cover, in blue sparkly resin, would bring it to the next level 🙂

I started by routing out the initials, freehand with a router:

Then filled in the groove with the resin:

I then cut the covers off the main board. This is American Black walnut.

Now for the text block: very straightforward.

Cutting the stitching holes:

I kettle-stitched the whole thing together, then glued up the spine with some mull.

The walnut wasn't quite wide enough for what I had in mind, so I added a decorative strip of ash, and planed everything down and to size:

I did a classic assembly, gluing the covers to the leather for the spine.

Then cased in the book in one go, which fortunately worked quite well!

The finish is a few light coats of french polish, applied with a rubber (how else?).
I think it turned out ok, but I'd be the first to admit that Eleonora's covers are prettier than mine!

 I came across the idea of a book nook quite recently; one just popped up in a search for something else (a book, I think). And I just had to have a go, as it's a perfect crossover between several of my interests. I was about half way into it when I realised it would take a simply absurd amount of time (somewhere probably over 50 hours work), because I've never done one before, and kept having to invent things from scratch. So I leaned into that, and let it take all the time it needed.

It also occurred to me about half way in that it would be a perfect wedding present for my dear friend Veera, whose wedding I couldn't go to thanks to the blasted plague. So I know it's going to a good home!

I started by making the box, and like a fool decided to dovetail it all together. I was at the ‘this won't take long' delusional phase, so I rushed it rather, and I'm not at all happy with the joinery there. No pictures for that reason. Part of the difficulty was that I had a completely free hand to do anything- it's a purely decorative piece, so there are no constraints other than size, and even that's negotiable. I had the idea at some point that one side should be mirrored, to create an illusion of depth, and then decided to make it a library. But I wanted more variation, so thought that the library should have an upper floor that's more mysterious, more fantastical. I can't paint for shit so I printed out a forest scene for the top floor, and a library scene for the bottom floor. 

The library scene came from here: http://www.dollshouse.com/3d-library-paper-door-books-plaque

it wasn't in the right size for my project, so I scalped the image off their website and re-sized it. I hope they don't mind! I've sadly lost the reference and the image I used for the forest scene.

The library door needed some texture, so I made some moulding in walnut and added it round the doorway. The floor is made of birch veneer, some stained black, some bleached. I cut it in strips, taped them together, then cut them in squares. Nice to do a bit of veneer work, it's been a very long time! I was inspired by Uri Tuchman's video in which he makes (among other things), a frame for a painting.

I thought the library needed some furniture, so I made a little table, and some books.

The books are super-easy: just little bits of maple wrapped in goatskin. Compared to bookbinding, they took seconds!
Then I thought to make a fake doorway upstairs, to hide the sword behind. It's glued in position, so doesn't open or close.

I've never used lighting in a project before, so figuring out how to do it took some time. There's just one light, in the space behind the door.

Now the sword… I forged the blade from a nail, then filed it to shape. Cut and filed the brass crossguard, made a little walnut handle, then added a pommel and finished shaping the handle. Sadly I forgot to photograph the finished sword before hiding it forever in its stone!

Now the doorway: I cut the basic shape from this piece of walnut, then ripped it down the middle so the arch is made of bookmatched grain.

I then carved some detail, just for fun. But, it turns out you should make the furniture after making the nook complete…

Oops!

So I made a new table, this time out of cherry, and in a more modern style. No reason, just because.

Of course the nook needed to be tested in a realistic environment, so here it is in a bookshelf:

I'm happy to report that it made its way to its new home without mishap, and here it is!

I’m in that funny limbo state between a book being finished and being published. My translation and interpretation of Fiore’s longsword plays (of which the current working title is now From Medieval Manuscript to Modern Practice: The Longsword Plays of Fiore dei Liberi. What do you think?) is back from the editor, his 2,370 comments and changes accepted, rejected, or otherwise acted on (that number is exact, not figurative. 2,370. Really. That's normal for a good editor with a 65,000 word document) and the resulting draft is now being proof-read. I expect that back in a couple of weeks, then it’ll be off to layout. Hurrah!

So it's a Schrödinger’s book, both finished and not finished. Done and not done. I can’t really concentrate on another sword related writing project (I think the replacement volume for The Duellist’s Companion is next up) until this one is really done. Instead I’m doing some productive procrastination, which for me is usually some craft-related activity. It’s something of a relief to get away from ideas and pixels, and back to physical materials. I’m making bookcases. This one is basically done:

That’s 18mm birch ply with solid cherry banding, and adjustable shelves, held onto the wall with a French cleat.

I haven’t done the cap or base yet, because I’m concentrating on getting books out of boxes. I can add the decorative but not actually necessary elements later. Bookcase 2 is basically the same, but with maple accents. I’ve been using the kiridashi knives daily since I made them– and holy cow, they are beautiful tools. They led me to dust off a chip-carving knife I’ve had knocking about the workshop for maybe 6 years. I got JT Pälikkö to make the blade for me, and I stuck a crappy birch handle on it just to get it into use asap. But I haven’t used it nearly as much as the quality of the blade deserves, which is partly because the handle just wasn’t appealing. So in some down-time between bookcases, while all my clamps were occupied with a glue-up, I started re-shaping the handle. After five minutes I thought ‘you know what? This knife deserves better’, and stripped off the old handle, and made a new one out of maple, cherry, and walnut. You can see part of the old handle in this photo.

Top tip: leave the wood long as long as possible- it's much easier to hold it still if it has a built-in handle! I epoxied the whole thing together.


Then I did 90% of the shaping before cutting the handle to length. I went so far as to actually finish the handle at the blade end before cutting the waste away.

The handle is finished in boiled linseed oil, then shellac. I made a home for it on my tool board- it fits in beautifully!

Of course, in my enthusiasm, I drilled the hole for the tang too deep, and it was visible at the pommel end, so I plugged it with a square cherry plug. I could have made it disappear with some antique-restorer trickery, but decided to highlight the error with a contrasting wood.

This is in the spirit of wabi-sabi: the things that make something imperfect can also make them beautiful. This is true in many fields, but not, ever, book editing!

There is magic in sharp steel. The feel of a perfectly honed edge slicing through wood, leather, or other targets, it’s as if the thing being cut parts before the blade like the Red Sea before Moses.

I’ve spent my whole working life with blades, first as a cabinet-maker, then as a swordsmanship instructor, so it’s odd to think that I’ve never made one. Well, thanks to Sergio Muelle at Twisted Horseshoe Knives, I’ve now made three. Sergio runs ‘Make a knife in a day’ workshops at his forge in the Suffolk countryside, and I showed up on January 9th with a sense of keen anticipation. 

In the three months between booking the workshop and the happy day arriving, I thought a lot about what kind of knife to make- Sergio is happy to help you make literally any kind of blade that a beginner could reasonably attempt: he even runs a three-day damascus knife workshop. His courses are individual instruction, so you really can make whatever you want, within reason. I wanted a knife I’d use all the time, not something fancy to hang on the wall, so I opted for a cabinet-maker’s marking knife, in the Japanese style (kiridashi). Because this is a very simple design with no handle components, Sergio told me we would have time to make a pair of them, both left and right-handed. This is really useful, because in fine woodworking you often need to use one or the other for maximum accuracy. And in the end, we made three: one left handed, one right, and one with both bevels which can be used either way. 

Here they are:

We started with the basic safety briefing (fire is hot, the British government thinks that pillar drills are more dangerous than forges running at 1000 degrees centigrade, etc.) then I sketched the basic idea of the knife onto a sheet of paper, and we got started. The left and right handed ones started out as a piece of steel that Sergio cut out from a sheet with an angle grinder, and the middle one began life as a farrier’s rasp. 

Our first job was to bulk up the steel at the point end. We did this by heating it up, putting the hotter end on the anvil, and bashing it with a hammer like driving in a fence post. I say we, but in every case, Sergio showed me what to do once or twice, then I did it. While I couldn’t have done this without his guidance, I did about 98% of the actual bashing and quenching and grinding etc. It turns out that having two irons in the fire is way more efficient than just one. You get maybe 30 seconds of bashing time, and have to re-heat for maybe a minute. During that minute there is nothing to do, unless you are working two blades at once. So in terms of forging time, two knives take about the same time as one. 

Once the ends that would become the points had been thickened, I bashed the blanks into the overall shape, first drawing out the handle, then shaping the point and the bevel.

I also put holes in each handle for hanging on a nail in my workshop. This was done with a punch, cutting through the red-hot steel, then widening the hole.

As you can see from the end results, I got better with practice! The first one is very wiggly woggly, the other two much cleaner.

I also stamped the blades with my initials. At the end of this process, which took maybe an hour and a half, I had two knife blanks cooling down, and the third about half-way done. The two forged blanks were ready for grinding to shape on static belt sanders.

Here you can see one blank straight from the forge, the other ground to shape:

Then the real magic: the alchemical process of heat treating. I coated the blanks in clay, leaving the cutting areas bare.

I then dried the clay in the forge, before leaving the knife in there (one at a time) to heat up to the point where the steel glows brightly, and is completely converted to austenite. Then out of the fire and into the frying pan (or in this case, the oil bath). The rapid cooling converts the austenite to martensite, giving the steel the crystal structure that makes for excellent sharpenability and edge-holding. 

Oh my, that was fun.

We then took the blades back to the grinder and finished shaping them. I knew exactly what I wanted, and I’ve done a lot of sanding of various kinds before, so Sergio left me to it while he heated up the tempering oven and got lunch ready.

The knives sat in the oven at about 180 degrees while we had lunch. This takes the very hard and rather brittle blade and relaxes it a bit, leaving it plenty hard enough, but tough with it.

After lunch while the left and right handed knives were cooling down, I forged the file blank into the right shape for the double bevelled knife.

Sergio speeded up this process enormously by doing some of the basic shaping in the powered press. The file steel was much easier to beat into shape than the high-chromium steel we used for the other two. It didn’t take long before it was ready to cool down before being ground to shape, heat treated, ground again, and then tempered. While it was tempering I polished up the first two knives.

The time-saving element of doing several blades at once only applies to the forging: grinding and polishing takes ages!

I didn’t sharpen the knives there- I was getting tired, and I have a decent sharpening set-up in my home workshop. So far I’ve got the right-handed knife sharpened, and have been using it for woodwork and cutting leather. It is absolutely beautiful to use. Sharp enough to split hairs, solid and stable in the hand, with enough weight behind it that you need very little effort to get the job done. 

What a start to the year! Three shiny new blades, some new skills, and what is shaping up to be a new friendship.

Sergio Muelle

If you are within striking distance of Stowmarket (Suffolk, UK), then you should definitely contact Sergio to set up your own knife-making experience. Feel free to share this with anyone you think may be interested!


I’ve had my woodworking bench for twelve years now. It’s been a good workhorse, small enough to fit into my bijou little workshop spaces but big enough to be useful. It first lived in a corner in the old salle, then the tatami shed in the ‘new’ salle:

then my garage in Ipswich, and now my workshop at the end of the garden):

The vice has never been great though. Good enough for most things, like holding this bit of ash in place while I mark it out for a scabbard:

But it was always quite sticky, and has gotten worse over time. And with changes in atmospheric moisture, the bench top has moved a bit, so it didn’t close up all the way to the edges. 

The body of the bench has also never been perfectly stable. It’s okay, but a bit light, and with the racking forces from planing on the bench top, it’s gradually become more wobbly.

Yesterday I spent about four hours disassembling the vice and getting it tuned up; planing down the vice jaw, the side of the bench, and the bench top; and adding some diagonal members to stabilise it.

Dressing the front edge of the bench so the vice will mate properly with it.

Turns out, the floor itself in my workshop isn’t very stable (it’s fundamentally just a shed) so I put down a couple of planks to spread the load a bit.

Now the vice twizzles beautifully.

At the time, I just felt like spending a day doing woodwork, and thought I’d take half an hour or so to improve the vice because I have some tricky sliding dovetails to cut. But one thing lead to another, and now the bench is performing better than it ever has before.

So here’s a thought. What other bits of maintenance am I neglecting? What other opportunities are there to put in a little bit of work now, to reap rewards for years to come?

I've set this post to go out automatically on Christmas day, so as not to spoil the surprise (in the unlikely event that my nieces actually read this blog). Don't worry, I'm not sat at my computer right now!
My nieces were thrilled with the broomsticks I made for them four years ago, and they are still avid Harry Potter fans. They are members of Pottermore, and have been sorted into their houses: Slytherin, and Ravenclaw. The eldest is just starting University, so I thought a Slytherin-themed notebook would make a good Christmas present for her. Her sister being in Ravenclaw, so it made sense to make her a similar one too. I'm still mostly a woodworker when it comes to crafts and craftsmanship, but I took up bookbinding as a hobby I can do at home sat at the table while my kids do their homework. Plus, I am very pernickety when it comes to notebooks, and the only way, I found, to get them exactly the way I want them is to make them myself. I usually make them about A6 size, to fit in a pocket. Hardback, so they have their own writing surface built in, and properly stitched, so they lay flat. At that size, I can fold the text blocks out of (archival quality, nicely weighted) A4 sheets, but for the larger notebook format, I got some large sheets from Shepherds Bookbinders in London, and got to work.

The roll on the right is vellum- I picked up some scraps while I was there… Anyway, I folded the large sheets into quires, and slit them into pieces about the right size for folding into the notebook.

The smaller stack is about 18 by 27cm square. I like the big, broad 5″ blade of my Cold Steel Voyager for slitting the folds. It's also handy as a paperweight.

I then created 6 quires of 4 sheets each, to make the text block. That makes 8 leaves, 16 pages, per quire, so a 96 page book.
These went into my rather rough and ready lying press (whacked together out of bits of pine, dismantlable into a few short planks), for cutting the sewing holes. I decided to stitch these onto tapes, as it makes for a stronger book (I'm hoping this one will be put in a school bag and carted everywhere), so I marked out the places to cut.

I prefer cutting the holes with a saw, as it keeps them all perfectly in line from quire to quire, and the longer slits in the outside folia of each quire help with the laying flat (I think).
I didn't photograph the stitching process, as both my hands were busy! But it was a pretty standard version, and you can see it done beautifully in this video by an actual real proper bookbinder:
I don't have a sewing frame, so I just do it at the table, and it works just fine. The sewn text block then went back into the lying press for gluing up and adding a layer of mull:
And with the mull:
Then I needed to trim the block, which I did with a stanley knife. Top tip: I keep a diamond lap handy, and touch up the edge every few minutes. Much faster than changing blades, and one blade lasts me for years! Besides, they are not sharp to my standards straight out of the box anyway.
Once the block was done, I made my life much harder and more interesting by deciding to create windows in the front cover; one for a fixed image of the Slytherin house crest, and the other for a changeable message (e.g. motivational slogans). So the owner could adjust the tone of the notebook at whim.
The cover is pretty standard, otherwise: it's not threaded onto the tapes, it's all just glued in. This makes everything a lot simpler. I started by printing out the crest and slogans, to give me the exact size for the windows, then cut out the covers. Here's a shot of the window. The hardest part of this whole job was gluing the (Slytherin green) bookcloth into the edges of the windows, and sticking the edges down.


I finally got them down, and under some weight!


After that, it didn't take long at all to get the covers laid out on the book cloth:


Then glued down. When the edges were folded round, I cut out the windows:


Then it was a simple matter of gluing in the crest photo (now printed out on proper photo-quality paper), and casing in (the process of gluing the text block into the covers).
Here you can see the text block for Niece #2's notebook, and the finished front cover of Niece #1's. Excuse the scruffy deletion of her name from below the crest; it's none of the internet's business what her name is. In the actual book, it's rendered in a rather jazzy Harry Potter font.


Open it up, and you can see the little pouch I made for the changeable window's content:


I also need to add a storage pouch for the extra changable texts.
And here is the finished version of both books. The names have been blanked out, so the books look better than this in real life.
Awesome, or what?
Merry Christmas everyone!


Sitting will kill you. It's almost as bad as smoking. Don't believe me? Read Arsebestos, by Neal Stephenson in his compilation Some Remarks, or more fully, Deskbound by Dr Kelly Starrett.

So as a matter of urgency, I created a standing desk adaptation for my work space at the Waterfront Studios.
The heart of the desk is a lovely piece of walnut, left over from both my sister's bookstand, and Heli's meditation stool. The design is just two boxes, one tall for the monitor, and one wide for the desk surface:
The boxes are dovetailed together out of broad pine planks which I machine cut to length at the awesome Ipswich Makerspace. At home, I added a solid wood banding on the fronts.  Oak for the monitor box, and maple for the desk. I did drop the desk box at one point, amid much swearing, and had to patch the corner:
Top tip for cutting dovetails, or any joint: make every cut truly vertical. A pocket level helps. As I'm cutting pins at right angles, in this case the top surface is level. Cutting tails, I'd put the piece in the vice at an angle and use a set-square on the (level) bench to check. This way your natural sense of plumb won't drag the cut out of line.
The critical thing is the heights; they must be absolutely perfect for the ergonomic advantage to work, so both boxes have cork feet. Sorry about the shitty gappy joints. No excuses.
I finished it the whole thing using only hand tools, and no sandpaper; I went all James Krenov on it, and the finish is straight from the plane, with just a whisk of French Polish to bring out the colour. 
I did cheat though and use a router to cut a very deep groove in the top to fit the battery compartment on my Apple keyboard and trackpad. It puts them at a much better angle for my wrists.
Note the level; got to check that gravity is working  for you, not against you!
This all took about 30 hours of my free time, so it's definitely not a commercial solution, but I don't care. I spend a lot of time at my desk (sometimes as much as four whole hours in a day!) so it's worth getting it nice.
Search

Recent Posts

Categories

Categories

Tags