I started editing the second edition of my book Swordfighting for Writers, Game Designers, and Martial Artists a little while ago and pretty quickly it developed into a total rewrite, aimed solely at writers. I’ve cut 45,000 words already, and will probably end up redoing the whole thing from scratch. Good writing is all about the reader, so I created an online form for writers to ask me questions, to help me figure out what they need to know. Many of the responses have been very on-topic for the book I’m trying to write, and I’ll answer those questions in due course in the book.
But some folk took the opportunity to ask me whatever they wanted (and why not?). As there’s no reasonable prospect of addressing the questions in the book, I thought I’d do it here instead. Some of the questions have lengthy answers that I've already given in books and courses, so while I've tried to give a brief stab at it here, I'll also link to the relevant longer work. I’m running a Swordschool birthday sale until the end of March 2025: use the code SWORDSCHOOL24 at checkout to get 24% off any digital product (ebooks, courses, etc.).
There were a bunch of questions about Vadi, and how he relates to Fiore. I’ll start with them:
Q: I am curious, working from my own copy, how Vadi's implicit tactics compare to Fiore's?
A: Both masters include attacking and countering the defence; and waiting for the attack to counter it. They both agree that you should control your opponent's weapon. Arguably Vadi makes more mention of feints, but other than that I don't see much difference.
Q: Would you include discussion of Vadi's use of measure, feints, and counter-cutting vs slicing-off vs blocking passively in an interpretive section, or within the main body of the text?
A: I wouldn’t include it at all in a book on writing swordfights. It’s way too specific to one source, and way too technical. Also, slicing-off and passive blocking aren’t mentioned anywhere in Vadi that I can find. He also doesn’t explicitly discuss measure.
Q: How do Vadi's regional origins contribute to which techniques or tactics he emphasises (eg does the law code of Vadi's residence effect what kinds of executive action he favours, as compared to other contemporary fencing treatises)?
A: We have no way to know. There are no contemporary sources at all: Fiore was 70 years earlier, the first Bolognese sources 40+ years later. Vadi doesn’t mention law at all, and while there may be a connection between local law codes and what he recommends, it’s impossible to say. Are we talking in Urbino, where the dedicatee was Duke? or in Pisa, where Vadi came from?
Q: Which works were influenced by Vadi's work?
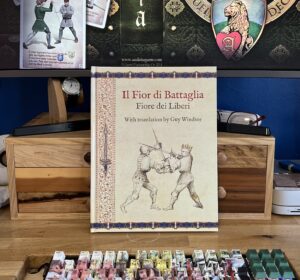
A: I’ve not found any direct evidence of Vadi’s influence in any later works. I go through the possible relationship between Vadi’s guards and the Bolognese guards in the introduction to my book The Art of Sword Fighting in Earnest.
Q: How does Vadi's work relate to Fiore's work?
A: It’s a short question with a very long answer, which you’ll find in the introduction to my book The Art of Sword Fighting in Earnest. Basically, I think it’s unlikely that Vadi was taught in a direct lineage from Fiore, and he may or may not have read a version of Il Fior di Battaglia. There’s not enough internal evidence to say for sure.
Then some more general questions:
Q: Learning fight choreography is challenging enough without running out of breath or not being able to fight with a sword in rehearsals and the actual performance. How do you train actors to get fit for stage sword fighting if they have not already been sword fighting before including arm strength and endurance?
A: I don’t. But I do train anyone who wants to learn, regardless of their physical fitness, so my system includes a huge amount of training solutions for range of motion, strength, joint health, and fitness. You’ll find them in the Solo Training course, or in my book The Principles and Practices of Solo Training.
Q: I'm a martial artist (Shito-Ryu karate) and one of my biggest shifts for fencing vs karate is what moves first (I tend to move hip first/at the same time for MA and have been repeatedly reminded that it's sword first for rapier fighting). Do you have any recommendations to facilitate the change in mindset between picking up a sword in ongoing training and my continuing karate work? IDK how question-y my question is: rewording is sort of how to keep my karate habits and rapier habits separate I guess? While still actively training and building in both and acknowledging that there is crossover for pieces like some stances, mindset, footwork, etc.
A: Yes I do. In short, if you understand why you move in a certain way, not just intellectually but at a fundamental ‘this solves a problem’ level, then you’ll move correctly for whatever you’re doing. In other words, if your mind is on the right thing (solving the problem presented by your opponent), and you’ve been trained to solve that problem correctly, you’ll do it correctly. It’s not a matter of style (which you have to remember), it’s a matter of function (which is made obvious by the context). In the same way that you might talk shit with your mates, but speak politely in a business meeting, you’ll initiate with the hip when doing karate (because it works better that way), and with the point of the sword when doing rapier (because it works better that way).
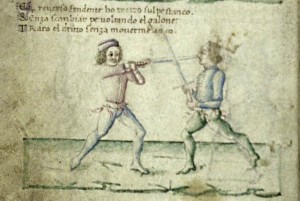
The best example of this was teaching a student to do a scannatura with a rapier (plate 13 from Capoferro). He kept binding the opponent’s point down and walking onto it, because he wasn’t leading enough with the sword. I took a sharp rapier off the wall and took the part of the opponent. He bound that sharp scary stabby thing the hell away from himself and then stepped in. Problem solved. Don’t try this at home, but you get the idea, I hope.
Q: How would you describe the difference in fighting styles between a Fiore fighter and a Chinese Jian user?
A: I wouldn’t, because I don’t know any Jian users who actually fight. (I’m sure there are many, I just don’t know them). My first step would be to find such people, and watch them train and fence, and ideally fence with them. Then compare that to what I know (Fiore stuff). As a writer, you could find someone using a jian online in the way that works for your character, and someone doing the same with a longsword, and compare what you see.
Q: I teach a Beowulf camp and include a HEMA section. I use Liechtenauer. Is that a good source to pair with Beowulf?
A: No. It’s many centuries later, and a completely different weapon. Beowulf dates to around 1000AD, so they would be using what laypeople think of as “Viking” swords, shields, and armour. The closest we have to that is probably I.33 sword and buckler. (I have a course on it here.) There are folk online working with swords and shields from that period, but it’s always going to be reconstructive archaeology, not based on written sources (because there aren’t any). Doesn’t mean they’re wrong though!
Q: What would be the best content to teach writers as a HEMA instructor? I teach at a writing conference and do the basics of long sword and short sword over three days. My goal is experience over sitting, but there's so much to offer!
A: AFAIK there’s no such thing as “short sword” in historical martial arts. So I don’t know what you’re teaching there. But I’d say that all writers would benefit from either longsword, or rapier, or both, because they are the two most common types of swords used in historical fiction and fantasy. Of course historical fiction writers would be best served with a style from their period. E.g. smallsword or backsword/sabre for Napoleonic era swordsmanship, Liechtenauer or Fiore for late 14th-early 15th century, etc. But that’s probably out of scope for this kind of intro class.
If you have questions you’d like to see answered in the book, here’s the form: https://forms.gle/QHspLZNQ2Lw7A1nT9
Questions that are off-topic for the book are best asked on my social media platform, swordpeople.com in the “advice wanted”, “pub”, or “salle” spaces.
If you want access to any of the courses, the best value is probably the subscription package: access to everything for $45/month. You can get 24% off with the code SWORDSCHOOL24 The code also works for ebooks and audiobooks at swordschool.shop. The code expires on March 31st.