Guy's Blog

Guy frequently keeps this blog updated with thoughts, challenges, interviews and more!

Tag: Pedagogy

Guy holding a sharp longsword with decent mechanics

I'm teaching a seminar here in Suffolk for my friends at Suffolk HEMA on Saturday October 18th. If you'd like to learn to move better, and to analyse any guard position or movement from a structural perspective, you should come!

Move Like Fiore

Improve your structure, flow, and control in Fiore’s art of arms
Good movement is the foundation of great fencing. It keeps you safe from injury, helps you control your level of force, protects your training partners, and lets you fight harder and longer without fatigue.
In this full-day seminar, you’ll develop practical skills to make your fencing smoother, stronger, and more efficient. Together we will cover:
1. Analysing and improving the structural qualities of Fiore’s guard positions
2. Refining transitions between the guards
3. Different ways to hold the sword for specific purposes
4. Centres of rotation and how they affect different plays
5. How to strike with speed, power, and control
6. Applying these mechanics to wrestling, dagger, and longsword plays

Event Details

When: Saturday, October 18 · 11am–5pm (with a lunch break)
Where: The Coddenham Centre, Mary Day Cl, Coddenham, Ipswich IP6 9PS
Cost: £50
Bring: Longsword, fencing mask, dagger (if you have one), water, lunch. Freeplay kit is optional, but bring it if you like.
Sign up with this paypal link.
I would highly recommend having a look at my free Fundamentals: Body Mechanics course to prepare (or in case you can't make it over here from New Zealand). It will familiarise you with my approach, and the more people who know the basics of this method, the more stuff we'll be able to cover on the day.

I flew to Belgrade last week to attend the Sword and Balkan event. I arrived on Thursday evening and spent Friday exploring downtown Belgrade to get a sense of Serbian culture. I’ll write that up properly next, but in the meantime: if you’re visiting Serbia, do not skip the National Museum on Republic Square…

The event began on Saturday morning, and right from the start it felt different. We were all invited to break off a piece of bread, dip it in salt, and eat it (I just had the salt, being allergic to wheat). This symbolic act made us part of the family—and that sense of familial warmth and camaraderie set the tone for the whole weekend. Literally everyone I interacted with was relaxed, friendly, and there to enjoy some good swordy fun. It was especially nice to catch up with Francesco Lodà after more than 20 years!

The event’s principal organiser, Željko Glumac, was a game designer before devoting himself fully to swords—and I’ve never encountered a more gamified (in the best possible way) fencing event. There was a creative and intricate token system: participants earned tokens through various activities and could use them to bid for spots in the final tournament, choosing weapons like rapier, smallsword, and so on. You could win tokens from fellow fencers in challenges—unless, when revealing your secret team card (Fiore, Hutton, etc.), it turned out you were on the same team! When challenging instructors, they would award you 1–3 tokens based on the quality of your fencing (regardless of the score).

No wonder the reception table looked like this:

The reception table with bread, salt, and a lot of gaming tokens

That’s Željko on the left.

I knew Željko is a Capoferro man, but I also knew he’d be swamped with organisational duties, so I kidnapped him early Saturday for a quick fencing match. It was a joy. Sometimes fencing feels like an argument between people who don’t speak the same language—but this was a vigorous and friendly conversation between two native speakers of the same dialect.

My class that morning was Skill Development with the Longsword. About 26 students attended, with a wide range of experience levels. They were all a pleasure to teach, and I think everyone got something useful from it.

Guy Windsor with longsword students at Sword and Balkan in Belgrade 2025

I’d twisted my right knee on Wednesday morning, so I was being careful—short lunges, no unnecessary pressure—but still managed to get in two bouts after lunch. First, with Thomas Tassie on smallsword (a quick fencer with a lovely circular parry in quarte), and then with Branislav Petrović, another Capoferro fencer. He hit me with Capoferro’s scanso della vita—a rare thing to see in freeplay! But a little later I got him back with the same technique, which may have been my personal fencing highlight of the weekend.

By evening I was fairly worn out, but I really enjoyed chatting with Viktor, Veronika, and Elay. Fortunately, V and V are early-to-bed types like me, so they gave me a lift back to the hotel and we turned in around 11:15. But I must say—those Serbs understand carnivory at a high level.

On Sunday morning, I did a thorough physio session to keep the knee and neck issues at bay, and then fenced with Karl Rapp from Vienna. We hit each other quite a bit—but he managed to catch me twice with the same move: a thrust to the flank after covering my blade with his left hand. Son of a bitch! (In the best possible way.) It was a delightful bout, swiftly followed by another with Viktor Kachovski—good thing we both got to bed at a decent hour!

That day I taught a smaller class, Skill Development with the Rapier, which meant we could go deeper into the subject. Again, the group included both beginners and veterans with over a decade of experience, and again, everyone was a joy to teach. Special thanks to Pavle Ilijašević (in the red and black poofy pants) for demonstrating with me—with sharps!

Guy Windsor with rapier students, sword and balkan 2025

After lunch (and a bit of tech wrestling with the projector), I gave an hour-long lecture on syllabus design. I think it went well—when I formally ended the session, the room stayed for another 45-minute Q&A, mostly on pedagogy. I sometimes ask the audience to vote on the best question of the session. This time, Daniel won the prize (a Swordschool patch) for getting me going on teaching mixed-level classes.

You may have noticed the total lack of photos or videos of me fencing. That’s because I was having too much fun to remember I even own a phone.

The event wrapped up with the challenge tournament. I was absolutely knackered by this point, but it was clearly enormous fun for everyone involved—team members cheering each other on and nobody taking it too seriously.

All in all, a thoroughly delightful event. Željko and his team got the tone exactly right—and everything else flowed from there.

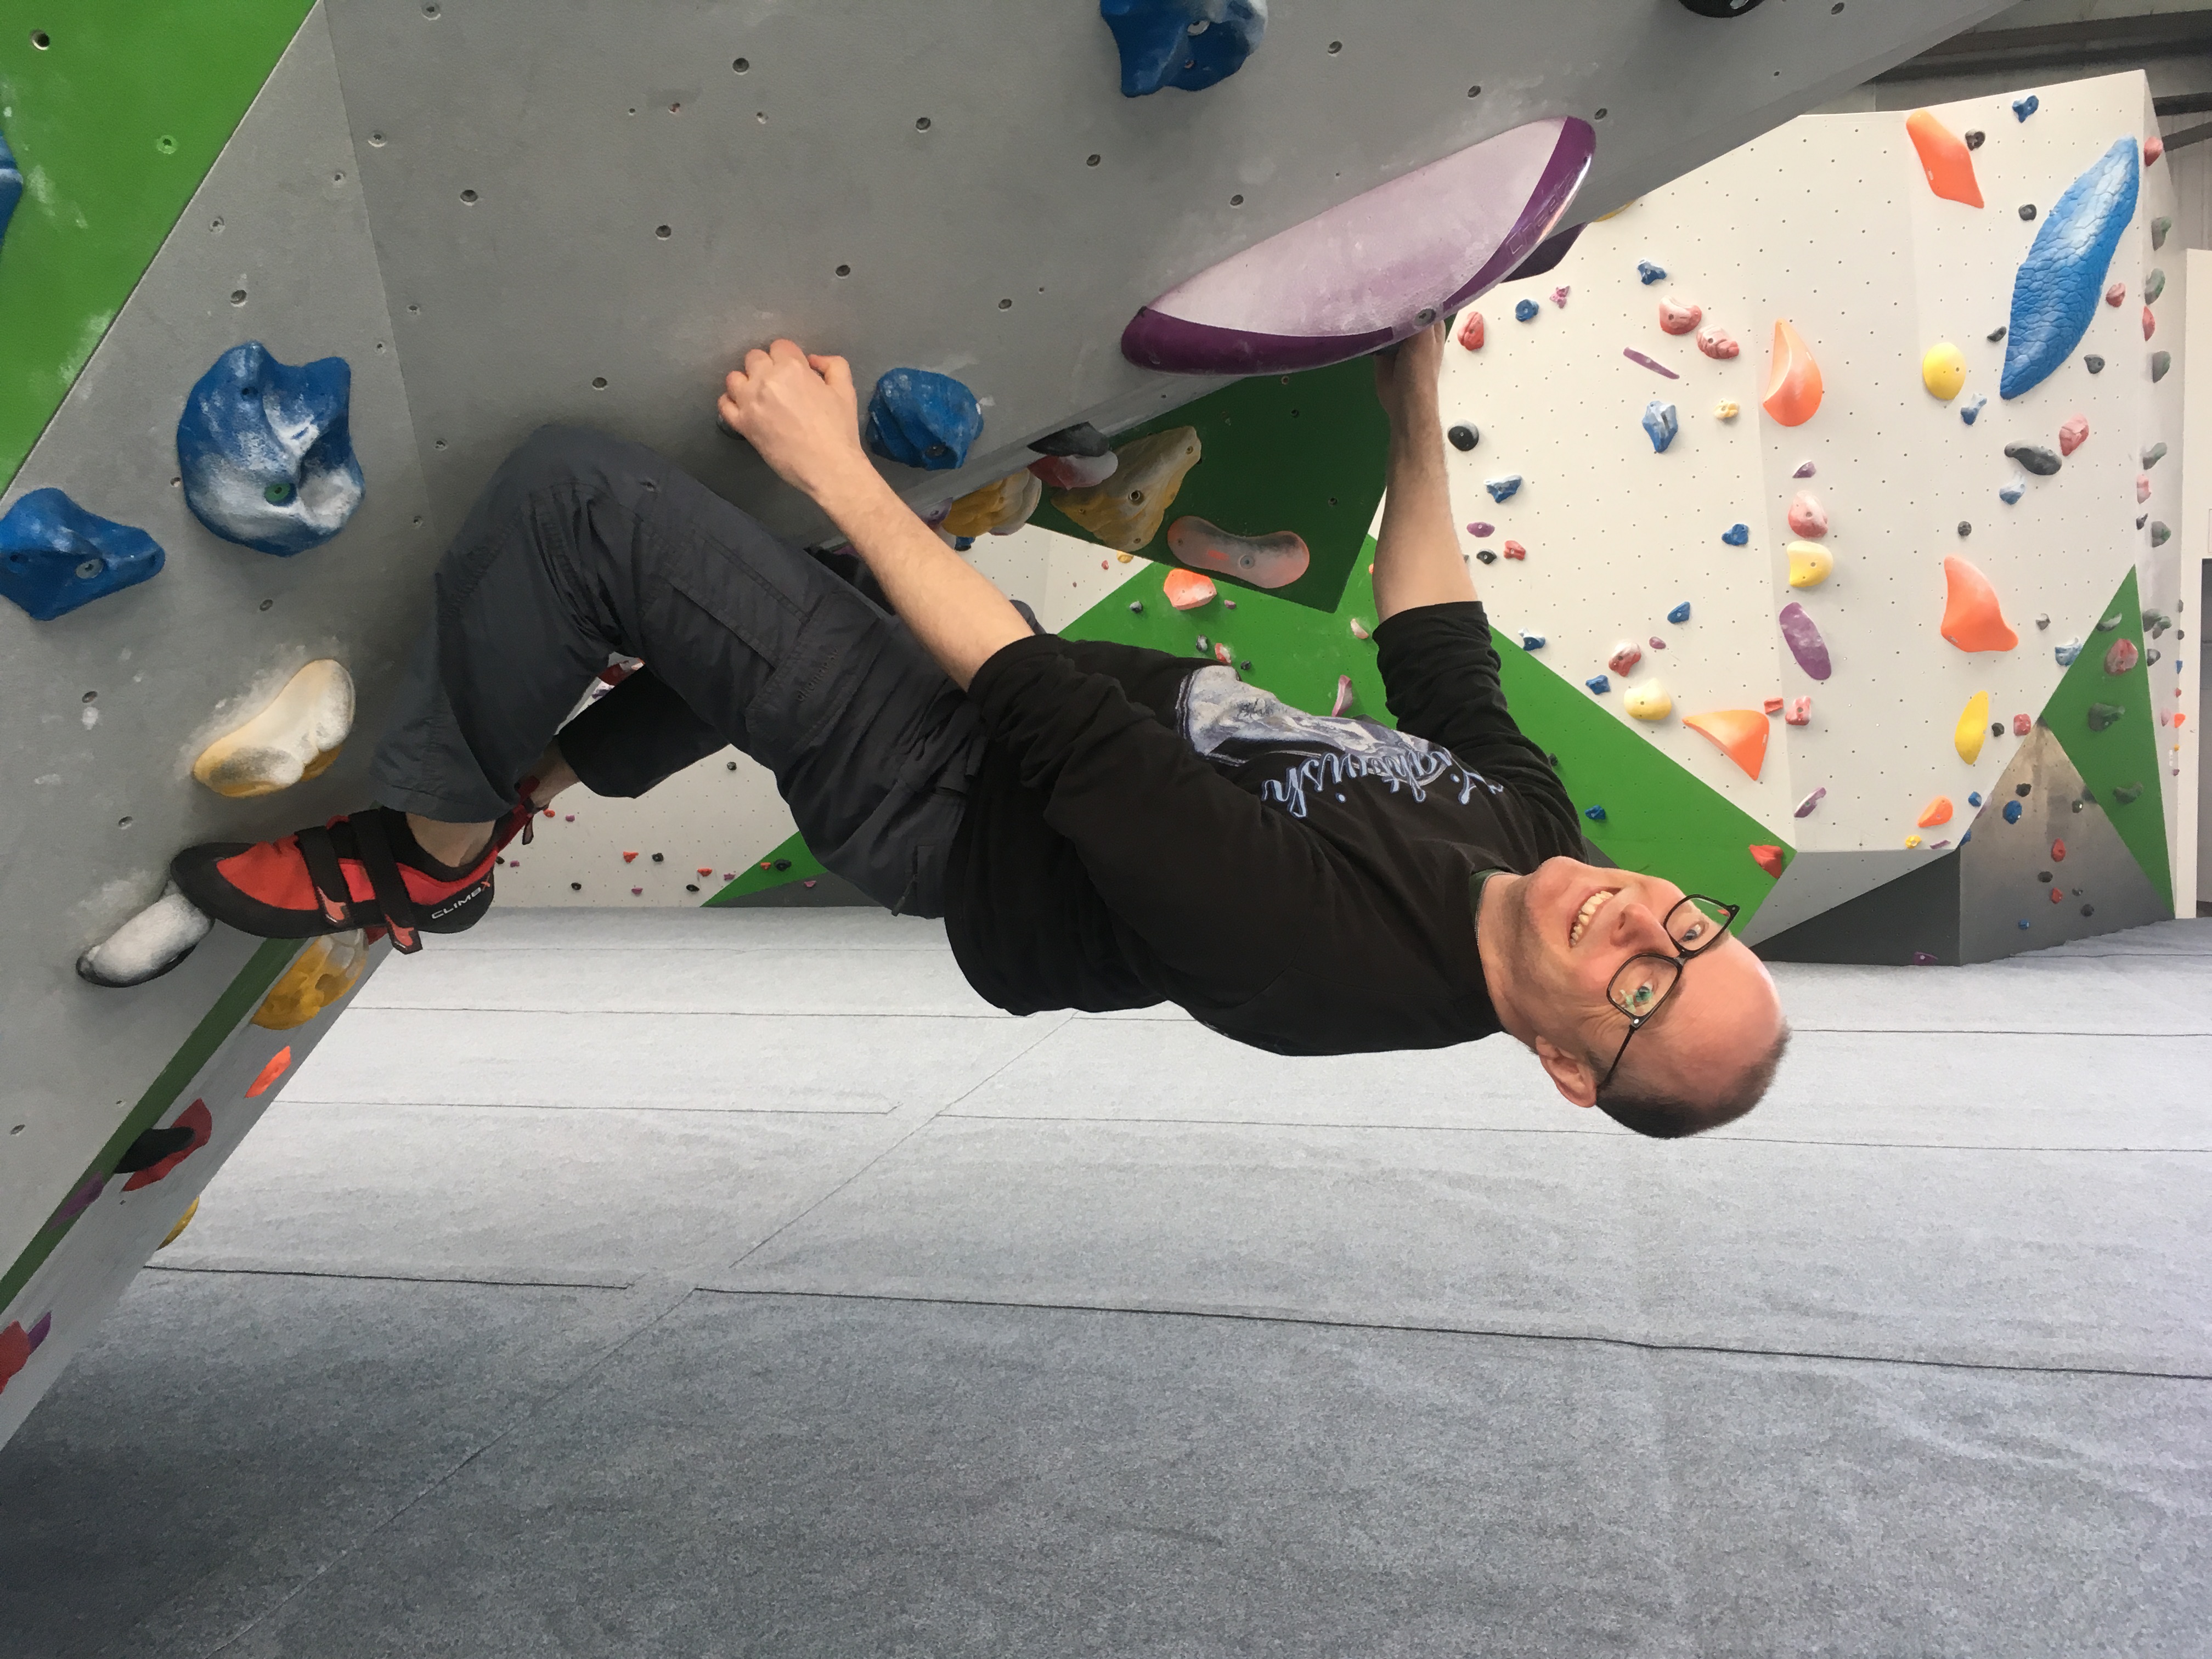
I am often asked by students if they are “ready” for a class with me. It's a common insecurity- nobody wants to feel that they are holding the class back, or be overwhelmed by a fire-hose of information. I actively seek out opportunities to be a beginner, partly so that I can better understand and empathise with the beginners who train with me. One such opportunity occurred earlier this year. I started bouldering (indoor climbing on low routes, no ropes) a couple of years ago, and on January 20th 2020 took a class with Neil Gresham, at my club, Avid, in Ipswich. It was a great example of being in a class way over my head. But it has been really useful, and while the specific insights regarding bouldering are probably not useful to you, the process of extracting the most value out of a class that is way beyond your current level will be.

There were 10 students, varying in experience from dazzlingly good (from my perspective), to my friend Katie and I (one year of about once a week). One person in the class had been climbing for only two months but was elegantly smashing routes I can’t do (yet), so Katie and I were definitely bottom of the class. Which is the best place to be- literally everywhere you look you can see someone more experienced doing something interesting. You should never give up the opportunity to take a class with a great instructor just because you’re “not experienced enough”. Sure, your brain may fill up in the first ten minutes, but that’s ok, there are ways of capturing the rest of the class for future reference. I’ve been working on the insights from this climbing class for nearly a year now. Money very well spent! But that's only possible because I captured the class outside my brain, and then refiled it.

In short, the process is this:

1) expect to be out of your depth, and to stop taking in new information early in the class

2) take detailed notes (I use pen and paper with stick-man sketches, but any system that works for you by definition works)

3) write up your notes as soon as possible after the seminar. Ideally on the same day. Notes work to trigger memory, and the longer you leave it, the less effective the trigger will be

4) summarise the key points.

Here is my somewhat edited write-up of the seminar, with topics bolded so I can find them easily:

We began with some opening remarks, Neil introduced himself, asked a couple of questions to get the feel of the class. Then we warmed up. The instruction was to do vigorous exercise for a few minutes to get the blood pumping. Wind sprints, burpees, and running were suggested. I did all of those, plus some monkey walks.

Then Neil lead us through some basic joint rotations; shoulders (as front crawl, then reversed), hip rotations (forward-back, then side). He advised to avoid passive stretching before climbing (I agree 100%).

Then it was shoes on, and to the wall. When warming up on the easy grades, here are the rules for improving footwork:

1. No sliding your foot down the wall onto the foothold.

2. No re-placing the foot after contact with the hold.

3. Silent feet.

4. Watch your foot until after you’ve made contact with the hold.

Goal: to improve precision in footwork that will help with harder climbs.

Practice. I spent some time on a green-grey (easiest) grade. It’s surprisingly hard to be that precise, even on really easy climbs. This one approach had me thinking two things: 1) why the hell didn’t I think of that? It’s so very like how I teach swordsmanship footwork: use very basic drills to concentrate on foot placement. And 2) I’ve got my money’s worth already. Everything after this is a bonus.

Then we re-gathered, and Neil talked about arms.

  1. Keep them extended but not locked, as much as possible.
  2. Bent legs, straight arms.
  3. Keep the shoulders engaged though, so you’re not hanging on your joints.

Practice: back on the easy grades. Indeed, as he said, especially at the start, it’s tempting to step up onto the footholds, pulling yourself into the wall. It’s better to hang from the handholds, bending the legs as much as necessary.

Finally, grip: we re-gathered and Neil challenged us to climb easy routes using the minimal tension in our grips. “Use the friction of your skin” to hold on.

Practice: with precise feet and straighter arms and relaxed hands.

Summary: when warming up on the wall, use these rules to encourage precision and minimal strain when climbing. This mental focus will also help transition you mentally from normal life to climbing.

This was followed by a discussion of bouldering training sessions: either volume, or intensity. Volume sessions involve a lot of easier grade climbs. Intense sessions involve working on a few very hard (for you) problems.

Techniques for overhangs:

We went to a part of the wall that overhangs, and Neil talked about how to do it. Fundamentally: left foot goes to right holds, and right foot to left holds. This allows you to reach with an extended arm. No frog-clambering (my term, not his). This did make life a lot easier, where the holds were set up to allow it.

If you have a right foot on a right hold, or vice-versa, you can “flag”: if there’s space, reach through with the other foot inside the one on the hold. If the foot on the wall is too high for that, you can flag “outside”. This has a similar body placement effect to having your left foot on a right hold, etc.

Note: “avoid a pull-ups competition”. Good advice, especially for me. I tend to rely on strong arms more than is gracefully optimal.

Volume sessions: When doing a volume session, try a pyramid approach: start easy, get harder, hardest climbs at the mid-point of the session, then ease back down. (Same idea as our pyramids: 1 pull-up, 2 push-ups, 3 squats; 2,4,6 etc. Until you max out on one (e.g. 4 pull-ups). Then back down the pyramid: 3-6-9, 2-4-6, 1-2-3.)

“Project” sessions: warm up with 10-12 easier climbs, then pick 2-3 hard problems and work on them. Not too long on any one, or you’ll get tired. Rest: rule of thumb is 1 minute rest for every hand move.

Using the circuit board (a wall with graded routes that go in a circle round the wall, for endurance training): two approaches:

1. “Strength”: pick one hard circuit and go round once. Rest, etc.

2. “Endurance”: pick an easier circuit, and do laps (e.g. 3-4). This trains you for longer climbs, such as rope work outside.

I didn’t mention in class that I find going round once on the easiest circuit to be a sufficient challenge to my endurance! But I’ll work on it, starting by just doing a few moves after the end of the first circuit, to get out of the habit of automatically stopping at the end.

Supportive Conditioning”: for injury prevention. Assuming you’re not a gym rat (good call).

#1 most important exercise to prevent tendonitis: finger extensor training, opening the hand against resistance, e.g. using an exercise band. 3 sets of 20, 2-3 times per week. Yes this is useful but I think I should do a class on forearm maintenance for climbers. They all seem to get tendonitis! (You can find my forearm conditioning training here: go.guywindsor.net)

#2 easiest supportive conditioning: push-ups. 3 sets of 10-25, twice a week.

#3: TRX handles on straps (I’d use my gymnastics rings at home). 3 exercises shown, all knees on floor to start:

1. Push-ups

2. Pec fly, arms out to the sides at shoulder level, recover.

3. Plank, extending the arms out in front like diving into a pool, recover.

#1 stretch, after EVERY climbing session: hand flat on wall, shoulder height, fingers pointing down (extending the wrist). Extend other arm about shoulder height like in a pec fly, look out over your extended hand. Seems useful.

Other stretches recommended:

1. feet wide, knees wide, squat and push knees apart to open hips.

2. Standing, knee to chest, pull knee in to stretch hip.

Best takeaways:

1) After the usual warm-up, warming up on the wall with: precise feet, extended arms, and minimal grip.

2) Flag on overhangs.

3) Pyramid sessions.

4) Use circuits more.

5) Why have my rings been in a box in the shed for the last year?

And finally:

As you can see, that is a TON of information, way more than even the more experienced climbers will be able to remember the next day. How many sets of how many push-ups was it?
And here's the kicker. I'd accidentally left my notebook and pen at home, so I borrowed a pencil and a single envelope from the reception desk. Literally ALL of that was captured in note form, covering both sides of an ordinary envelope (about 4 inches by 9, or 10cm by 22). Notes do not have to be extensive to be useful.

The specifics I tried to capture were notable phrases (such as “avoid a pull-ups competition”), the overall pattern of the class (or I would certainly have forgotten entire sections), and as many specifics as possible (such as “finger extensor training, opening the hand against resistance, e.g. using an exercise band. 3 sets of 20, 2-3 times per week”). Then when writing out the notes, I added as much detail and experience as I could recall.

Experienced students are able to remember more than the less experienced simply because they can chunk the information, and fit it into pre-existing patterns in their heads. I didn't have the experience to chunk the information, nor the pre-existing patterns of climbing theory, terminology, and practice. But even though the class had way more information than I could possibly make use of at the time, and so way more than I'd be likely to remember, I could effectively use the class insights months later when I was ready for them, because I have a way to file them outside my brain.

This is actually better than videoing the class, because it depends on the write-up immediately afterwards. Information outside your brain is of no practical use. To be useful, it must be stored inside your brain. Having a video of the class will tend to let you believe that you have it all available, and so you'll forget to ever watch the video, and the information never breaches the world/brain barrier. But having dodgy notes on a scrap of paper that simply must be written up soon or it will become useless forces you to re-enter the information in another format, which massively improves retention. I saw and heard the class, and experienced the exercises, now I have to recall the class from notes and memory, and re-create it as text. That regurgitation process is absolutely key to getting your brain to hold onto the information.

I hope this is useful, and perhaps persuades at least one beginner to jump in the deep end and take a class above their level. Feel free to share.

I was recently contacted by a reader asking about teaching left handed students. It’s a common and relatively complex problem, so rather than confine my answer to an email I thought I’d post it here.

The Question

How do you teach left-handers?

Why it’s a problem

Left handers are relatively rare (about 10% of the population, including my dad and my sister), and most of the historical martial arts treatises we work with don’t say much about them. Capoferro has one plate of rapier and dagger showing how to murder a leftie:

Fiore mentions that the guard of coda longa on horseback works against right or left handers (click on the image to expand it, and you can read the text and the translation by Tom Leoni):

Perhaps the biggest section of any treatise dealing explicitly with lefties is in Jeu de la Hache, but it’s still a small proportion of the overall material.

So what’s the problem?

The problem is that many of the techniques we recreate from the sources simply don’t work the same way as shown in the books when done cross handed. In addition, right handers don’t see many left-handers, so in combat sports generally, left handers tend to be far more common at the top levels than they are in the general population. This is entirely due to familiarity. Everybody knows how to handle righties- we see them all the time. (For an interesting book that also addresses this in some detail, see The Professor in the Cage, which is well worth reading if you have any interest in martial arts…)

The question is about teaching lefties, not fighting them, so I’ll address that. (If you want my best advice for fighting left handers it’s this: fight them a lot. You’ll get better at it.)

What difference does handedness make?

In blade on blade actions, not much. Principally, inside and outside are not symmetrical [For those unfamiliar: if the sword is in your right hand, everything to the left of the blade as you see it is ‘inside’, and everything to the right is ‘outside’.] If we are both same-handed and our blades are crossed, we will both be either on the inside or on the outside of each other’s blades. But when one of us is differently handed, if you are on my inside, I’m on your outside, and vice-versa. This means that some targets are different, and the angles of attack may be different. But usually, the rules regarding how to attack remain the same. For example, I would only push your elbow if I’m on the outside of your arm. That doesn’t change; what changes is how I would get to your outside, and which of my hands may be able to reach your elbow.

In wrestling at the sword, it makes a great deal more difference.

Tricky to pull off cross-handed. Trans. by Tom Leoni.


This wrap, for instance, only works well using the opposite arm (eg left against right) and from the inside of the wrapped person’s arm. Because this is over both arms, it can be used cross-handed, but you won't get the same control of the sword arm.

Likewise this counter rarely occurs cross-handed at the longsword, because the preceding wrap would have to be done by the sword arm, which is unusual (though you can see it in I.33, f.18.v).

Ligadura sottana, 15th play of the zogho stretto. Trans by Tom Leoni


I include specific examples of techniques adapted from symmetrical drills to cross-handed versions in chapter seven of The Medieval Longsword. In case you don't have it to hand, I've extracted it for you here:

Medieval Longsword sample Cross-handed

So that's the problem. What's the solution? There are several approaches you can take:

Approaches to the problem:

1) make everyone train right handed. I think this is a bad idea if your goal is to produce great practitioners, but if your goal is to perfectly reproduce the plays of a specific treatise, in which everyone is right-handed, then it makes sense. When Christian Tobler began researching German medieval sources, he switched from his natural left handedness to do everything right handed because it was much easier than converting everything.

2) make everyone train both sides. I think this is advisable up to a point- I would expect all my senior students to be able to do all our basic drills and actions with either hand, and any professional instructor to be able to demonstrate anything within their art with either hand. But it’s probably not the best way to train beginners.

3) create specific ‘cross-handed’ variations of every major drill or exercise you use. I think this is essential. The basic drills usually assume two right-handers. Two left-handers can do exactly the same drill, it’s just mirrored. The problems only start when there are a right hander and a left hander training together. I include set forms for the cross handed version of every basic drill in my syllabi.

Advice to instructors:

  • If your syllabus is lacking cross-handed drills, create them. You can do this by setting up the drill and seeing where you (as a lefty) get stuck. Then following the basic principles of the art, solve the problem. When the problem is solved, incorporate that solution into the ‘cross-handed version’.
  • When you have a lefty in class, it’s your job to make sure that they learn the standard form of the drill (i.e. with a fellow left hander, which may have to be you), as well as the cross handed forms. Also, you should take advantage of their presence to accustom your other students to dealing with cross-handed situations.
  • As the instructor, you can always require the senior students to reverse their handedness (so lefties become righties, and vice versa), which gives  everyone else the chance to face the less-common situation.
  • Start with the simplest drills- make sure that you can do all the solo drills in your syllabus with your left hand, and can see what they should look like in your students when they are left handed.
  • Set up a basic pair drill, and see what happens. At any given point, the left-hander should be behaving normally for them. Never ask them to attack differently or switch hands for the convenience of the right hander (unless they are very experienced and the righty is a beginner).

I hope that's helpful! Feel free to make any suggestions or ask questions in the comments below.

For more on how to teach, you may find these posts useful:

How to get started teaching historical martial arts

How to teach a basic class

Screen Capture from the Dagger Course: the four blows

Last week I talked about the importance of swordsmen learning dagger techniques, and I promised I'd explain how to integrate training the dagger material with the longsword material. This needs to be done at the level of syllabus design, as well as within specific training sessions or classes. Let's start with the syllabus.

NOTE: In this post I'll be referring to lots and lots of specific drills from my syllabus. It would get ridiculously long if I wrote them all out, or even embedded the relevant video at every step. But you can find all of this material online on video on the Armizare syllabus page.

My Armizare syllabus is divided into seven levels, the first four of which are considered ‘basic'. If we take a look at the first couple of levels you'll see that the dagger content is spread out, as is the sword. Level one, for instance, covers the following:

Mechanics and Conditioning:

  • Weight distribution on the feet
  • Tailbone Alignment
  • The basic guard position
  • The guard positions
  • Standing Step drill (aka push-hands)
  • Basic falling, solo
  • Stick avoidance drill
  • Understanding of safe training, control, and School etiquette

Unarmed:

  • Fiore footwork: 4 steps: accrescere, discrescere, passare, tornare; 3 turns: volta stabile, meza volta, tutta volta
  • Four unarmed poste: longa, dente de zenghiaro, frontale, porta di ferro

Dagger:

  • The meaning of the terms remedy, counter-remedy and counter-counter-remedy
  • 4 lines of attack: mandritto, fendente, roverso, sotto.
  • First remedy master (against mandritto or fendente)First 7 plays of the First Master
  • Roverso disarm (third master, from Pisani-Dossi MS), from Third remedy master (against roverso or fendente)
  • Fendente disarm (fourth master)
  • Sottano disarm (ninth master)

Longsword

  • Five of The 12 guards: Tutta porta di ferro, posta di donna (both sides), posta longa, posta frontale, dente di zenghiaro
  • Two of the Seven Blows: Fendente, Sottano
  • Sword handling drill up, down, around, around.
  • Cutting drill, part one only.
  • The salute
  • First drill
  • Second drill

As you can probably see, there is a minimum of learning large chunks of data (such as all seven blows of the sword), and an emphasis on teaching just enough new elements that the student can start working on applications. So they learn one blow of the dagger, and one defence against it, then the same defence against another blow, then another and another, before they learn all four blows of the dagger as a set to memorise. They also have sword handling drills, and two full-length sword drills. The difficulties they face learning the sword drills will make the dagger material in the next level very welcome; it will solve a problem for them.

In Level Two, they will find:

Mechanics and Conditioning

  • Forearm conditioning: Wrist and Forearm Exercises
  • Forearm massage: Self Massage
  • Basic Breathing exercises
  • Guard position analysis with pressure
  • Volta stabile and pass with pressure
  • The footwork combinations: 1) accressere fora di strada, passare alla traversa, 2) accressere, 3 passi, with tutta volta.
  • Able to competently warm up self

Dagger

  • The Nine Masters One thing from each of the Nine Remedy Masters
  • Dagger disarm flowdrill
  • The 5 things: disarm, strike, lock, break, takedown
  • Five things from four lines

Longsword

  • All of the Blows, including the Mezani, and the 5 Punte
  • All of The 12 guards
  • Sword handling drill 3: six grips
  • Exchange of thrust
  • Breaking the thrust
  • Four corners drill
  • First two plays of sword in one hand

Now that the base has been laid in level one, it's quite easy to build on it in level two. Incidentally, I'm sure that some Fiore scholars will be horrified to see the lack of abrazare so far; that is coming in the next level, at which point, as with the dagger material, it will actively solve a problem for the students, rather than be something they have to plod through to get to the shiny sword.

At this stage, the students have a complete set of basic techniques for the dagger; all nine remedy masters, and all five things that Fiore tells us we need to know (on f9v of the Getty Ms).

This pattern of interleaving dagger and sword (as well as abrazare, spear, and so on) continues throughout the syllabus, though the dagger material is essentially complete by level four. It would be remiss of me not to mention the section of the manuscript that explicitly ties the dagger and sword sections together: the defences of the dagger against a sword attack, and the defences of the sword in the scabbard against a dagger attack. We do cover these in the syllabus, but much later than you would otherwise expect, because the defence of the dagger against the sword requires a) both partners to be able to attack safely with the sword and b) both partners to be able to do a pretty tricky technique. They will usually get there in level four when learning the Syllabus Form, which begins with the defence of the sword against the dagger.

Integrating dagger into the class:

In a well-taught class there is a coherent reason for including every item that is taught. It could simply be ‘you're working on this level, and you need to know this new thing'. That is, if you like, the most basic level of teaching: filling gaps in the students knowledge. For this, you must have a syllabus, and the students must be able to track their progress along the path laid out in the syllabus.

At the next level, there is teaching a single idea across different contexts. For example, in our second drill with the longsword, we have a ligadura mezana at step three (the counter-remedy). This first occurs at time 0.13 in this video.

https://youtu.be/SUw7JSKgFAI

The counter-counter-remedy first occurs at 0.20, and is the 15th play of the zogho stretto (as referred to in last week's post). Most students find this particularly difficult against an enthusiastically applied ligadura. If I'll be teaching second drill, I'll adjust the whole structure of the class to lead up to it. Let me take you through what that would look like, and run you through the usual structure for a 90 minute evening class in my salles at the same time:

Salute

Warm-up (10 min or so). This will emphasise shoulder mobility, to prepare for the locks.

Four guards drill, other footwork drills: 5-10 minutes. Possibly include the standing step drill, and work the ligadura and its counter into that.

Dagger (10-30 minutes): starting with first play first master (disarm), then on to the third and fourth plays (ligadura mezana and its counter). This will be taught from scratch, or revised, depending on the level of the class, and may go on to tactical applications, or executing the plays in more complex environments (such as the dagger disarm flowdrill) if the students are ready for it.

Longsword (rest of the time; usually 30-40 minutes):

Sword handling first: sword handling drills, and/or cutting drill, and/or farfalla di ferro. This may be 5 minutes if sword handling is not usually a critical point of failure in the target (in this example, second drill), or 15 or 20 minutes if it is (e.g. when teaching the punta falsa).

Then second drill, step by step, for the remainder of the class. Assuming that the class is ready for the whole drill, then steps one and two should be pretty solid already, so most of the time will go on working on steps three (ligadura) and four (its counter).

So in this example, we are using the dagger plays as a lead-in to teaching the same basic actions with the sword.

At the next level of teaching, once these basic technical issues are fundamentally resolved, then we can start using the dagger material for training tactical principles, and attributes such as speed, timing, and grounding. For instance, working on counter-remedies. One major difference between knightly combat and modern self defence is that knightly combat is not usually concerned with self defence. It's a military art, for soldiers whose main job is to kill people for social or political reasons. So we have multiple examples of the dagger attacker *overcoming the defender*. By modern standards, this is murder, plain and simple, especially as that defender is often unarmed! (This is one of the examples I use to hammer home to beginners the idea that this is nothing like modern, politically correct, or self-defence-oriented martial arts.) Teaching a student to attack, flow around the defender's response, and strike (many times) is easier with a dagger than a sword. The basic tactical structure of any fencing sequence can be reproduced with the dagger, so you can teach the structure with the easier-to-control weapon, and then move on to applying the same principles with the longsword.

I should point out at this stage that it is *perfectly correct* to simply start at the beginning of the manuscript and work your way through from abrazare, to dagger, to sword, to armour, to polearms, and on to mounted combat. It works just fine. But Fiore certainly did not write his book as a training manual for 21st century computer programmers, nurses, lorry drivers or university students. He wrote it as a complete representation of his art, for a 15th century nobleman who was also an experienced warrior. It should come as no surprise that the ideal pedagogical structure for the average student that comes to my classes is a bit different to the ordering that Fiore gives us.

Let me finish off by saying that the way I solve this problem is not the only way; it's just what seems to work best in my experience. And it's worth mentioning that the exact approach I take in any class is actually student-led; I almost invariably ask the students present in my classes what they are interested in learning, and teach them that. For instance, I'll be in Auckland, New Zealand, teaching a seminar in November 4th and 5th (you can find out the details  here: if you're in the neighbourhood do come; I'd love to see you there). The organisers have specifically requested that I spend a day on the dagger, and then a day on the sword; that's fine by me!

Some useful resources:

The Syllabus wiki: http://www.swordschool.com/wiki/index.php/Fiore_basic_syllabus

You could check out The Medieval Dagger book. You can even get it in German!

And yes, I even have a course on it. But before you dash off to buy it, remember that I’ll be launching it with a hefty discount to my email list in a week or so, so it might be a good idea to sign up below in anticipation of that happy event.


Teaching a I.33 class in the Lonin loft.

A recurring theme in my life is a contact from someone who narrowly missed a seminar with me in some far-flung outpost because they didn’t know it was happening. So let me take a minute of your time to let you know about two events coming up in the Pacific North West:

This weekend, April 29-30th, I’ll be teaching in Seattle; Saturday’s class will be Fiore and Vadi, Sunday morning I.33 sword and buckler, and Sunday afternoon Capoferro rapier.

Please email info@lonin.org to register!

This is a regular bi-annual event; I expect to be back in Seattle in the autumn.

The following weekend, May 6th and 7th, I’ll be teaching for the first time at the Valkyrie Martial Arts Assembly in Vancouver BC. Valkyrie is the school of the author of one of my favourite HEMA blogs,  boxwrestlefence.com, Randy Packer, with Courtney Rice and Kaja Sadowski. Randy and Kaja have both shown me physical training exercises that I can’t do, so I’m looking forward to some useful cross-pollination.

It’s been two years since I last taught in Canada (at VISS 2015), and I don’t know when I’ll be back, so if you’re in the area don’t miss it!

Day one will be a beginner-friendly introduction to Fiore’s longsword material on Saturday May 6th.

Day two will be a full day of Vadi’s longsword on Sunday May 7th.

You can register here!

I’ll make sure that anyone that comes on the Saturday has the necessary training by the end of the day to get value out of Sunday’s more advanced session, so by all means sign up for both! (Plus, you get a discount!)

In every case, while the system we will cover is established in advance (eg Vadi Longsword), the exact content of the seminar is planned with the attendees on the day; we take a few minutes to survey the class and take requests, which I then work into a scheme for the class training. This works very well, and in almost every case the students get exactly what they came for.

If you have friends in the Seattle or Vancouver areas that you think might want to know about these seminars, please share this post with them!

I hope to see you there!


Grace and Katriina cooking

Teaching is, and often should be, a stealth activity. Let me take a charming example: my kids learning to cook.
Cooking is one of the most important skills a human being should have. If you can cook, you can exert some control over your diet. Your diet represents probably 40% of your long-term physical health (with exercise and sleep being the other 60%). If you can’t cook, you are at the mercy of family, friends, restaurants and corporations for what you can eat. The first two in that list probably have your best interests at heart. The other two? Not so much. So it’s essential parenting to make sure your kids can cook.
The key ingredients in cookery are:
1) Recipes. You can use other people’s or invent your own, but you do need some kind of blueprint.
2) Ingredients. You must be able to find and select the ingredients that are right for your recipe.
3) Cooking techniques: chopping, boiling, frying, baking etc.
To this end, we let our kids watch shows like Great British Bake Off, YouTube channels like Tania Burr, Nerdy Nummies and so on, because children copy what they see, and while this does tend to encourage some odd habits and turns of phrase (some baking is always done in an American accent in our house), it also leads to exchanges like this:
“Daddy, I want to make a [insert name of vile sugary thing here]”
“Ok, make a shopping list”.
The child then gets a piece of paper, and writes out the ingredients (see how we sneak in some writing practice there?), and we go to the shops. In the shop, we find the ingredients. The kids have to read the labels, and make sure they have enough of everything (for which they need arithmetic). We then buy it, go home, and get to work. Of course, boring old daddy doesn’t like watching the video in the kitchen; oh no, the instructions need writing out too! (“I don’t want flour on my mobile phone…”)
And then we follow the instructions, make the triple-caramel-quad-choc-sprinkle-covered diabetic extravaganza, and eat it, to all-round delight.
The point is, by letting them follow their own interests, we create a momentum in the direction of ‘command of diet’. Now all we have to do is to gently steer that momentum in a healthier direction: “we can only eat that after dinner. So what shall we have for dinner?”; “kids who come shopping get to choose what we eat”; that sort of thing.
All of this is why my elder daughter can bake pizza from scratch, makes a mean chicken pie, and has very strong opinions about “store-bought” pastry. My younger daughter is less interested, and so less skilled, but it’s still perfectly normal for her to choose something she wants to make, and set about establishing the recipe, choosing the ingredients, and making it, commandeering whatever help she needs in the process.

Grace baked this Pavlova ‘just because'. We helped put it in and out of the oven, but otherwise were not needed…

The major downside is we eat far more crap than we otherwise would- it plays hell with my low-fast-carb diet. But it’s worth it in the long run because whatever diet my kids choose to follow as adults, they will be able to make from scratch, and control exactly what goes into it. I hope they’ll choose wisely, but whether they do or not, at least they will have the choice.
I take the same attitude towards teaching swordsmanship. It’s not for me to sneer at a student who secretly wants to be an elf, or even an ewok. Whatever brings them to the sword is inherently good. It’s then up to me to gently steer that momentum in a more rewarding direction. This is why I’m not upset in the least by the tournament scene, and why I begin all my classes by asking the students what they want. Sure, sometimes they ask for things that are bad for them, so I redirect things a little but make it clear that it’s the closest I can get them to the goal they set. It would be fundamentally counter-productive to shut them down or bring their enthusiasm to a sudden stop.
This reminds me of steering a boat (as I did on my trip to Guernsey in September). When the boat was stationary (also known as ‘dead in the water’), I couldn’t steer it at all; but when it was under way it took only the gentlest touch to guide it right or left. Sometimes, a wave would hit and bash the ship off-course. Then I let it go, and when the crisis passed a moment later, another gentle touch brought it back to the mark.

I've been thinking a lot about teaching over the last dozen years or so, and have put together an online course to help historical martial arts instructors teach better. You can find it here: https://swordschool.teachable.com/p/how-to-teach-historical-martial-arts-or-anything-else

One of the most common questions I get asked is this: “there are no HMA clubs near me. What should I do?”, and my answer is always the same: “start one”. So the next question is “how do I do that?”

The most difficult part of starting a HMA club is deciding to do so. Once the decision has been made, the rest is not so hard.

I’ve been involved in starting many groups, from the Dawn Duellists’ Society in 1994, to the British Federation for Historical Swordplay in 1999,  The School of European Swordsmanship in 2001, and literally dozens of satellite clubs since then, so I have some ideas on the subject, as you might imagine.

Let’s begin with some general principles (this is extracted from an article published in Teaching and Interpreting Historical Swordsmanship in 2005):

“Starting a group is not as hard as it may seem, it just requires determination, and some basic social skills. The obstacles vary so widely in different countries and cultures that it is very hard to advise on the specifics, but I use a set of basic principles to run my school, which are applicable to any group (summarised in these terms by Mike Stillwell).

  • Group purpose: every group must have a purpose, clearly stated. “The study and practice of historical swordsmanship” covers most, but you may wish to narrow the focus.
  • Group needs: every group has specific needs, which must be met for the group to flourish. Typically they include financial health, sufficient membership, and the specific means to achieve the purpose, such as weapons, treatises and a place to practice.
  • Individual needs: every group is comprised of individuals, who will leave if their needs are not met. Such needs include sharing in the common purpose; assistance for beginners, and the various social needs that we all share. Most practitioners prefer a group where they feel welcome and needed, to one where they are looked on with suspicion until they have “proved” themselves. Even the most inexperienced beginner should be recognised as a vital part of the group: without such beginners, the Art, and the group, have no future.

A group will succeed if all the above needs are met, and kept in balance. Once the needs of any one individual (including the illustrious founder) take precedence, the group is doomed. Likewise, any group decision, whether made by the individual in charge, by a committee, or by the whole group, should be arrived at based on how well it serves the three needs. Individuals whose needs are met by the group will stay, and enable the group needs to be met, which enables the group purpose to be met. Of course, many individuals will fall by the wayside when they discover that their needs are not met by a group with that purpose; this is normal, so expect attrition. Also there are some individuals who feel a need to take over any group they join; this is not a problem provided that the group purpose and needs are served by their ascendancy. Just beware of political infighting, and establish the aims of the group clearly enough to prevent slippage. “

Now we have established the principles, let’s get into the specifics. You want to start a HMA club: what’s the first step?

1) Find a friend who'll have a go at swords. One friend is good; two is better. What, you’ve got three interested friends? Then this will be easy…

2) Be honest with yourself and your co-founders about your interests, and agree on exactly what, at this stage, the club is going to do. Establish in clear and exact terms the group purpose. For example “we are going to train for HMA tournaments in Longsword and take part in as many as we can”. Or “we are going to recreate Meyer’s swordsmanship from his book”. Or “we are Jedi and will train accordingly”. Look for the sources and help you might need. For groups wanting to “recreate Fiore’s art of arms”, you could use my books, syllabus and so on; but if you want to study Liechtenauer, then those won’t be much help. Many of my branches started out as “we will train from this book by this Windsor fellow” and grew from there. Choose, a book, a syllabus, a historical source, even a youtube channel, whatever suits your purpose, and say “we'll do this and only this”. It is much better to add things later, once the group is established, than to start out trying to please everyone. To begin with, focus on one thing, and make it absolutely clear what that thing is.

The key question at this stage is ‘does being part of this club actually meet my individual needs?’ If you wanted a club so you could learn to teach 18th century smallsword, and nobody in this club wants to do smallsword (they’re all obsessed with polearms), then start a different club and be clearer about your goals. It is perfectly okay, normal even, for the founders to start the club to scratch their own itch. Start the club you’d want to join.

3) Meet regularly. Once a week minimum, at the same time and in the same place. Depending on the weather and local laws, you could meet in a park, or (as the DDS did for years) train in a courtyard outside a pub in the centre of Edinburgh. You don’t need money for this; there is lots of free spaces most places, if you just look. When you start out, you will be ignorant and unskilled. That is okay!! Everybody starts at zero. But you have SO much more help available than I did in 1992, and I turned out alright. So you will probably do even better.

Fencing with Scott Wilson in Holyrood Park, February 2001.

4) Advertise in any free medium (twitter, facebook, etc). for like-minded people in your neighbourhood. If you’re training in a public space, then be ready for curious people of all ages and types to come up and talk to you. Be very clear about what you are trying to do, so Viking re-enactors won’t come along and be disappointed by your sword and buckler club, or vice-versa. Being specific means that people can see in advance whether the club is likely to meet their individual needs.

5) When you have 6-10 people coming regularly, it’s time to establish a formal club. Start collecting fees. Price it at the cost of a night out per month, minimum. Eg. in the UK, perhaps 25 quid. In Finland, maybe 30 euros. This is essential. One of the biggest mistakes beginner clubs make is to not gather fees, and they do this mostly because they don’t feel they are providing a service that is worth paying for. But you are not selling a service (unless you are setting up a professional school, which I am not covering here), you’re gathering the resources the club needs to meet its goals. Members who don’t want to pay are not going to help meet the group needs.

What is the money for? To help accomplish the group purpose. You can use for whatever helps pursue the purpose, such as to pay for a teacher, buy club equipment, send your most active class leaders to events they can’t afford to go to on their own, pay for a better venue; the list is endless. My point is that clubs that have money can pursue their purpose much more easily than those that don’t. I advise having members use a ‘set it and forget it’ direct debit or paypal regular payment; it’s much more effective than manually collecting dues.

6) At this stage you will need to register a non-profit organisation. This is usually quite easy to do, if you don’t mind filling in forms. Use whatever umbrella organisations are available. University students can start a University society to get access to University facilities. Your local sports fencing club might let you set up a sub-group within their umbrella (as, for instance, my branch in Oulu, Finland, did). If there is a suitable umbrella available, consider joining it. Be careful that doing so does not interfere with your group purpose, though. If joining an umbrella organisation means giving up your core purpose, or unacceptable changes to equipment or rules, then don’t do it.

Be careful that you understand the rules around what a non-profit organisation can and cannot do. I can’t advise you on the law in your country, but in general, you can hire a teacher (but the employee cannot usually be part of the governing board). You cannot use the funds to pay for your personal sword collection. You will also probably have to  file annual accounts and a list of members. This is not too much work if there are many hands helping; maybe one person handles the paperwork; another handles finding new members; a few others run regular classes. At this stage the thing to watch out for is that the individual needs of the people doing all the work are being met. Some kind of compensation for their efforts is appropriate (such as not having to pay dues, or subsidised attendance at an event, or a guarantee of never having to clean the training space, or something). The last thing you want is for the essential administration to not get done because the poor bugger doing it has been snowed under mounds of paper and can’t get to class, so quits. Look after your officers, they deserve it.

And there you have it. It’s really not so hard. It is a lot of work though, but that’s true of almost everything worthwhile.

I wrote this blog post in response to this survey; it was one of the most commonly expressed frustrations. Feel free to take the survey yourself- who knows, I might answer your question!

If you need help learning to teach, you might find this post useful.

If you need help recreating a historical swordsmanship style from a historical source, you might find this course useful.

Lonin, April 4th 2016.

I have always made sure that there are at least some women in the photos in all of my training manuals. This photo from The Swordsman's Companion is one of my favourite pictures ever:

Last weekend, teaching at Lonin in Seattle, one of the women students told me that the only reason she had started training was because she had seen the women in my books, and therefore felt it might be ok. She got her biggest, toughest-looking male friend to come with her, just in case, but she came. She’s now on the governing board of her club. I nearly cried when she told me this. Martial arts training should be for everyone who is interested, be they clumsy or deft, weak or strong, timid or bold, tall or short, without regard to their starting point. Everyone can get better with practice.

Later that day, I taught my first ever all-women class. It was a fascinating experience for me as a teacher, and also as the head of a large and very diverse school. In essence, I know nothing at all about the particular requirements women may have in training, so I asked them what they wanted, they told me, and I did my best to oblige. I am, after all, a consulting swordsman. I think the class went well, everyone seemed happy with it, and I’ve only had positive feedback about it so far. And it has got me thinking (again) about the whole issue of gender in martial arts. When I was a kid, one of my role models was Cynthia Rothrock. You can see her famous scorpion kick in this excellent Ameridote video:

At my school karate club we were taught by Mr and Mrs Williams. Either one of them could have kicked my head off. My first fencing coach was a woman, Gail Rudge. She was assisted by the captain of the fencing team, also a woman. Neither of them had any difficulty stabbing young Guy when needed. Which was rather a lot. This all means that I have never been infected with the foolish idea that women can’t do martial arts or swordsmanship to the very highest level.

In a perfect world, no kind of gender discrimination would exist, and so nobody would think to organise a women-only class. But mansplaining is a thing. So is “I couldn’t hit a girl”. So is copping a feel when you’re supposed to be grappling. So I can see that this kind of class could be preferable, at least to some women. I should also point out that Lonin is an extremely inclusive and friendly club, vastly more welcoming to people of all kinds than many others I have seen, so it’s not like they had a special need for this kind of class. But the women training there just decided to organise a semi-regular women’s class, and advertised it to the general public. Over 30 people showed up! Clearly, there was something about a mixed, general, beginners’ class that put these women off, and starting this class just removed that barrier.

A martial artist ought to be able to handle whatever opponents life throws at them. My primary reservation about women-only classes stems from the possibility that women’s training might become ghettoised, and women who train in these classes might never get to train outside them, or might choose not to, and so limit their own development. They should be an option, not a refuge.

But that’s a lot of ‘mights’. What I saw was people happily training, some of whom would not have got started without the psychologically and physically less intimidating option of the women’s class. And it’s probable that some of them will grow in the Art and become role-models for the next generation of swordfighters.

I salute them.


Spring is in the air, the grass is pushing up under the snow, and books are making their way from my dusty hard drive and out into the world.

Ok, in Finland, spring is nowhere to be seen. My kids are going ice-skating and everyone I know has a cold. Bear with me. I have another book out, and it makes me giddy.

I'm spending most of this week fulfilling the promises made in my last Indiegogo campaign, for Advanced Longsword. That means doing battle with Lightning Source's arcane and wilfully inefficient “short run” printing interface, manually creating over 250 book orders so that the backers of the campaign will get their books in the post in a couple of weeks. I am also manually packing and shipping a boxful of The Medieval Dagger books. This is all, on the surface, very tedious, BUT it is actually really nice to feel that moment of personal connection with every backer, even as superficially as when I input their address into a web form.

Backers of Audatia should already know that WE HAVE SHIPPED THE FINAL PACKS: Liechtenauer and the Patron are done, shipped, and that marathon of a campaign is now 100% fulfilled. It only took about two years longer than expected. But it is a load off my mind. Crowdfunding is all about transparency, value, and keeping your promises.

And somehow in the middle of all this, I managed to edit together and publish The Swordsman's Quick Guide part 5: How to Teach a Basic ClassThis booklet is 10,000 words long, enough to cover the really important stuff, like safety, writing class plans, making corrections, and so on. The purpose of it is simple: to give inexperienced instructors confidence. If you've read it, do let me know what you think!

Search

Recent Posts

Categories

Categories

Tags